Month: May 2023

Tips to Avoid Chimney Fires

It’s estimated that over 25,000 chimney fires occur every year in the United States, causing over $125 million in property damage.

Flames in the bottom chimney migrate upward, cracking, warping, melting, and badly affecting the masonry or metal chimney walls.

In extreme cases, chimney fires can destroy homes and endanger people’s lives.

Chimney fires are brought about by a failure to examine, repair, and clean a chimney regularly, leading to the malfunctioning or accumulation of dangerous buildup, putting your family at risk.

Thankfully, if you follow the precautions outlined here, the hardworking column above your fireplace or wood stove should continue to do its job of directing smoke and other byproducts out of your home, allowing you and your family to enjoy cozying up in front of the flames securely.

To help you out, here are ways you can prevent chimney fires from coming about in your home:

Minimize creosote buildup

Creosote is the primary cause of chimney fires. When fire byproducts (smoke, vapor, and unburned wood) condense as they flow from the hot fireplace or wood stove into the cooler chimney, this extremely flammable, dark brown substance coats the chimney walls.

Creosote can catch fire if the temperature in the chimney flue (the space inside the chimney) is high enough. The creosote buildup is thick enough, and the fire can spread and migrate up the flue.

To minimize the creosote in your chimney, only burn seasoned hardwood that has dried for at least six months and has no more than 20% moisture content.

You can test the moisture levels using a wood moisture meter (available online and at hardware stores). Keep the damper (a metal plate in the flue that regulates the draft) open throughout a fire to maintain appropriate airflow.

If your chimney’s flue liner (the layer between the flue and the chimney walls) is uninsulated, it’s best to work with your chimney contractors and insulate it by wrapping it in a heat-resistant insulation blanket or pouring an insulation mix like vermiculite into the space between the flue liner and flue.

You should insulate your flue because an insulated flue liner keeps flue temperatures from dropping too low, which can cause fire byproducts to condense and develop creosote.

Clean the chimney every year.

Since many flaws that cause chimney fires aren’t visible to the human eye, such as a cracked flue liner, it’s critical to have a Chimney Safety Institute of America-certified chimney sweep inspect your fireplace or woodstove, chimney, and venting system once a year.

This professional will notify you of any damage and if wanted, repair it and clean soot, creosote, or blockages like bird nests.

As mentioned, you should hire a certified professional who knows what they are doing.

Install a chimney cap.

When touched by loose embers from a fire, leaves and animal nests inside a vent can quickly feed a chimney fire.

A chimney cap around the outside entrance of the chimney flue on the crown will keep debris and rodents out. The cap will help prevent “back puffing,” which occurs when smoke from a fire enters the chimney and the house.

Caps also keep corrosive rainfall from entering the chimney and corroding it. While some homeowners choose to install a chimney cover themselves, doing so may void the warranty—hiring a professional may be worth it.

Remember that improper installation might cause functionality problems or jeopardize the chimney’s structural integrity, so ensure it’s always expertly installed.

Consider installing a spark arrestor in your chimney cap if you have a wood-burning fireplace. A spark arrestor keeps sparks and embers from exiting the chimney and starting a fire. To guarantee compliance, review local construction codes and regulations.

Properly installing the cap isn’t enough—you still need to maintain it. Maintain and examine the chimney cap regularly.

This is because debris and soot may accumulate on the cap over time, reducing its effectiveness. Clean the cap regularly and inspect it for signs of damage or wear. If necessary, replace the cap to ensure protection.

Ensure that your walls don’t have more than ¼ inch of buildup

You should regularly clean your chimney to prevent a chimney fire. To tell whether your chimney is ripe for cleaning, you should scratch your finger against a chimney wall, and if you find one-eighth of an inch of buildup, it’s time to clean it.

If you are a dab hand at DIY projects, you can do the cleaning yourself, but for the best outcome, let a professional do the chimney cleaning Upper Marlboro. This is because the professional will thoroughly clean as they have the necessary tools.

For example, the professional will thoroughly sweep the outside of the chimney and the firebox, smoke shelf, smoke chamber above the firebox, and flue liner.

As mentioned above, ensure that the professional you hire is certified and experienced enough. You don’t want someone who won’t do a good job.

Use clean burning tricks.

Low-temperature, slow-burning fires, especially those left to smolder overnight, emit more smoke and leave more unburned combustible material behind. When this hardens into creosote on the chimney walls, the risk of fires increases.

On the other hand, hot, fast-burning flames produce significantly less smoke, vapor, and unburned wood, resulting in little to no creosote formation.

The top-down burn approach is the finest way to burn a clean fire: Add four to five horizontal layers of kindling to the bottom of the fireplace or wood stove (with the bottoms of the logs facing you), then top with fuel and light.]

Before retiring for the night: With a fireplace poker, spread out the wood and embers, then cover them with the ash at the bottom of the fireplace with a fireplace shovel.

You should then entirely cover the cooled wood and embers with baking soda—the sodium bicarbonate will extinguish any remaining embers.

After the firebox has cooled (at least three hours, preferably eight), scoop the ashes into a metal container. Fill the metal container with water and keep it outside, away from other flammable objects, until you’re ready to dispose of it.

The post Tips to Avoid Chimney Fires first appeared on First Class Chimney Services.

This post first appeared on https://www.firstclasschimneyservices.com
Tips to Prepare Your Fireplace For Summer

Now that we’re well into May, most homeowners across our region have stopped using their fireplaces. The next step on their to-do list is to get it ready for summer. This usually involves a handful of repair and maintenance tasks. If you’re not sure where to begin, here are our favorite tips to prepare your fireplace for summer!

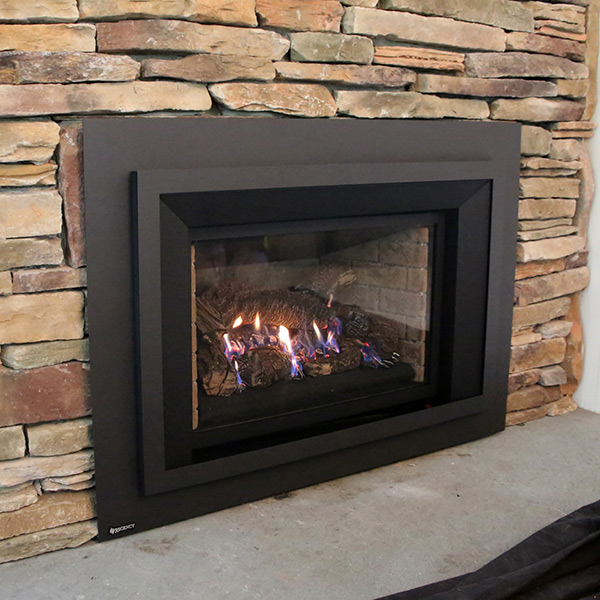
Gas Fireplace Insert Sale and Installation in Rocky Hill CTFirst things first, which style of fireplace do you own?
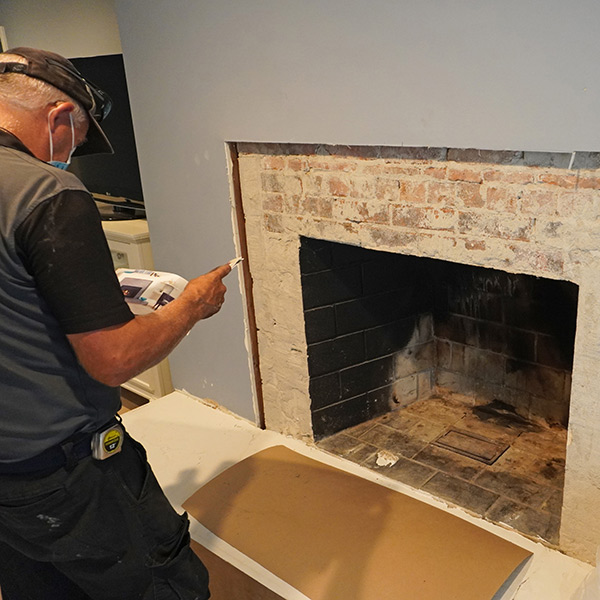
Here in the U.S., there are two primary types of fireplace systems: wood-burning options and gas-powered fireplaces. We’ve separated our tips to prepare your fireplace for summer into three categories below based on that, with tips that are specific to each style as well as universally applicable tasks.

Let’s look at gas fireplaces first.

Tips to prepare your gas fireplace for summer

One of the selling points of a gas-powered fireplaces is that they are easier to clean and maintain. There are fewer steps to prepare your gas fireplace for summer, though you’ll still need to tackle a handful of items.

The first is to turn off your pilot light. Leaving it on is not only wasteful, but it can also add additional heat to your room while you’re trying to cool it off from the summer’s higher temperatures. Cleaning is often less involved as well, primarily focused on the burners themselves. Finally, one idea that many homeowners will do is to decorate their gas fireplace with various themes during the off-season.

Tips to prepare a wood-burning fireplace for summer

Moving on to wood-burning fireplaces, the steps to prepare it for summer are more involved. First, you’ll need to remove the ashes. We don’t recommend vacuuming them up, as the smaller particles can then permeate throughout your home. Instead, once they’ve fully cooled, you’ll want to scoop them up and dispose of the ashes in a sealed container or trash bag. Next, you’ll want to clean the firebox extensively, using mild soap and water to remove any excess soot from its walls. Finally, you should clean the glass doors of your fireplace, giving it a streak-free shine for the summer.

Final Preparations for Summer

And finally, there are a few things that you should do regardless of the type of fireplace you own. The first is to call Northeastern Chimney and schedule your annual sweep and inspection. Our team can use this time to clean off any creosote build-up from the walls of your flue. We’ll also ensure that there is no physical damage, such as spalling bricks, a rusted damper, or a cracked down.

Fireplace Insert Summer Upgrade in Bloomfield CT In addition, we can also take care of any repairs at this time. One of our tips to prepare your fireplace for summer essentially boils down to preparation. You will want to do everything you can in the off-season to get your fireplace ready for use this fall. At that time, we’ll replace or repair anything that needs to be addressed, such as the previously mentioned components, your cap, flashing, flue liner, and so on.
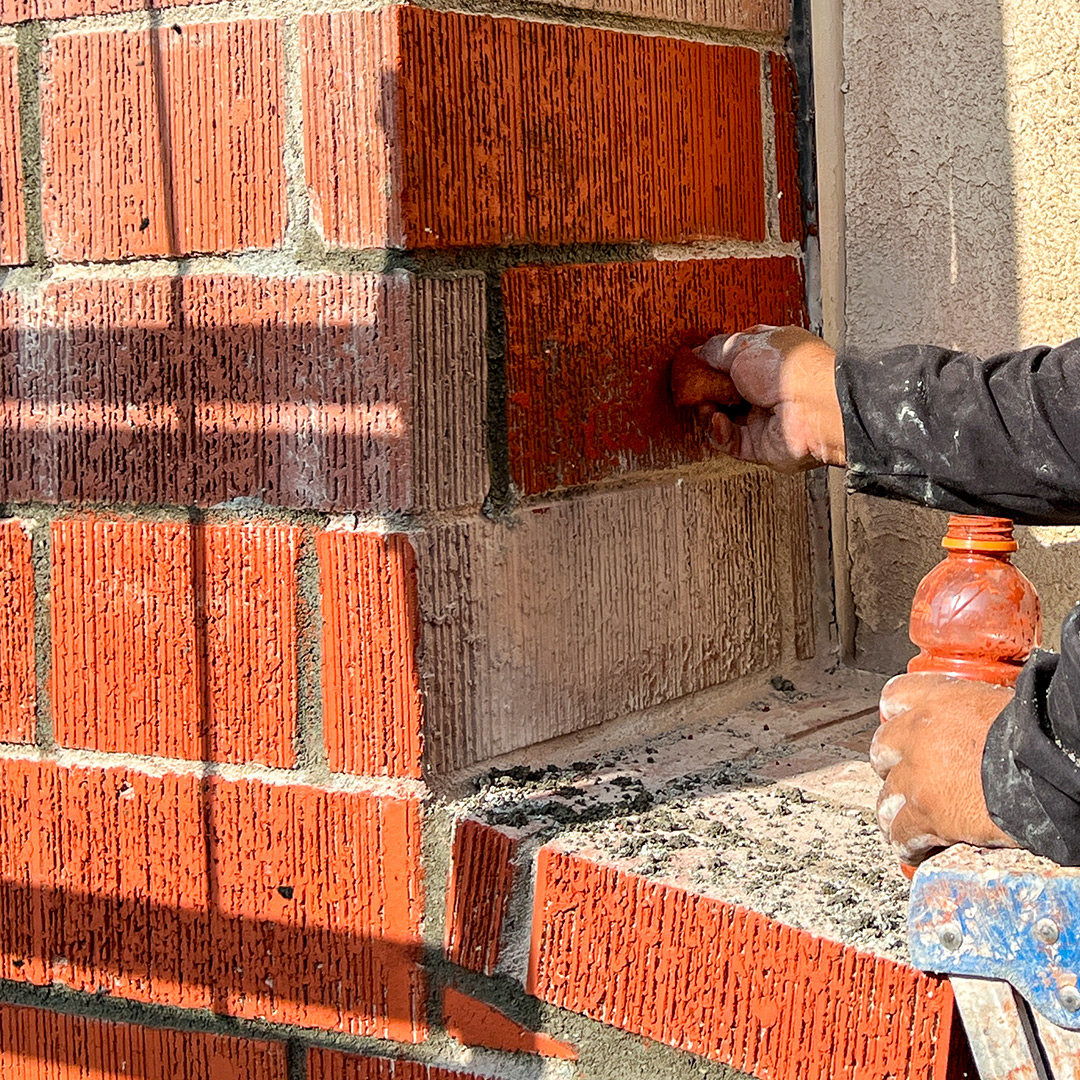
Contact us for assistance!

If you’ve stopped using your fireplace for the season, then the best time to prepare it for the summer is now. Contact our team to schedule your appointment by calling Northeastern Chimney LLC at 860-233-5770 or by sending us a message.

The post Tips to Prepare Your Fireplace For Summer appeared first on .

This post first appeared on https://www.mychimney.com

Enhance Your Fireplace or Chimney With Brick Staining

If you want to give your fireplace or chimney a fresh look or cover up imperfections, brick staining is a cost-effective way to do it. In this post, we look at the benefits of brick staining, how much it costs, and why you should hire a professional.

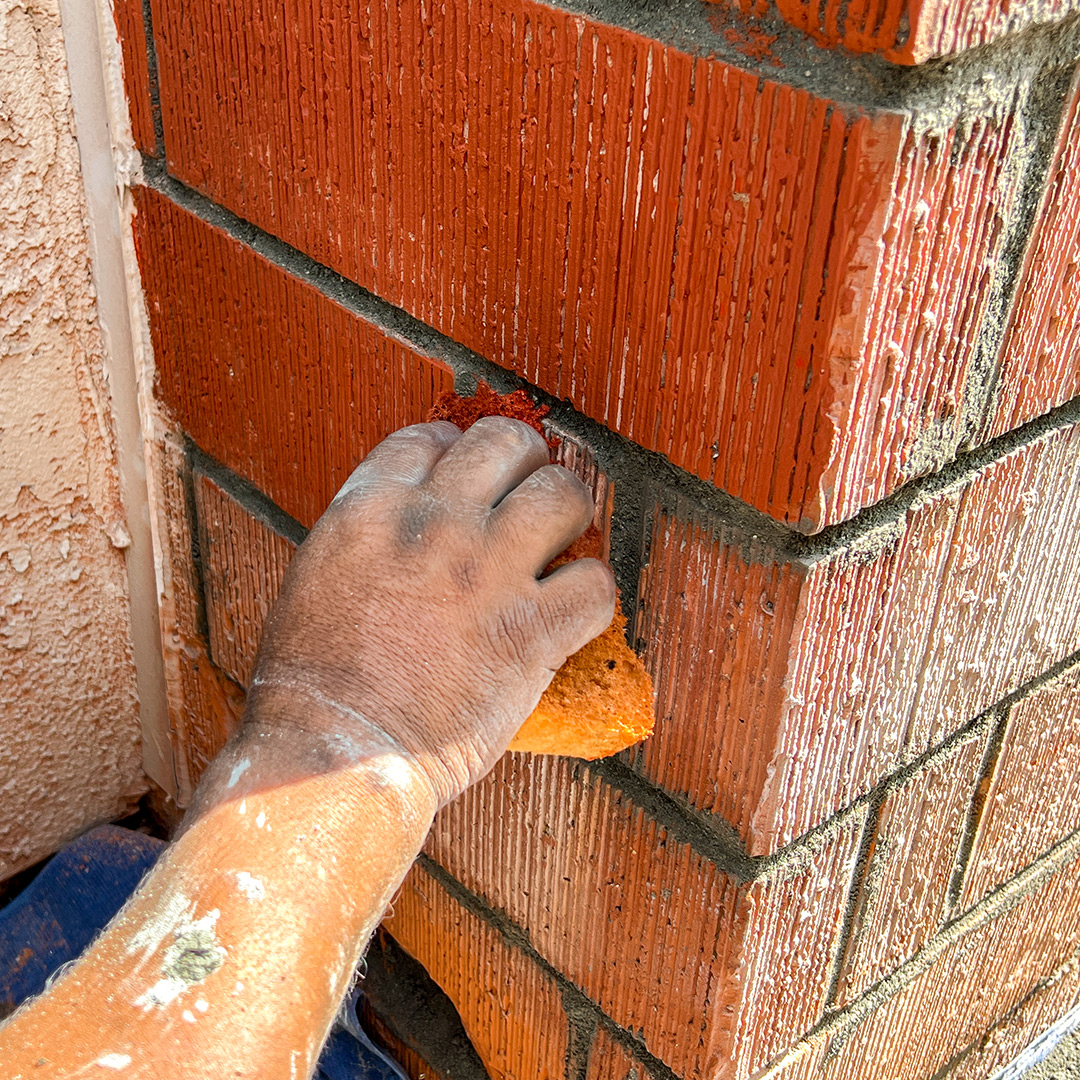
What is Brick Staining?Brick staining in Shawnee KS

Brick staining is similar to wood staining, involving applying a specially formulated pigment stain to the brick surface to change its appearance and color. Staining is popular because it’s an inexpensive way to rejuvenate an old fireplace or chimney without extensive and messy renovation.

Benefits of Brick Staining

A New Look

People stain their chimneys or fireplaces, mainly to give them an updated look. Whether you have old faded bricks that don’t match your interior decor or color scheme, staining is an easy way to fix that, with the many color options available. Besides creating a new look, applying a stain can mask unsightly blemishes, making the bricks appear new.

Cost Savings

As mentioned, staining your chimney or fireplace’s bricks is a cost-effective way to improve the appearance. In most cases, the brickwork is structurally solid, but it looks faded and old because of wear and tear or weather. Before staining, homeowners would replace the bricks, which is costly and time-consuming, but you don’t have to go down that road, thanks to staining.

Increased Durability

Modern brick stain products can make the bricks more durable. The colorant penetrates deep into the bricks’ pores, forming a protective layer that can prevent moisture from seeping in. Moisture is the number one cause of chimney damage, especially if you live in an area with a freeze/thaw cycle. Staining your bricks can mitigate the damage and the expensive repairs needed.

Versatility

Another advantage of modern staining products is you can use them inside and out. Any brickwork around the house is a potential candidate for staining, and you can create a unique look that enhances your home’s curb appeal and makes it stand out from your neighbors.

Mold & Mildew Resistance

When water seeps into your chimney, it doesn’t only cause damage from freezing and thawing; it creates a breeding ground for mold and mildew. Mold is the bane of homeowners because once it takes hold, it spreads quickly and is difficult to get rid of.

How Much Does Brick Staining Cost?

The cost of staining your brickwork depends on various factors, including the size of the area you want to stain, how complex the project is, and labor costs (if you choose to hire a pro).

If you’re doing it yourself, the average cost ranges from $.50 to $2.00 per square foot for materials, including the brick stain, brushes, and cleaning and preparation supplies. The quality of the tools affects the price as well.

Hiring a professional is pricier, but recommended if you want the best results. The average cost of hiring a professional ranges between $3 to $8 per square foot or more. Remember, experienced contractors are more expensive, but worth it if you want to avoid dealing with the mess.

Why Hire a Pro?

Brick staining is more complicated than you might think. And since you’re probably doing it to improve your home’s look, you want to avoid ending up with shoddy results, which is why it’s best to hire a professional.

Professionals have the expertise and skills to deliver high-quality results and know how to deal with challenges as they crop up.

Moreover, you must properly prepare the brick’s surface for staining, which is essential for ensuring the stain lasts a long time and is visually appealing. Think of brick staining as an art form; professionals have years of experience, and you’re practically guaranteed a good outcome rather than doing it yourself or hiring the neighborhood handyman.

Lastly, staining bricks is a messy, time-consuming job, especially if you have a large surface you want to be stained. Hiring a professional means, you can focus on more important household tasks and have confidence that you’ll get the results you want.

Brick staining in Stilwell, KSCall Fluesbrothers Chimney & Fireplace
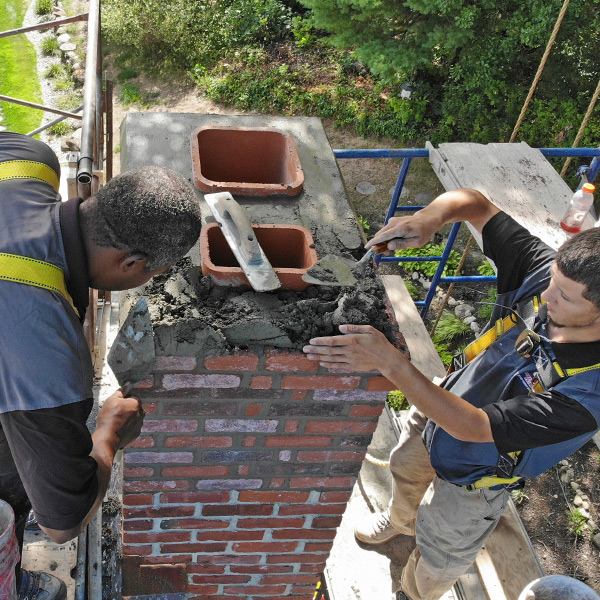
You can count on us whether you want your chimney or fireplace stained or need cleaning, inspection, or repairs. We’re the go-to chimney and fireplace contractor in Kansas City because we’re locally owned and operated. Our technicians are certified by the Chimney Safety Institute of America and the National Fireplace Institute. Book your appointment today at 913–236–7141.

The post Enhance Your Fireplace or Chimney With Brick Staining appeared first on Fluesbrothers Chimney Service.

Chimney Flashing: Protect Your Chimney from Spring Showers

Have you checked your chimney flashing this year? Or have it professionally checked by a certified chimney technician? After a humid, wet and cold winter and spring, it’s possible that your chimney flashing experienced some damage. Currently, Illinois is experiencing friendlier spring temperatures but as the saying goes: May flowers bring spring showers! Not many talk about the damage these spring showers can cause to your chimney flashing. If you haven’t yet checked your chimney flashing, now is the time before the summer’s hot, humid weather sets in. Any damages to your chimney flashing can create water leaks which turn into water damage inside your home. You can check for basic signs of damaged chimney flashing yourself, but it’s best to leave the inspection and repairs to Superior Chimney certified professionals.

What is Chimney Flashing?

In most chimneys made of masonry, there’s a layer of sheet metal installed between the roof and the chimney itself. This sheet of metal prevents water leaking into your house. Flashing can be made of aluminum, copper, steel or stainless steel. Flashing is made of 3 parts, all which must be installed correctly with waterproofing materials. If any of these parts are installed incorrectly, the flashing will break and cause water leaks. It’s not so easy to determine chimney flashing damage. After all, the flashing is located on the roof, so it’s easy to miss potential damages. A leak in the flashing is one of the most common causes of water leaks inside the home, so it’s important that you check the chimney flashing by contacting a certified chimney professional at Superior Chimney.

Signs to Repair Chimney Flashing

Here are 6 ways you can look for signs of problems with the chimney flashing.

1. Water stains on the ceiling around the chimney.

2. Water stains or molding in the attic.

3. Puddles in the fireplace.

4. Dripping water in the chimney. It’s easy to hear after a big spring storm.

5. Rust stains on the flashing. Condensation trapped in the metal flashing will cause rust stains and weaken the sealant properties of the flashing.

6. Discoloration of the bricks around the flashing.

These damages can be very serious if left untreated. Chimney leaks are usually not difficult to repair, but leaving them untouched can create structural damage. Leakage can create wood rot in your ceiling, which can weaken and fall, not the mention the insects that love to feast on damp or wet wood. Leakage can occur all year round, as snow and ice cause as much damage to the porous exterior of the chimney and the metal flashing as a spring rain storm.

What’s Next?

If there is any potential damage, it’s best to call a certified chimney professional as soon as you can. The buildup of damages can create serious issues down the line if not repaired in a timely manner. Spring showers will continue to wear down the flashing, chimney and inside of your home. The professionals at Superior Chimney will help identify and repair any damages to your chimney flashing. The first step is to set up a chimney inspection with us to assess the fireplace, chimney and chimney flue. To set up a certified chimney inspection, call Superior Chimney today at 877-244-6349.

This post first appeared on https://www.superiorchimney.net

Do I Need to Clean a Gas Fireplace?

Is it necessary to clean gas fireplace in Illinois? It’s intuitive that the dark black buildup of combustion needs to be cleaned from a typical wood burning fireplace, but is it needed to clean a gas fireplace? It’s gas…right? Gas fireplaces do not have a visible buildup of combustion, but should be cleaned at least once a year to prevent serious problems with the fireplace.

Gas vs. Wood Burning Fireplaces

When thinking of the inside of a family home, we think about the most comfortable room: the living room or family room. This is where the family meets, watches movies, and plays board games during rainy days, evenings and family time. It usually has a lofty, cozy couch and a wood burning fireplace. Nothing’s more comforting than falling asleep to the dim light of the fireplace and faint smell of burning wood. Nowadays, we have a close alternative to this old fashioned comfort: the gas fireplace. Gas fireplaces don’t leave much creosote behind, however gas fireplaces should be cleaned once a year, per the CSIA, due to dust, pet hair, insects, and other debris that can build up and cause performance problems. Chimney sweep are primarily for firewall worthiness assurance, cleaning and obstruction free assurance.

Gas fireplaces look similar to wood burning fireplaces, with a live flame. The logs inside the gas fireplace look real, but are not actually burning. Oftentimes, they are made of ceramic. A gas fireplace produces much less heat than a wood burning fireplace, but can retain more heat inside your home based on its type and configuration. Gas fireplaces can be low maintenance and energy friendly alternatives to a wood burning fireplace.

Some Signs to Clean Gas Fireplace

1. Buildup: Although gas fireplaces do not produce as much visible flammable and hazardous buildup, it does produce some corrosive substances and flue gasses that may settle inside your home without you knowing. Burning natural gas leaves a residue that must be cleaned annually. Failing to clean the residue may cause health risks if left untouched.

2. Technical Issues: There may be technical problems that are not visible, such as issues with the burner. Gas fireplaces are usually built to last long term but it’s imperative to check if there are any unnoticed technical issues at least once a year.

3. Gas Leaks: Over time, valves and pipes turn weaker and become corroded. It’s important to inspect these valves, as a gas leak is extremely hazardous. A certified chimney specialist must inspect and determine any damage or future damage to prevent this serious problem.

4. Condensation: Due to the high temperatures in the flue, there’s a buildup of condensation when the fireplace vapors are cooled. Natural gas exhaust also contains a high content of water vapor in emissions. The condensation reacts with byproducts and is acidic and corrosive, and must be cleaned at least once a year to not pose a potential health hazard.

It’s just as important to clean a gas fireplace at least once a year to prevent long term issues that could pose health risks if not cared for. A certified chimney professional from Superior Chimney will inspect and sweep the fireplace and ventilation system. Contact us today to clean gas fireplace at 877-244-6349.

This post first appeared on https://www.superiorchimney.net

Why Now is the Best Time for Masonry Repairs

When is the last time you used your fireplace? For most homeowners in the Connecticut area, that season ended a while ago. With warmer weather on the horizon, now is the best time for masonry repairs. After all, your chimney takes a beating during the winter months. Let’s start by looking at a few warning signs.
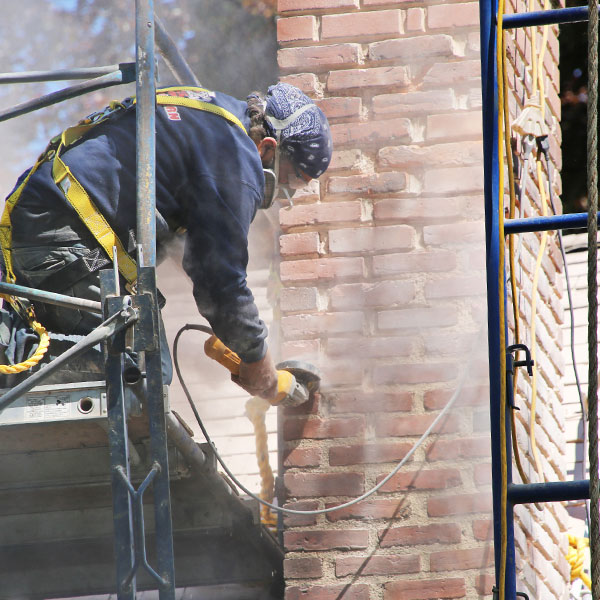
chimney crown repair specialists, farmington ctSigns that now is the best time for masonry repairs

Visually, there are several warning signs letting you know that you need to repair your chimney’s masonry. Those include:

  • Damage to your chimney crown;

  • A missing chimney cap;

  • Spalling, cracked, or missing bricks, and;

  • Staining, especially if they’re white stains.

The root of it all

Although any type of stain on your chimney is cause for a Northeastern Chimney technician to visit your home, white stains are a sign of efflorescence. These are leftover salt deposits as water evaporates. Indeed, moisture is a major problem with any chimney and should be addressed as soon as possible.

Water erodes masonry, causes cracks in your brick-and-mortar, and can invade your home causing additional damage. Excessive moisture can also lead to mold growth as well as a leaning chimney.

Types of spring chimney repairs

Spring brings with it multiple types of household repair tasks as we collectively shake off the effects of winter. During this time of year, there are five primary types of chimney repairs. Those are:

  • Tuckpointing, which repairs damaged mortar joints;

  • Repointing, which removes old mortar and replaces it with new;

  • A system rebuild, which can include just a few sections or the entire chimney structure itself;

  • Replacing damaged or absent components, such as a broken crown or missing cap;

  • And waterproofing, designed to protect your recent repairs and overall investment.

Sometimes, emergencies arise necessitating major repairs regardless of the season. However, now is the best time for masonry repairs because of these three big reasons.

Benefit 1: Fix new issues from winter

Have you ever had a vehicle that was long overdue for an oil change? If so, you probably noticed a drop in fuel efficiency. Eventually, it will lead to additional engine problems.

Likewise, any new issues with your chimney that are allowed to grow will only lead to bigger repair costs down the road. Fix them now before they become larger problems.

Benefit 2: The weather is perfect”

Mind you, we get that spring doesn’t always have the perfect weather. Rather, what we’re referring to is the general fact that the springtime months are warmer than the ones that preceded them. The higher temperatures allow for your masonry components to set more efficiently than when it’s colder outside.

Benefit 3: Early preparation for fall

Although we’re just now coming out of winter, it’s never too early to prepare for the upcoming season. By addressing your chimney’s repair needs today, you’ll be ready to use your chimney the moment the weather turns cold this fall.

chimney tuckpointing pros, simsbury ctContact us today to get on our calendar!

If you notice that your chimney has any of the signs we’ve mentioned or other apparent damage, let us know. Because now is the best time for masonry repairs, we’ll get you on our calendar ASAP.

Ready to get started? Then contact Northeastern Chimney, LLC by giving our team a call at
860-233-5770 or by sending us a message through our contact page.

The post Why Now is the Best Time for Masonry Repairs appeared first on .

This post first appeared on https://www.mychimney.com

Guide to Taking Care of Your Gas Fireplace

Many homeowners prefer gas fireplaces over traditional wood-burning fireplaces because they are far more convenient. 

Gas fireplaces are easier to light and control and require less cleaning because they emit no ash and make little mess.

The convenience doesn’t come cheap—they are pricy to install, and for you to keep your investment in good shape, you need to take good care of it. 

If you fail to care for your gas fireplace properly, you can expect to deal with costly chimney repair and time-consuming cleaning duties.

So, how do you keep your gas fireplace in top shape? Here are tips to follow: 

Ensure that its safe

The first and most important component of caring for your gas fireplace is ensuring it is safe to operate. 

You should install a carbon monoxide alarm near the fireplace (and on every other floor of your home) to notify you of any dangerous leaks. 

Remember that, unlike smoke from a wood-burning fireplace, carbon monoxide is odorless and difficult to detect, making using a gas fireplace without properly maintained detectors a bad idea. 

If the alarm goes off, you should leave your residence as soon as possible to limit exposure to the harmful gas. 

If you have children, ensure your gas fireplace is child-proofed before using it. The glass safety covering that protects your fireplace’s firebox can grow extremely hot, endangering young children. 

If your children aren’t old enough to comprehend the dangers of touching a hot glass, consider installing a safety grate around the front to keep their little hands from being burned on the hot glass. This could be good for pets as well.

Keep the logs clean

After months of frequent use, logs are bound to get dirty. You should give the logs a thorough scrub to keep them looking attractive. 

How you do it will vary depending on the type of wood used in your fireplace, so you should check the chimney manual to confirm how you do it. 

Regardless of the log type in your fireplace, you should start by switching off the gas. After dismantling everything, take the logs outside for cleaning.

If this is the first time you are dismantling the fireplace, remember to take photos of it before the deconstruction. This will assist you in reassembling the logs in their original location after cleaning. 

If your logs are made of ceramic fiber, which has a light, foam-like consistency, clean them carefully with a stiff brush made of horsehair or ceramic bristles. Water can ruin this type of log, so use a dry cleaning technique to ensure it lasts as long as possible.

Do you have ceramic refractory gas logs in your chimney? These are far more durable; you can clean them with dish soap and water. 

You can also easily clean them using a gritty cloth; just be careful not to remove paint by scrubbing too hard. 

Clean the glass

While your gas fireplace will not produce mounds of ash from burning wood logs all winter, you must clean its components to keep it looking great. 

Cleaning the glass on your fireplace is one of the simplest ways to keep it looking nice all year. 

You should clean the glass at least twice a year. Otherwise, due to the natural venting process of the fireplace, it may develop an opaque grayish-white layer that is not only unappealing but also makes it hard to tell if your unit has a problem. 

Most homeowners use cream or alcohol-based cleaners to clean the chimney glass but don’t rush to do it as you might have a different type of glass. Instead, you should refer to the manufacturer’s manual and follow the manufacturer’s instructions to do the cleaning. 

Avoid harsh cleaning products, such as ammonia-based formulas, that can damage the glass. You also should avoid wiping the glass with anything that will leave residue behind. 

Always prepare the chimney for the new season.

When fall arrives and the weather becomes cold, it’s natural to want to light the fire in your fireplace. Before you do this, double-check that everything is in working order. 

Chances are you shut off the gas or extinguished the pilot light after the previous winter.

If you try to start your fireplace and it still doesn’t work after you switch on the gas and pilot light, the air in the gas line may be the problem. 

Typically, this can be resolved by pressing the pilot button repeatedly until the air has flowed through the line.

If your gas fireplace has a blower, clear out any dust, pet hair, or debris that may have accumulated over the warmer months.

Changing the batteries in your fireplace’s remotes at the start of each season is also a good idea to ensure they’ll work when you need them the most.

Finally, if you haven’t had your fireplace and chimney examined yet, the beginning of autumn is a great time to do so.

Have your chimney inspected by a professional

Most people who own a wood-burning fireplace understand the importance of examining their chimney and fireplace once a year. 

Of course, wood fireplaces produce a lot of creosote, which can clog your home’s chimney and prevent your fireplace from ventilating the smoke it creates.

Because gas fireplaces do not burn wood or emit creosote, some homeowners believe they do not need to have these areas properly inspected. This, however, is not the case.

While gas fireplaces do not cause the same problems as wood fireplaces, it is still critical to have them evaluated annually by certified chimney contractors Upper Marlboro

This is because animals can create clogs in your chimney’s ventilation when building nests. Furthermore, moisture and structural flaws might cause your chimney to crumble, compromising your fireplace’s airflow and forcing carbon monoxide into your home. 

Because most homeowners cannot completely inspect the fireplace’s valves and connections, much alone the chimney, bringing in the professionals and having your gas fireplace inspected yearly is always a good idea.

Of course, you need to ensure that the professionals have the necessary experience and know what they are doing. You don’t want someone that will cause harm to your unit, do you?

The post Guide to Taking Care of Your Gas Fireplace first appeared on First Class Chimney Services.

This post first appeared on https://www.firstclasschimneyservices.com

How Often Should a Chimney Be Swept?

A chimney cleaning or chimney sweeping should take place at least once a year to ensure safe and efficient operation. However, the frequency of sweeping can vary depending on several factors, such as the type of fuel being burned, the amount of use the chimney receives, and the condition of the chimney. It is recommended to have a professional chimney sweep inspect and clean the chimney to determine the appropriate cleaning schedule at least once a year. Additionally, it’s important to monitor the chimney for signs of buildup or blockage and promptly address any issues. Regular chimney maintenance is essential for preventing chimney fires and ensuring proper ventilation of harmful gasses.

Why is Chimney Sweeping Necessary?

Chimney sweeping is necessary for several reasons. Over time, soot, creosote, and other debris can accumulate inside the chimney, reducing its efficiency and increasing the risk of a chimney fire. These byproducts can also block the flue, preventing proper ventilation and causing dangerous gasses, such as carbon monoxide, to build up in the home. Regular chimney maintenance can remove these deposits and help prevent these hazards. To learn more risks of not sweeping your chimney, read our blog about what causes internal chimney deterioration.

In addition to the safety concerns, chimney sweeping can also improve the overall performance of the chimney and the heating system. A clean chimney allows for better airflow, which can improve the heating system’s efficiency and reduce energy costs. It can also help extend the chimney’s life and reduce the need for costly repairs.

What is the Chimney Sweeping Process?

Inspection

A professional chimney technician will first inspect the chimney to assess its general condition and determine if sweeping is needed. There are three levels of chimney inspections, with each level being more comprehensive than the last. The level of inspection needed will depend on the construction of the chimney and if there are any known issues. Read our blog on the difference between Level 1 and Level 2 chimney inspections to learn more about the type of inspection your chimney needs.

how often should a chimney be swept

Preparation

Before sweeping the chimney, the sweep will protect the surrounding area by laying down tarps or drop cloths. They may also use special tools to seal off the fireplace or stove to prevent debris from entering the home.

Sweeping

The chimney sweep will then use specialized brushes, rods, and vacuums to remove any buildup of soot, creosote, or other debris from the inside of the chimney. The tech may work from the top or bottom of the chimney, depending on the type and condition of the chimney. You can view a more detailed list of tools chimney sweepers use here.

Final Inspection

After sweeping the flue, the chimney technician will conduct a final inspection to ensure that the chimney is free of debris If this is a fireplace and it has an operational damper, the damper will be closed upon our departure.

Cleanup

The tech will then clean up any debris or dust that may have accumulated during the sweeping process, and remove all equipment and protective coverings.

Chimney sweeping is a thorough process that requires specialized tools and knowledge. It’s important to hire a professional chimney sweep like our team at Best Chimney Services who can safely and effectively inspect and sweep the chimney and ensure that it is functioning properly.

Other Chimney Services That Should be Done Annually

Several chimney services should be performed annually to ensure the safe and efficient operation of the chimney. These include:

Inspection

A professional chimney technician should inspect the chimney annually to check for any damage, blockages, or other issues that could affect its operation.

chimney services for sweeping, inspection, repair, and maintenance

Repair

Any necessary chimney repairs should be made promptly to ensure that the chimney is functioning properly and to prevent further damage.

Maintenance

Regular maintenance of the chimney and heating system can help prevent issues from arising and ensure that the system is functioning efficiently.

By performing these annual chimney services, homeowners can make sure that their chimney is functioning properly and safely, and reduce the risk of chimney fires and other hazards.

Contact Best Chimney Services for Your Greater Boston Area Annual Chimney Sweeping

Now that we’ve answered your question of “how often should a chimney be swept?” you know it may be time to schedule your annual chimney sweeping or inspection. Our team of certified chimney technicians is ready to provide you with quality chimney services such as chimney sweeping, chimney inspections, and more. Click here or call (781) 893-6611 to schedule your chimney services.

The post How Often Should a Chimney Be Swept? appeared first on Boston's Best Chimney.

What Causes Chimney Leaks In Heavy Rain?

A chimney is an essential part of any home that uses a fireplace or boiler for heating. However, chimney leaks in heavy rain can become a major problem. Chimney leaks in heavy rain can cause damage to your roof, ceilings, and walls, leading to costly repairs. This blog will discuss the causes of chimney leaks in heavy rain, the role of flashing and chimney caps in preventing leaks, and the dangers of ignoring leaks.

Causes of Chimney Leaks in Heavy Rain

Damaged Chimney Crown

There are several reasons why a chimney might leak during heavy rain. One of the most common causes is a damaged chimney crown. The chimney crown is a concrete or masonry cap on top of the chimney stack, discouraging water from entering the flue. If the crown is cracked or damaged, water can seep through and cause leaks. To learn more about chimney crowns and their importance, read our blog “What is a Chimney Crown?.”

Damaged Flashing

Another common cause of chimney leaks in heavy rain is damaged flashing. Flashing is a metal or lead material that is installed at the base of the chimney, where it meets the roof. It is designed to provide a watertight seal between the chimney and the roof. Water can enter the home through the gap if the flashing becomes damaged.

chimney leaks in heavy rain

Contact Best Chimney Services for Flashing Repairs

The flashing is one of the first locations to be examined when a chimney leaks to look for fractures or cavities.  It allows the elements, notably rainwater, to penetrate the house and cause harm if it is not correctly fastened. Flashing repairs can range from being straightforward to requiring more involved repair work. Our team at Best Chimney Services has over 30 years of experience in flashing repairs. Schedule your flashing estimate today!

The Importance of Using a Chimney Cap and Proper Flashing

Chimney caps and flashing are both essential components of a properly functioning chimney system. Chimney caps are installed on top of the chimney to minimize rain, snow, and debris from entering the chimney flue. They are typically made of metal, such as stainless steel, and come in a variety of sizes and shapes to fit different chimney types. In addition to preventing water damage, chimney caps also serve other important functions. For example, they can prevent animals such as birds, squirrels, and raccoons from entering the chimney, which can be a major nuisance. Chimney caps can also prevent downdrafts from occurring, which can cause smoke and other byproducts of combustion to enter your home.

Flashing is installed around the base of the chimney to create a watertight seal between the chimney and the roof. It is typically made of metal, such as aluminum or copper, and is designed to withstand extreme weather conditions. Properly installed flashing can prevent water from entering the home through the chimney.

There are several types of flashing, including step flashing, continuous flashing, and counter flashing. Step flashing is used on sloped roofs and is designed to overlap each shingle. Continuous flashing is used on flat roofs and is a single piece of metal that is bent to fit the shape of the roof. Counter flashing is installed over the step flashing and is designed to protect the flashing from exposure to the elements. To learn more about why chimney flashing is important, read our blog!

Installing flashing and chimney caps is crucial for reducing leaks during heavy rain. If you suspect that your chimney is leaking, it’s important to have it inspected by a professional to identify the cause of the leak and determine the best course of action to prevent further damage.

fix chimney leaks and flashing repairs

Why Ignoring Leaks Can Be Dangerous

If you ignore chimney leaks, they can lead to serious problems. Water damage can weaken the structural integrity of your home, leading to sagging ceilings and walls, mold growth, and even electrical hazards. Leaks can also cause damage to your chimney itself, leading to the need for costly repairs or replacement.

In addition to the physical dangers, chimney leaks can also pose health hazards. Moisture from leaks can create a breeding ground for mold and mildew, which can cause respiratory problems, especially for those with allergies or asthma. In addition, if the leaks cause a damaged flue liner, harmful gasses such as carbon monoxide can seep into your home, posing a serious health risk.

It’s important to address chimney leaks promptly and have them inspected and repaired by a professional. This can help to prevent further damage to your home and protect the health and safety of your family. To learn more about the dangers of moisture in your chimney, read our blog!

Call Best Chimney Services to Prevent Chimney Leaks in Heavy Rain

Are you struggling to know what to do with your leaking chimney? Our team of experienced chimney technicians provides chimney repair services for chimney leaks, including flashing repairs. We also conduct preventive services with chimney waterproofing, chimney liner installation, chimney cap installation, and more! Click here or call (781) 893-6611 to fix or prevent your chimney leaks in the Greater Boston, Massachusetts area.

The post What Causes Chimney Leaks In Heavy Rain? appeared first on Boston's Best Chimney.

Tips for Restoring Your Historic Chimney: Tips to Bring Back Its Charm

If you are a proud owner of a historic chimney, then you know that restoring it requires special care and attention.

Historic chimneys are not only a beautiful architectural feature of a home, but they also play an important role in maintaining the safety and functionality of your fireplace. However, restoring a historic chimney can be a complex process, and there are several things you need to consider before you begin.

Let’s look at seven important things you need to pay attention to when restoring your historic chimney.

7 Essential Tips to Restore Your Historic Chimney

1. Reline the Chimney with the Right

One of the most important aspects of restoring a historic chimney is relining the flue.

Many older homes were built without a chimney liner, which can cause numerous problems, including poor ventilation, smoke damage, and even fire hazards.

The trick is to use a rectangular stainless-steel liner that fits snugly into the chimney. The flexible liner will bend to conform to the narrow passageway as it winds through the chimney. This will help improve ventilation, prevent smoke damage, and reduce the risk of fire.

2. Select the Most Appropriate Lining Material

Another critical tip for restoring your historic chimney is to choose a suitable lining material. Certain lining materials are only compatible with specific fuel types, and the liner must be sized to the firebox and appliances it serves.

You have several options for the lining material: cast-in-place concrete lining systems, stainless steel, and galvanized or aluminum sleeves. You can consult an expert to choose the best lining material for your chimney to ensure it fits in just right.

3. Fix the Masonry Damages

Masonry deterioration is another issue that can affect historic chimneys. Over time, the mortar between the bricks or stones can deteriorate, leading to structural problems and water damage. If you notice any cracks, gaps, or other signs of damage, it’s vital to have them repaired as soon as possible.

Depending on the extent of the damage, you may need to have the entire chimney repointed or rebuilt. It’s best to have your chimney inspected regularly by a professional to catch any issues before they become major problems.

4. Remove Accumulated Creosote

Creosote buildup is another common issue in historic chimneys. Creosote is formed when wood or other organic materials are burned in your fireplace. As the smoke rises through the chimney, it cools and condenses, leaving behind a black, sticky residue.

This residue can build up over time and may lead to chimney fire if not properly addressed. That’s why it’s essential to have your chimney cleaned and inspected regularly to prevent creosote buildup.

5. Install a Chimney Crown

The chimney crown is an essential component of your chimney system. It sits at the very top of the chimney, acting as a protective barrier against water, snow, and other debris.

If the crown of your chimney is cracked or damaged, water can penetrate the masonry, causing it to deteriorate and weaken over time. This can lead to structural damage, such as leaning or collapsing chimneys. Also, the seeped-in water can lead to rust and corrosion of metal components, such as the damper or flue liner, leading to further damage and safety concerns.

Installing a new chimney crown can help protect your chimney from water damage and extend the life of your chimney. A professional chimney technician can inspect your chimney crown and determine if it needs to be repaired or replaced.

6. Repair or Replace the Damper

The damper is a crucial component of your chimney system that helps regulate airflow and prevent smoke from entering your home. If your damper is damaged or rusted, it can prevent proper ventilation and cause smoke to enter your home. Repairing or replacing the damper can help improve the efficiency and safety of your historic chimney.

7. Improve the Structure & Design of the Smoke Chamber

The smoke chamber is situated above the fireplace and below the flue in your historic chimney. It’s designed to help funnel smoke and other byproducts of combustion up and out of your home. However, over time, the smoke chamber can become cracked or damaged and may lead to serious health concerns.

Historic chimneys are typically repaired or replaced with masonry, have their smoke chamber design improved, and have insulation added to prevent heat transfer. A professional chimney technician can inspect your chimney and determine the best course of action to fix any issues with the smoke chamber.

Work With an Expert Team to Bring the Chimney Back to Its Glory

Historic chimneys require special attention and care to keep them functioning properly. The best way to restore your historic chimney is by hiring professionals who know what they’re doing and can make sure everything is done right.

If you want an expert team of restoration technicians to work on your historic chimney and make it safe and functional for years to come, contact us today.

The post Tips for Restoring Your Historic Chimney: Tips to Bring Back Its Charm first appeared on Southern Chimneys.

This post first appeared on https://southernchimneys.com

(877) 959-3534