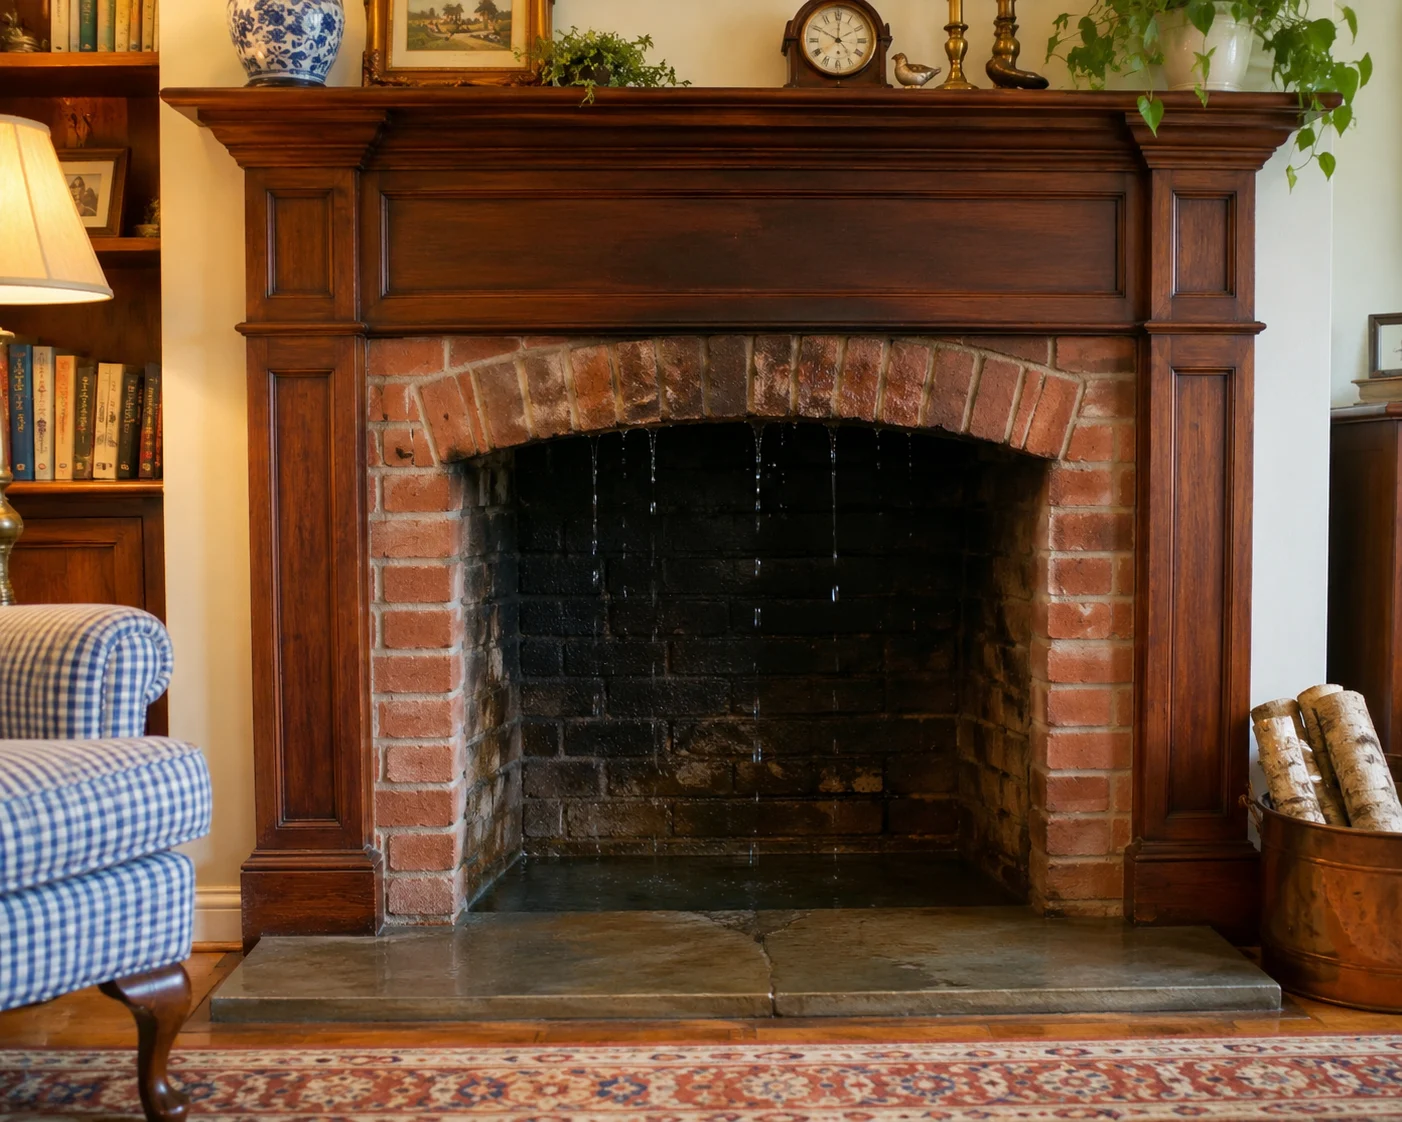
Water leaks are one of the worse problems to have. That’s because finding the source of the leak can be difficult to almost impossible to find. Even a chimney water leak! It can appear on the inside of your home in a room that is not even remotely close to where the fireplace is at. Water has its own mind and is very resourceful to find places to travel. One of the places to check is your chimney. Now, you probably need help with this one, and getting a certified technician from Superior Chimney can be the answer as they are well versed in leak finding. But before you make that call, let’s first learn more about chimney water leaks.
Water Is Your Chimney’s Worst Enemy
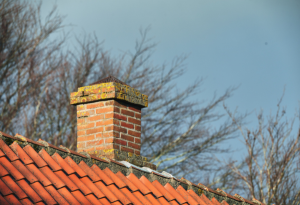
Chimney water leaks cause more damage to masonry chimneys than fire. That’s not a typo. Water wins. And the sources of water leaks are numerous: no chimney cap, crown cracks, deteriorated mortar joints, cracked masonry, worn or missing flashing, foundation cracking, or flue gas condensation from an improperly sized liner. Any one of these can let water in. It can even be a few of them at one time!
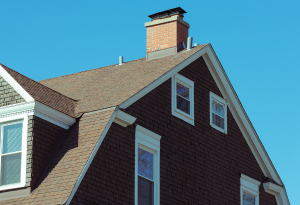
Here’s what makes it worse. Every other part of your home sits under the protection of your roof and eaves. Your chimney doesn’t. It stands fully exposed above the roof taking rain, snow, wind, and the punishing freeze-thaw cycles of winter every year.
How the Damage Happens
Masonry is porous. During winter, that absorbed water freezes. It expands. Then it thaws and contracts. Then it freezes again. This cycle repeats over and over again. Each time, stress builds and cracks form. Over time, the gaps in the cracks widen. Chimney water leaks grow more serious if it is not fixed.
The real danger? The process is slow and subtle. You may not notice a chimney water leak until it’s already done significant damage. By then, the repair costs have increased. What starts as a minor crack can quietly become a structural problem. (This is why the CSIA recommends at least a yearly inspection.)
Where Do Chimney Water Leaks Come From?
Here’s an obvious one. No chimney cap means rain falls directly into your chimney flue. A damaged chimney crown allows water to gather and slowly make its way into the masonry below. Deteriorated mortar joints or gaps between bricks, give water an opening. Flashing failures is where your chimney meets the roofline. If it’s not secure and sealed, water will enter.
Each time it finds a new entry point, the problem builds. As a homeowner making an investment in your house, you don’t want damages to happen.
How to Protect Your Chimney
The good news: chimney water leaks are preventable. Here’s what needs to happen:
Install a professional-grade chimney cap. It’s the first line of defense against water intrusion. Repair or replace a damaged chimney crown. Fix deteriorated brick and mortar joints through proper chimney tuckpointing. Fix any leaky chimney flashing immediately. And waterproof your chimney with Superior Chimney’s Chimney Saver.
That last one gets overlooked too often. Professional chimney waterproofing treats the masonry itself, allowing moisture vapor to escape while blocking water from penetrating. It’s not a cosmetic fix. It’s structural protection.
Don’t Wait, Call Today! Chimney water leaks don’t resolve on their own. Superior Chimney handles every aspect of chimney water leak repair and prevention. One call addresses it all, so call today at 877-244-6349.
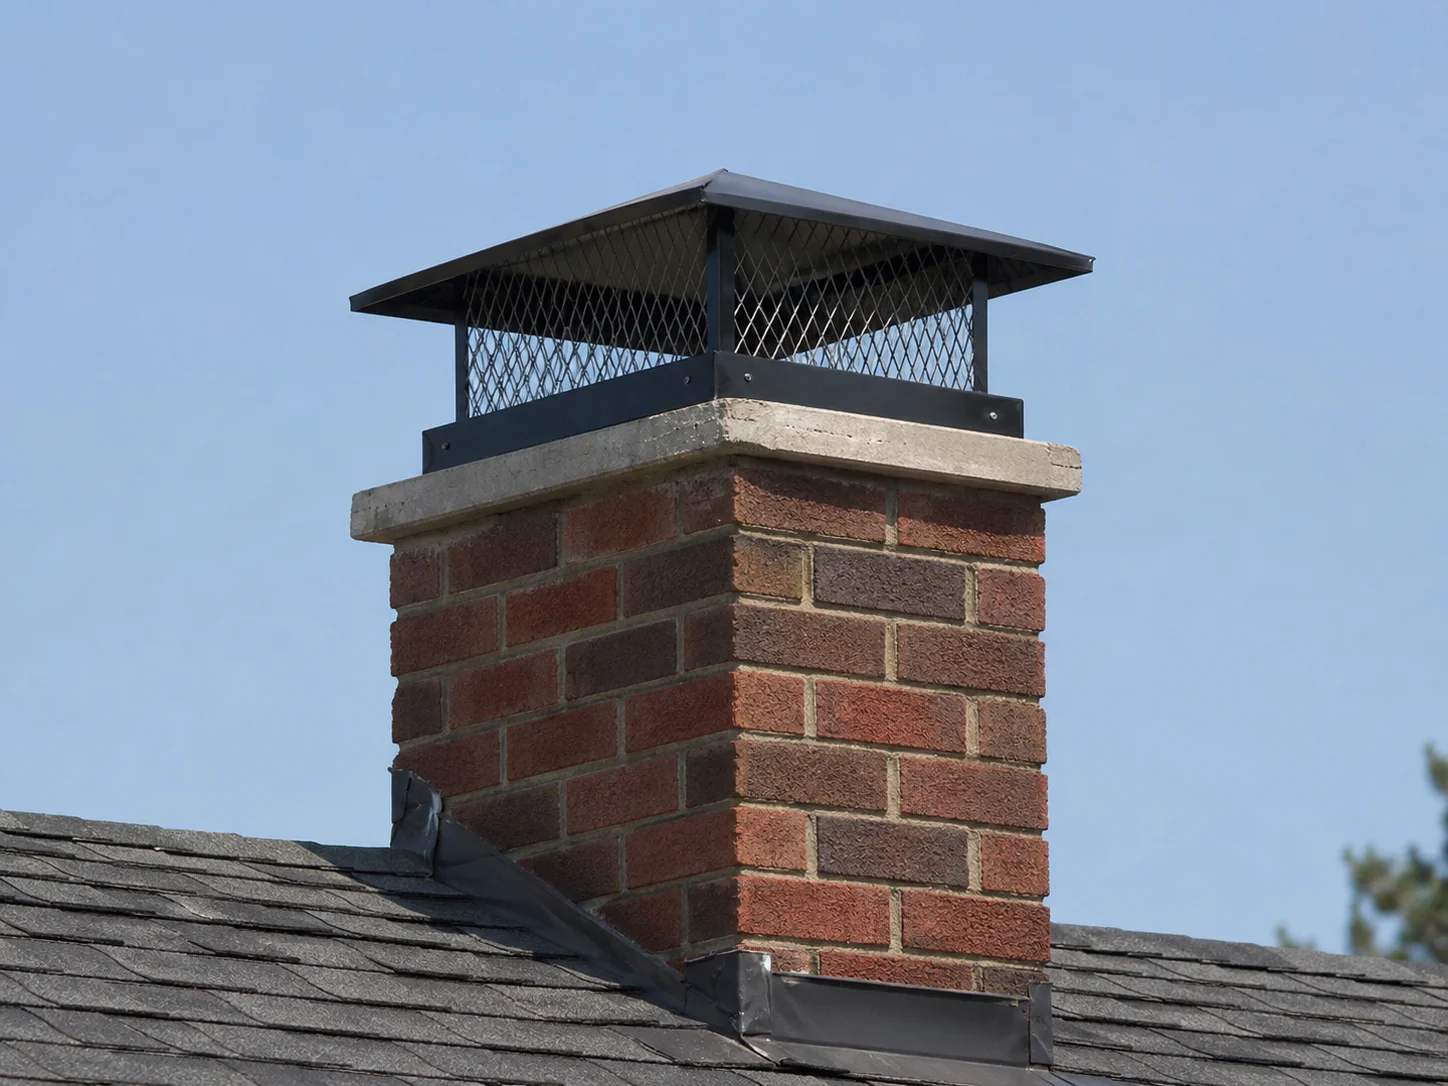
We all would like a best friend. Someone that’s got your back, watching out for your best interests. It gives us a chance to relax and not always be on guard. That’s the same thing with a chimney cap. It’s got the back of your chimney so nothing bad happens to it and ultimately your home. So, what does this little piece of steel do? Let’s take a look.
Advantages of Chimney Caps
Let’s start with the basics. A chimney cap does four things really well. It keeps out rain and snow. It blocks animals. It stops sparks. And it fights wind downdrafts. The Chimney cap does all of this? Yes, absolutely. Each reason listed matters more than you might think. Every chimney needs a cap for the same reasons every home needs a roof!
Rain & Snow Protection
We just went through plenty of snow in the Chicagoland area. Let’s begin with the interior of the chimney. Your chimney’s interior is made from porous materials. Firebrick, fire clay tiles, high-temperature mortar, steel, cast iron… all of it absorbs moisture. Without a chimney cap, rainwater goes straight down into those materials. What happens next?
Saturation.
Frost.
Ice formation.
Deterioration at a faster rate.
Water is a chimney’s worst enemy, and a cap is the simplest and most effective defense you have.
Keeping Animals Out
Birds, raccoons, squirrels, even bats (which I have in my yard, great for managing mosquitos), they all think of your chimney as prime real estate. Warm, enclosed and protected from the weather elements. Perfect for nesting and raising young. Here’s the problem. Nesting debris and animal feces block exhaust flow. The smoke can’t get out of your home. Neither can carbon monoxide. That’s dangerous. Baby animals often can’t climb out and die inside the flue. What follows is grim. Foul odors, maggot infestation and airborne disease. And nesting material? Highly flammable. A chimney fire can become a real possibility. A quality chimney cap from Superior Chimney stops all of this before it has a chance to start.
Spark Arrestor Function
Sparks from a fire will leave your chimney. That’s just the physics of it. But where they land is the issue. Trees, dry leaves, roof shingles, nearby brush — one stray spark can ignite any of it. The spark arrestor built into a professional chimney cap intercepts those sparks before they become a problem. It’s a simple feature with serious consequences if it is missing.
Wind Downdraft Control
Ever had smoke blow back into your living room? Annoying, disgusting and potentially hazardous. Wind pushing down your chimney is usually the culprit. A chimney cap minimizes those downdrafts, keeping your fire burning cleanly and your indoor air clear.
What NOT to Do
There are homeowners out there that try to fix the problem on their own. Chicken wire, loose netting laid flat across the flue opening or even a crate from the grocery store creates new problems. Snow accumulates and ice forms. Suddenly your exhaust is blocked. Carbon monoxide and smoke have nowhere to go. That’s not a solution, it’s a disaster waiting to happen.
Also, let’s not forget that an improperly sized chimney cap can also cause problems. Think of it like a hose with a closed nozzle. Where does the air go?
What To Do Next?
A chimney cap is the most cost-effective preventive measure available for chimney protection. Superior Chimney’s professional-grade caps are engineered as a complete termination assembly for snow, rain, animals, spark arrestor, and wind blocker all in one unit. Superior Chimney certified technicians will ensure that your chimney cap is properly sized and installed. Don’t wait for damage to occur, contact us today at 877-244-6349.
Regular chimney inspections are essential for maintaining safety, efficiency, and compliance. Whether you own a home or manage a commercial property, understanding the right chimney inspection frequency can help prevent costly repairs and serious hazards.
This guide explains how often chimneys should be inspected and why working with professionals like Best Chimney is the right choice.
Why Chimney Inspections Matter
Chimneys handle heat, smoke, and harmful gases every time a fireplace or heating system is used. Over time, buildup and structural wear can create risks such as:
If you use your fireplace frequently or burn wood regularly, you may need inspections more than once per year.
How Often Should Commercial Chimneys Be Inspected?
Commercial buildings often require more frequent chimney inspections due to higher usage and stricter safety regulations.
Typical guidelines include:
Quarterly inspections for high-use systems such as restaurants or industrial kitchens
Semi-annual inspections for moderate-use systems
Annual inspections for low-use commercial properties
Local codes and insurance requirements may also dictate inspection frequency, so it is important to stay compliant.
Types of Chimney Inspections
Understanding the different inspection levels can help you determine what your property needs.
Level 1 Inspection
This is a basic inspection used for regularly maintained systems with no major changes. It includes a visual check of accessible areas.
Level 2 Inspection
This is required when buying or selling a property, after a chimney fire, or when making system changes. It often includes video scanning of the flue. Learn more about Level 2 Chimney Inspections.
Level 3 Inspection
This is the most detailed inspection, used when serious hazards are suspected. It may involve removing parts of the structure to assess hidden damage. Learn more about Level 3 Chimney Inspections.
Factors That Affect Inspection Frequency
Several factors can influence how often your chimney should be inspected:
Type of fuel used, such as wood, gas, or oil
Frequency of use
Age and condition of the chimney
Previous damage or repairs
Environmental factors like weather exposure
A professional inspection can help determine the ideal schedule for your specific system.
Signs You May Need an Immediate Inspection
Even if you follow a regular schedule, certain warning signs mean you should schedule an inspection right away:
Smoke entering your home or building
Strong odors coming from the chimney
Visible cracks or damage
Excessive soot or creosote buildup
Poor draft or airflow
Ignoring these signs can lead to serious safety issues.
Benefits of Regular Chimney Inspections
Staying consistent with chimney inspections offers long-term benefits:
Improved safety for occupants
Better heating efficiency
Lower risk of expensive repairs
Compliance with local codes and insurance requirements
Longer lifespan of your chimney system
Choose Best Chimney for Residential and Commercial Inspections
When it comes to chimney inspections, experience and reliability matter.
Best Chimney provides professional inspection services for both residential and commercial properties. Their team offers:
Certified and experienced technicians
Thorough inspections using advanced tools
Clear reports and honest recommendations
Services that meet safety codes and regulations
Whether you need an annual home inspection or routine commercial maintenance, Best Chimney has the expertise to keep your system safe.
Knowing how often chimneys should be inspected is key to maintaining safety and performance. Annual inspections are essential for homes, while commercial systems often require more frequent checks.
By staying proactive and working with a trusted company like Best Chimney, you can avoid risks and ensure your chimney operates safely year-round.
If your chimney is not working as safely or efficiently as it should, the problem may be inside the flue. Over time, chimney liners can crack, wear down, or become unsafe. That is where chimney relining comes in.
This guide explains the chimney relining process, why it is important, and how choosing the right professionals like Best Chimney can help protect your home.
What Is Chimney Relining?
Chimney relining is the process of repairing or replacing the inner lining of your chimney, also known as the flue liner. This liner plays a critical role in your home by:
Directing smoke and gases safely out of your house
Protecting the chimney walls from heat and corrosion
Improving the performance of your fireplace or heating system
If the liner is damaged or outdated, it can increase the risk of chimney fires or carbon monoxide exposure.
Stainless steel liners, which are durable and widely used
Aluminum, which are less common but acceptable in certain applications
Cast-in-place liners, which help strengthen aging chimneys
The right choice depends on your chimney structure and the type of appliance you use.
4. Liner Installation
The new liner is inserted into the chimney flue. With stainless steel liners:
The liner is lowered from the top of the chimney
It is connected to the fireplace or heating appliance
Insulation may be added to improve safety and efficiency
Proper installation is key to ensuring safe ventilation.
5. Sealing and Final Connections
Once the liner is in place, it is sealed and secured:
A top plate and chimney cap are installed to prevent water entry
The base is connected to your appliance (if applicable)
All joints are checked to ensure a tight seal
6. Final Safety Check
A final inspection confirms that everything is installed properly. This includes checking airflow, connections, and compliance for heat and hot water applications.
Benefits of Chimney Relining
Chimney relining offers several important advantages:
Improved safety for your home
Better heating efficiency
Lower risk of chimney fires
Longer lifespan for your chimney system
Compliance with current building codes
How Long Does Chimney Relining Take?
Most chimney relining jobs can be completed in one day. The exact time depends on the condition of the chimney, the type of liner used, and the complexity of the installation.
Why Professional Chimney Relining Is Important
Chimney relining requires experience and precision. Poor installation can lead to gas leaks, ventilation problems, and long-term damage.
Chimney relining is an essential part of maintaining a safe and efficient home. Whether you are dealing with a damaged liner or upgrading your system, understanding the process helps you make informed decisions.
Working with a trusted company like Best Chimney ensures the job is handled properly from start to finish.
What a winter it’s been! Whether you’ve spent it hibernating, enjoying all the snow, or somewhere in between, it’s so nice to finally feel the warmer weather rolling in.
Spring is the ideal time to check in on your chimney—and this year, the technology behind chimney care has taken a major leap forward.
Today’s masonry methods and products are designed not just to repair problems, but to prevent them for the long term. The biggest shift? Advanced, flexible waterproofing systems that outperform traditional materials in every way.
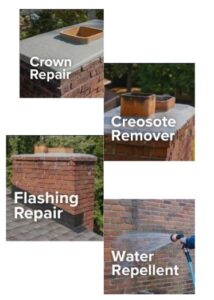
One standout example is Chimney Defender™ Next Gen Flashing Repair, a professional-grade, elastomeric waterproof coating engineered to seal and protect chimney flashing, roof penetrations, and roof-to-wall transitions. This next-generation formula forms a durable, rubberized barrier that adheres to metal, brick, stone, roofing materials, and masonry. It flexes with your home, resists extreme weather, and delivers a lasting seal.
But innovation doesn’t stop at flashing. We’re also seeing major improvements in total chimney protection:
Chimney Defender™ Next Gen Water Repellent: A professional grade sealant solution designed to deeply penetrate masonry surfaces, blocking water intrusion while still allowing the masonry to breathe. This helps prevent cracking, spalling, and long-term structural damage.
Chimney Defender™ Next Gen Crown Repair: Specifically engineered to restore and protect the chimney crown and wash—the most exposed part of your chimney. This product creates a seamless barrier that prevents water from entering and damaging the structure below.
Chimney Defender™ Glazed Creosote Remover: A next-generation poultice designed for the accelerated removal of glazed creosote buildup. This powerful solution breaks down hardened deposits more effectively, helping restore proper airflow and reduce fire risk.
These advanced products are built to handle New England’s toughest conditions—from freeze-thaw cycles to heavy rain and heat fluctuations—giving homeowners longer-lasting results and fewer unexpected repairs.
At Best Chimney, we use the latest materials and methods to deliver results you can rely on. Whether it’s preventative maintenance or a full overhaul, our goal is simple: do it once and do it right.
If you haven’t had your chimney inspected recently, now is the perfect time. And remember, proactive maintenance is preventive maintenance.
April Showers or Fireplace Leaks? Why Spring Rain is the Ultimate Test for Your Chimney
There is a specific kind of magic that settles over Atlanta this time of year. The Dogwoods are beginning to lace the streets of Buckhead with white petals, the pollen—bless its heart—is starting to coat our cars in that familiar neon yellow, and the air smells like wet earth and new beginnings. We all know the old adage: April showers bring May flowers. But for those of us living in the historic homes of Midtown or the cozy suburbs of Marietta, April showers often bring something a little less poetic: water dripping into the firebox.
While we usually associate our fireplaces with the crisp, cold nights of December, springtime is actually the most critical season for your home’s venting system. Think of the spring rains as a “stress test.” After a long winter of expansion and contraction from heat, your chimney is now being pelted by those sudden, heavy Atlanta thunderstorms. If you’ve noticed a damp smell or a rhythmic plink-plink-plink behind your damper lately, you aren’t alone.
Let’s dive into why the spring thaw is the ultimate test for your chimney and how you can protect your home before the humidity of a Georgia summer sets in.
The Seasonal Transition: From Heat Stress to Water Pressure
During the winter months, your chimney works overtime. Whether you’re burning seasoned oak or enjoying the convenience of a gas-fed system, the masonry undergoes significant thermal stress. When the fire is roaring, the bricks get hot; when the fire goes out, they cool rapidly in the chilling night air.
This cycle can lead to tiny hairline fractures in the mortar and bricks. You might not notice them in January, but when the heavy spring rains arrive, water finds those microscopic pathways. Water is patient, and it is persistent. In the Atlanta area, where we can see several inches of rain in a single afternoon, a small crack can quickly become a major structural headache. This is especially true for our older brick homes in neighborhoods like Virginia-Highland, where the masonry has stood the test of time but is beginning to show its age under the pressure of modern storm patterns.
The “Freeze-Thaw” Hangover
Even though Georgia winters are relatively mild compared to the North, we still experience plenty of nights where the temperature dips below freezing followed by 50-degree days. This “freeze-thaw” cycle is brutal on porous materials. Water gets into the brick, freezes and expands, and then melts, leaving behind a slightly larger gap than before. By the time April rolls around, those gaps are essentially open invitations for rainwater.
The Anatomy of a Spring Leak: Where is the Water Coming From?
Many homeowners assume that if water is in the fireplace, the “hole” must be directly above it. In reality, chimneys are complex structures, and leaks can originate from several vulnerable points.
1. The Crown Jewels
The chimney crown is the concrete slab that sits on top of your masonry. It’s designed to shed water away from the bricks, much like an umbrella. Over time, the sun and temperature shifts cause the crown to crack. When it rains in April, water seeps into these cracks, gets trapped behind the bricks, and begins to rot the interior structure of your home.
2. The Flashing: Your Chimney’s Raincoat
Flashing is the metal stripping that connects your chimney to your roof line. This is arguably the most common fail point. Because the chimney and the house are two different structures, they move independently. If the sealant has dried out or the metal has rusted, the “April showers” will head straight for your attic and ceiling.
3. The Cap: Your First Line of Defense
If you look up and see an open hole at the top of your flue, you’re essentially inviting every storm into your living room. A full coverage masonry cap is non-negotiable in the South, not just for rain, but to keep out the chimney swifts and squirrels that are looking for nesting spots this time of year.
It is a common habit for Georgia homeowners to put the fireplace out of their minds once the Masters Tournament concludes and the A/C units start humming. However, ignoring a spring leak is a recipe for disaster.
The Mold Factor: Atlanta is famous for its humidity. When you combine spring rain with 90% humidity and a dark, enclosed chimney flue, you create a literal petri dish. Water damage that isn’t addressed in April becomes a mold infestation by July. That “musty” smell you notice in the summer isn’t just old ash; it’s often organic growth thriving on the moisture trapped in your masonry.
The Deterioration Factor: Masonry is porous. When water enters a brick, it begins a process called spalling, where the face of the brick literally pops off. By addressing maintenance now, you prevent the need for a full-blown masonry reconstruction later this year. Furthermore, if you have a gas system, moisture can wreak havoc on the electronic components. Water and gas valves do not mix, and a spring leak can lead to a very expensive component replacement come November.
A Visual Guide: Signs of Trouble vs. Healthy Masonry
Feature
Signs of a Healthy Chimney
Warning Signs (Spring Red Flags)
Interior Firebox
Dry, gray or black soot, no odor.
Damp ash, “campfire” smell, water stains.
Exterior Bricks
Uniform color, solid mortar lines.
White powdery staining, crumbling mortar.
Ceiling/Walls
Clean paint, no soft spots.
Brown water stains around the fireplace.
Top of Chimney
Solid concrete crown, secure cap.
Visible cracks in the slab, rusted flashing.
Damper Operation
Opens and closes smoothly.
Rusted handle, difficult to move.
Why Choose Southern Chimneys?
When it comes to protecting your home, experience and local knowledge matter. Here is why Atlanta homeowners trust us:
Deep Local Roots: We understand Georgia’s specific climate challenges—from the heavy red clay soil that affects foundation stability to the intense humidity that accelerates masonry decay.
Comprehensive Care: We provide a holistic look at your entire venting system, from the basement to the roofline.
Transparency First: We use high-resolution internal cameras to show you exactly what is happening inside your flue. If there isn’t a problem, we’ll tell you.
Mess-Free Guarantee: We treat your home like our own. Our specialized HEPA filtration vacuums and drop-cloth systems ensure that not a single speck of soot ends up on your carpets.
Certified Expertise: Our technicians are fully certified by the Chimney Safety Institute of America (CSIA) and trained in the latest safety standards and masonry techniques, ensuring every repair is built to last.
When we visit a home in neighborhoods like Alpharetta, Decatur, or Vinings, we aren’t just looking for soot. We are looking for the story of the home. We understand that a fireplace is the heart of the house, and keeping it dry is about more than just aesthetics—it’s about structural integrity. A professional spring evaluation includes:
A thorough safety evaluation: Checking the flue liner for cracks that could leak carbon monoxide.
Waterproofing treatments: Applying vapor-permeable sealants that let the brick “breathe” while keeping the rain out. This is a specialized siloxane-based product that is far superior to standard paint or hardware store sealers.
Flashing repair: Ensuring the seal between your roof and your fireplace is airtight and watertight using industrial-grade materials that can handle the Georgia heat.
Living the Atlanta Lifestyle: Protect Your Home
Whether you’re hosting a summer barbecue in your backyard or curling up inside during a thunderstorm, knowing your home is protected provides immense peace of mind. Our local weather is beautiful, but it can be harsh on masonry. From the clay-heavy soil that can cause slight foundation shifts to the torrential downpours of the spring season, your chimney survives a lot.
The architectural diversity of Atlanta—from the mid-century moderns in Northcrest to the grand estates in Sandy Springs—requires a tailored approach. A one-size-fits-all repair doesn’t work here. By performing maintenance in the spring, you ensure that when the first cold snap of autumn hits, you’re ready to light a fire without worry.
Don’t let a small drip turn into a major renovation. Use this season of renewal to give your fireplace the attention it deserves. After all, the best time to fix a leaky chimney is when the sun is shining.
1. I hear a dripping sound, but I don’t see water. Should I be worried?
Yes. Many times, water leaks into the “smoke shelf” area behind the damper. You might not see a puddle on the floor, but the water is sitting there, rusting your damper and soaking into the internal masonry. If you hear it, the water is getting in somewhere.
2. Why does my fireplace smell like a wet campfire when it rains?
That smell is caused by moisture mixing with creosote. When the humidity rises or rain enters the flue, it “activates” those old odors and carries them down into your living space. A professional removal of these deposits and a moisture-entry check can usually solve the problem.
3. Can I just use some hardware store caulk to fix my chimney leak?
We don’t recommend it. Chimneys experience extreme temperature fluctuations. Standard caulk will peel and crack within a few months because it isn’t designed for the expansion and contraction of masonry. Professional-grade flashing sealants are specifically engineered to remain flexible under the intense Georgia sun.
Ready to Dry Out Your Home?
At Southern Chimneys, we pride ourselves on being the local experts that Atlanta families trust. We know the unique challenges of our local climate and the specific architecture of Southern homes. Reach out to our friendly team today to schedule your comprehensive safety assessment and moisture-prevention service. Let’s make sure your chimney passes the spring test with flying colors!
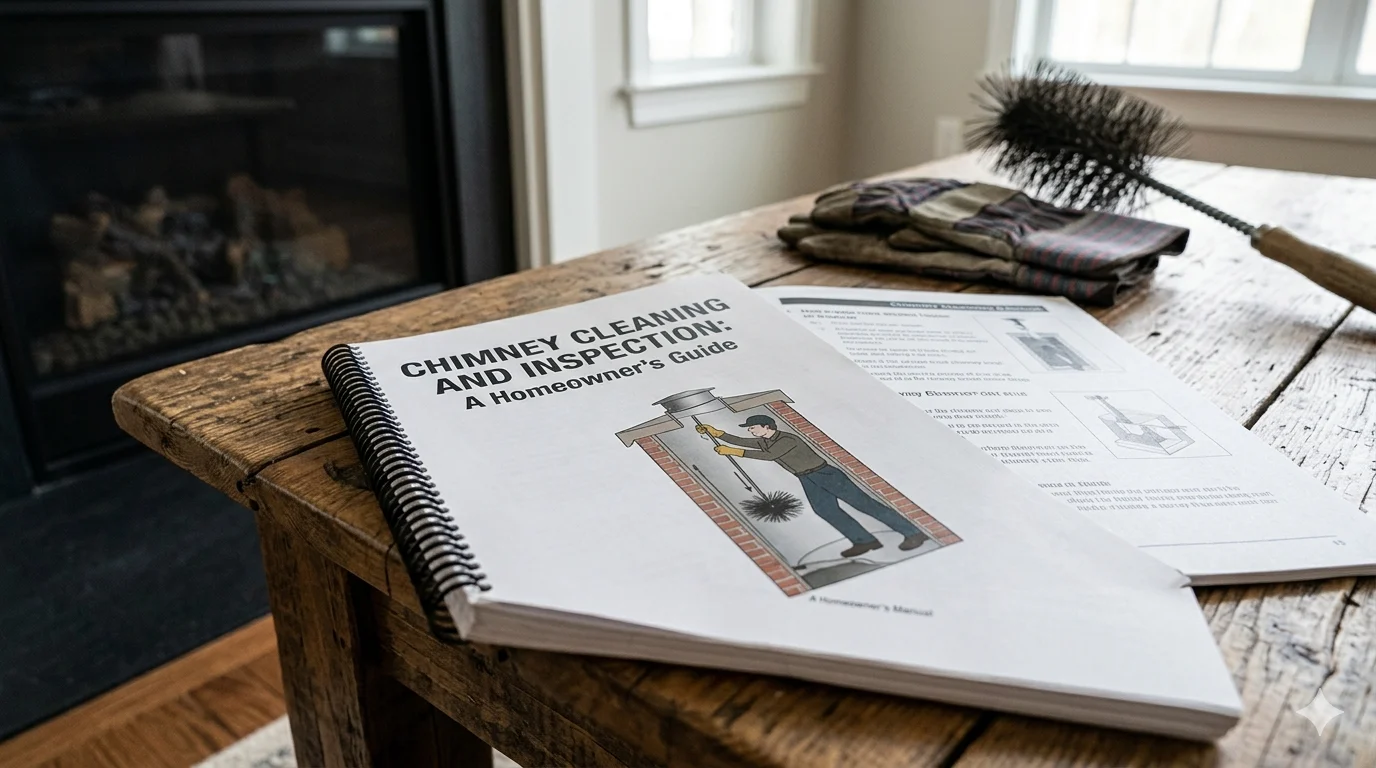
Don’t you wish we can have a homeowner’s manual for all the things we need to do and know as a homeowner? It’s all by trial and error…unfortunately. Did anyone every tell you about doing a chimney cleaning & inspection? Most homeowners will say, “I don’t use it,” or “I have a gas fireplace,” therefore, no reason to clean it…right?
Chimney inspections or fireplace inspections are performed in most homes. In a Level I inspection our CSIA Certified Chimney Sweep technicians will verify that your fireplace & chimney structures are sound, free of obstructions, and combustible deposits, such as creosote. What? What is creosote?
Wood Burning Fireplaces Need Annual Cleaning. No Exceptions.
Creosote is the main concern. Every time you burn wood, it builds up inside your flue. It’s sticky, it’s flammable, and left there, it becomes a serious fire hazard. A chimney inspection catches that buildup early before it becomes a problem that costs you far more than a routine annual cleaning.
Obstructions matter too. Birds, squirrels, raccoons, bats and debris find their way into chimneys more often than homeowners expect. A blocked flue doesn’t just smell bad; it pushes dangerous gases back into your home.
Gas Fireplaces Need a Cleaning & Inspection Too!
A lot of homeowners assume their gas fireplace doesn’t need cleaning. It burns clean, right? Not entirely.
Gas chimneys can build up acidic and corrosive substances along the flue. The longer these substances remain, the more damage they can do to your fireplace and its parts. Again, that’s not something you want to ignore.
Debris also collects in the vents, the flue, and inside the chimney of gas fireplaces. This restricts the airflow and can cause odors. Add in the possibility of animal nests or moisture damage and an annual inspection starts to make a lot of sense.
The bigger concern with gas? Carbon monoxide. Gas fireplaces produce carbon monoxide if not properly vented. That’s an invisible, odorless threat to you and your family.
What the Experts Recommend
The National Chimney Sweep Guild and the National Fire Protection Association both recommend that homeowners call a certified chimney sweep for an annual chimney inspection. Only a qualified, certified professional will be able to identify and resolve these issues. That’s a safety standard backed by two of the most respected organizations in the industry.
Don’t Wait Until Something Goes Wrong
Annual chimney cleaning & inspection is one of the easiest things you can do to protect your home. It keeps your fireplace running safely and efficiently whether it be wood burning or gas. All you need to do as a homeowner is schedule it once a year. And make sure the sweep you hire is CSIA Certified and an NCSG member. Your family’s safety depends on it. Contact us today to schedule your chimney clean and check at 877-244-6349.
We have had enough rain in the Chicagoland area to last us the rest of the spring and summer season! Although the grass got greener quite quickly and the tulips are at its peak, not everything is smelling fresh and new. It’s the fireplace smoke smell.
This past week, family came into town for a visit. We were sitting in the kitchen having some food and drink when a family member asked, “Do you have a smoker?” Obviously, others can smell it, but nobody else said anything. Great, how does a problem like this get fixed?
What is Happening?
The problem is air coming down the chimney. The fireplace smoke smell family noticed? It’s being carried down through the chimney and right into the living space. As air moves down through the chimney, it brings the inner chimney odor along with it. It is likely that the poor chimney is victim of a negative pressure problem.
What causes that pressure shift? More than you’d expect. Here are the most common culprits:
An inefficient or worn damper that won’t close fully
A new furnace, boiler, or water heater recently installed
New windows or doors that tightened up the house
A home addition that changed the pressure balance
Changes to roofing ventilation or attic fans
Kitchen range exhaust fans and dryer vents
A neighboring building that went up taller than yours
Any one of these can flip the pressure dynamics in your home. Your chimney becomes a convenient air intake instead of an exhaust. And it brings the smell along for the ride.
Summer Is Usually the Worst
Most people notice fireplace smells in warmer months. There’s a reason for it. Heat and humidity amplify creosote odors already sitting in the flue. Add in a running air conditioner, which pulls air inward, and the negative pressure gets worse. The smell gets pushed right into your living area.
You might also notice it when running the kitchen fan or clothes dryer. Both exhaust air outside, then make-up air is pulled from wherever the house can. Sometimes that’s your chimney.
Can a Damper Help?
A top-mounted, energy-sealing damper can make a real difference. Unlike a standard damper, it seals at the very top of the chimney. That cuts off much of the airflow coming down before it ever reaches the living space.
Get a Diagnosis with a Certified Chimney Sweep
Fireplace pressure issues can be complicated. They involve airflow patterns, pressure differentials, and how your chimney interacts with the rest of your home. It’s not something most homeowners can diagnose on their own.
The National Chimney Sweep Guild (NCSG) is a community of professionals that lead the chimney and venting industry, with members promoting the highest level of safety, integrity, and skill when serving homeowners. The NCSG even offers specialized House Pressure Training — known as the HAM House program — specifically because pressure-related chimney problems are that complex and increasingly more common.
A Superior Chimney CSIA Certified Chimney Sweep technician can assess your chimney, pinpoint the exact cause of the fireplace smoke smell, and give you a real fix that lasts. Contact Superior Chimney today to get the smells out and buy a real smoker. 877-244-6349
As the Georgia wildflowers begin to bloom and the humid breeze returns to the Greater Atlanta area, homeowners often think their fireplace duties are over for the year. However, spring is the prime season for a different kind of guest to take up residence in your home: local wildlife.
Ensuring your venting system remains code compliant and free of obstructions is essential for maintaining a home with no potential hazards. When birds, raccoons, or squirrels decide to nest in your flue, they create blockages that can lead to smoke backup or even chimney fires. Our guide will help you understand how to identify a wildlife intrusion and what steps to take to ensure your fireplace remains fully operational for the seasons to come.
If you suspect a furry or feathered visitor has moved in, it is vital to contact a chimney professional for a comprehensive chimney evaluation to clear the way and secure your home.
The most important rule when dealing with wildlife in your flue is to never, under any circumstances, light a fire to remove them. This is inhumane and often results in a trapped, deceased animal that creates a massive hygiene issue and a terrible odor throughout your home.
To remove animals humanely and effectively, follow these steps:
Identify the species: Different animals require different removal tactics and are subject to different local Georgia wildlife laws.
Keep the damper closed: This prevents the animal from entering your actual living space, especially in the case of frantic squirrels or birds.
Contact a professional: A chimney specialist can determine if the system is fully operational and help coordinate with wildlife removal experts if necessary.
Install preventative hardware: Once the animal is gone, installing a high-quality cap is the only way to ensure the system stays up to code and animal-free.
Why Atlanta Wildlife Loves Your Chimney
In suburbs like Marietta, Alpharetta, and Decatur, the lush tree canopies provide the perfect habitat for critters. To a mother raccoon your flue looks like a hollowed-out tree—the perfect, predator-proof nursery.
Common Spring Intruders
Animal
Signs of Presence
Common Entry Time
Raccoons
Heavy thumping, crying sounds (like human babies).
Nighttime/Dusk
Squirrels
Fast scratching, scampering, clicking noises.
Early Morning/Daylight
Birds
Chirping, fluttering, or winged shadows in the firebox.
Daytime
Bats
Squeaking, rustling, or dark stains at the chimney top.
Nighttime
The Dangers of “Uninvited Guests”
While a nest might seem harmless, it presents several risks to your property. A blocked flue is a system with potential hazards that can affect the health of your family.
Fire Hazards: Nests are made of dried leaves, twigs, and fur—essentially high-grade kindling sitting in your vent.
Carbon Monoxide: If the flue is blocked, dangerous gases cannot escape the home.
Disease and Parasites: Raccoons and birds carry mites, fleas, and histoplasmosis, which can enter your air ducts.
Structural Damage: Animals can claw at the mortar and liners, leading to a system that is no longer up to code.
Keeping the Critters Out: Your Prevention Checklist
To ensure your home remains a fortress against the local fauna, you must be proactive. A fully operational chimney is a sealed chimney.
Install a Full Coverage Masonry Chimney Cap: This is your ultimate line of defense. It shields the entire masonry crown from water damage while the mesh screen keeps sparks in and wildlife out.
Check the Spark Arrestor: Ensure the mesh is intact and has not been bent or pried open by a persistent raccoon.
Trim Overhanging Branches: In North Georgia, squirrels use “tree highways” to jump onto your roof. Keep branches at least 10 feet away from your masonry.
Annual Maintenance: A yearly professional flue sanitizing and sweep ensures that any old nesting material is removed before it becomes a fire risk.
Real-Life Atlanta Scenarios
Chimney Swifts are federally protected migratory birds that are a common sight (and sound) in historic Atlanta neighborhoods like Inman Park, Grant Park, and Decatur. Unlike many birds, they cannot perch on branches; they must cling to vertical surfaces, making the interior of a masonry chimney their ideal nesting ground.
Because these birds are protected under the Migratory Bird Treaty Act, it is illegal to disturb them or their nests. If they move into your flue, we are required to wait until they migrate south in the fall before any cleaning, restoration, or cap installations can take place.
Sandy Springs Squirrel Blockages
Homeowners in Sandy Springs frequently report scratching sounds or unusual odors emanating from their basement fireplaces. While many assume these are just “noises in the house,” squirrels are notorious for choosing chimney flues as a primary nesting site.
Unlike other animals that might accidentally fall into a chimney, squirrels will deliberately build massive nests on the smoke shelf. This accumulation of dry leaves and debris creates a significant fire hazard and can lead to persistent smells and hygiene issues within the home.
Professional Solutions for a Code Compliant Home
Ensuring your chimney is up to code requires more than just looking up the flue with a flashlight. Our team uses specialized cameras to check for obstructions and nesting materials that might be hidden behind the liner. This ensures that when you go to light that first fire in the autumn, there are no potential hazards waiting for you.
Securing Your Georgia Home: The Southern Chimneys Standard
Your chimney is more than just a stack of bricks; it is an integral part of your home’s ventilation and safety, acting as the lungs of your household. While the spring season brings beautiful blossoms and warmer weather to Georgia, it also signals a peak in activity for curious critters looking for a secure place to nest.
By staying proactive with high-quality caps, routine maintenance, and professional evaluations, you can ensure your fireplace remains code compliant and prepared for the next burning season.
Ignoring the early warning signs of wildlife—like rustling sounds or unusual odors—can lead to expensive damages and systems with potential hazards. Whether you are in a historic home or a modern build, securing your flue ensures your venting system stays fully operational and your indoor air quality remains high.
At Southern Chimneys, we are proud to be the trusted local experts for homeowners across the heart of Georgia. Our main focus is Atlanta itself, providing expert chimney care to the city’s historic and vibrant neighborhoods, including:
Buckhead & Midtown
Virginia Highland & Inman Park
Grant Park & East Atlanta
Brookhaven & Chamblee
Don’t wait for a scratching sound or a blocked vent to take action. Take the first step in protecting your property today by ensuring your home is ready for whatever nature throws its way.
Can I Use Mothballs to Get Animals Out Of My Chimney?
No. Mothballs are ineffective in a venting environment and introduce toxic chemicals into your home’s air supply. It also fails to make the system fully operational.
Is a Chimney Cap Required By Law?
While regulations vary, most safety standards suggest a cap is necessary to keep the system up to code and to prevent moisture and animal damage.
How Often Should I Have My Venting System Evaluated?
The NFPA recommends a professional chimney check-up at least once a year to ensure there are no potential hazards.
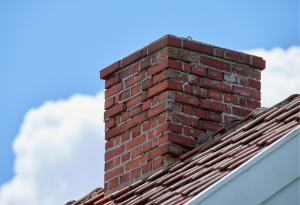
Winter is always tough on your home. This past winter was no picnic with the snow and cold. By the time spring (really) arrives, your chimney has put up with months of freezing temperatures, snow, ice, and the constant freeze-thaw cycle that quietly does damage you can’t always see from the outside. That’s why a spring chimney inspection isn’t just a good idea, it’s essential to have your chimney checked before storm season begins. Here’s why:
Water Is Your Chimney’s Worst Enemy
Here’s something that most homeowners don’t know: chimney leaks cause more damage to masonry chimneys than fire does. Think about that a moment. While everyone worries about creosote and chimney fires — and rightfully so — water is silently doing just as much, if not more, damage.
Unlike the rest of your home, which is sheltered by your roof and eaves, your chimney stands fully exposed above the roofline. It takes on rain, wind, snow, and every freeze-thaw cycle winter throws at it, all while absorbing moisture into its porous masonry materials. That water expands and contracts, causing cracks, structural stress, and integrity loss that accumulates over time. The worst part? Chimney leaks are often subtle and slow-moving. By the time you notice water damage inside your home, the problem has usually become more serious, and expensive.
What a Spring Inspection Actually Catches
A professional spring chimney inspection, such as Superior Chimney’s, goes well beyond a quick visual check. A CSIA Certified Chimney Sweep technician will evaluate your entire system — inside and out — looking for the most common sources of chimney leaks and damage, including cracked chimney crowns, deteriorated brick and mortar joints, damaged or missing chimney caps, faulty chimney flashing and roof leaks, chimney slab gaps, and flue gas condensation from improperly sized chimney liners.
Any one of these issues left without a proper inspection, heads into spring storm season is an open invitation for water damage. And as Superior Chimney has discussed, masonry water damage is a progressive problem — the longer it goes unrepaired, the costlier the fix becomes.
What You Can Do Right Now
The good news is that most chimney water damage is preventable. The key steps are:
have a professional-grade chimney cap installed if you don’t already have one
repair or replace a damaged chimney crown
address any deteriorated brick and mortar
fix leaky flashing and
consider having your chimney professionally waterproofed. Waterproofing alone can save you significantly on future repair costs.
What’s Next?
Superior Chimney always includes a free 14-Point Certified Written Inspection with photo documentation via email with every chimney sweep. This helps you to know exactly what condition your chimney is in and what, if anything, needs attention.