Month: September 2023

Chimney Inspection Rules You Should Follow

Whether you are building a new home or have been living in yours for a while, a chimney inspection is something you want to happen regularly. Why? Because it ensures the safety of your home by identifying potential hazards like creosote buildup or structural damage that could lead to fires or carbon monoxide leaks.

Plus, regular inspections help maintain the efficiency of your heating system, saving you money on energy bills. Chimney inspection guidelines and regulations can differ based on your location and the particular codes and standards applicable in your region.

Here are some general guidelines and key points related to chimney inspection:

Frequently inspect the chimney

How often should your chimney be inspected? That depends on several factors that will determined by the level of inspection.

Level 1 Inspection

If your chimney is used regularly but has yet to experience any significant changes or issues, then a Level 1 inspection is recommended once annually.

A Level 1 inspection essentially involves a visual examination of the readily accessible parts of the chimney, including the interior and exterior of the chimney structure, chimney flue, and connections to heating appliances. The inspector checks for obstructions, deposits, and basic structural integrity.

Level 2 Inspection

Your chimney will require a Level 2 inspection if there are changes to its system, such as a change in fuel type (e.g., switching from wood to gas) or installing a new heating appliance. This inspection is also necessary if you are selling or buying a home.

In a Level 2 inspection, the examination is more in-depth. It involves checking the attic, crawl spaces, and other accessible areas for potential issues like hidden structural problems, deteriorated liners, and proper clearances.

It may also involve using a video camera or other specialized tools to inspect the inside of the chimney.

Level 3 Inspection

As you may have guessed, Level 3 inspections are more comprehensive. They are typically conducted when serious hazards are suspected, especially if Level 1 and 2 inspections reveal problems. Consequently, they are typically performed on a more regular basis.

Level 3 inspections encompass all elements of Level 1 and Level 2 inspections but go further. They may involve removing certain building or chimney structure components to access concealed areas, such as a chimney crown or interior wall sections.

If there is a suspected safety hazard or a need for a more invasive assessment, your chimney must undergo a Level 3 inspection.

Work with certified inspectors.

You might think you can check your chimney or have another unqualified person do it because you want to avoid the cost and hassle of getting a professional. However, this could cost you more in the long run.

To be on the safe side, certified chimney sweeps or inspectors should carry out chimney inspections.

This is because such individuals have special training and are accredited by reputable organizations to do the work.

Moreover, certified inspectors know the newest industry standards, safety protocols, and best practices for chimney inspections. This means that they can easily analyze the state of your chimney, identify potential hazards, and recommend repair and maintenance options.

Besides, these professionals are always updated on local building codes and regulations, making them the best people for ensuring that your fireplace and chimney comply with safety standards. This will go a long way in averting legal and insurance issues.

Finally, the bodies certifying chimney inspectors and sweeps typically have codes of ethics to which these professionals must adhere. Consequently, you get to enjoy high levels of professionalism in the industry.

Document the inspections

After a chimney inspection, your inspector is required to document the findings of their assessment. What does that mean?

Written report: Once they are done checking your chimney, the inspector is supposed to furnish you with a written report about their findings.

Condition assessment: In the provided written report, there should be a comprehensive analysis of the condition of your chimney as well as any issues that were identified during the inspection, like cracks, creosote buildup, obstructions, or damage to chimney caps.

Repairs and maintenance recommendations: If there are any issues with your chimney, the inspector should be able to recommend repair options and subsequent maintenance practices. You can, therefore, expect things like replacement of flue lining, repair of impaired parts, or chimney cleaning, among other things.

Safety and Efficiency: In the inspector’s report, there may also be suggestions regarding improvement of the efficiency and safety of your chimney systems. It could be anything from installing a carbon monoxide detector to updating the heating equipment.

Record Keeping: As a homeowner, you should keep a copy of your chimney inspection report. Why? Because it plays an instrumental role in tracking the history of your chimney maintenance and providing evidence for potential buyers or insurance companies in case you want to sell your house someday.

Properly maintain the chimney.

In case there were any issues identified during a chimney inspection, they should be promptly addressed. This may encompass repairs, cleanings, or even replacements.

Play by the codes and regulations.

As they can differ, familiarize yourself with the building codes and regulations specific to your locality. Complying with these codes is imperative to ensure both safety and legal conformity.

Think about safety

The primary objective of chimney inspections is to guarantee the secure operation of the chimney, fireplace, or heating appliance. Regular inspections prevent chimney fires, carbon monoxide leaks, and other potential safety risks.

Additional considerations

Depending on your geographic location, particular rules and regulations on chimney height, clearance distances, and the utilization of specific materials may exist. It is advisable to consult with local authorities and examine building codes for supplementary prerequisites.

Final Thoughts

To uphold the safety and effectiveness of your chimney, it is essential to arrange for periodic inspections conducted by certified chimney contractors Ellicott City and to adhere to the pertinent codes and regulations in your region.

The post Chimney Inspection Rules You Should Follow first appeared on First Class Chimney Services.

This post first appeared on https://www.firstclasschimneyservices.com

Are Chimney Liners Required by Code?

Throughout the United States, there are building codes homeowners must follow. These codes touch on topics as detailed as the structure of your chimney. They can include everything from the height of the chimney to its framing on the roof. One of the questions that our team often hears is “Are chimney liners required by code?”  

At Best Chimney Services, we’re passionate about keeping our clients’ chimneys in proper working order. We have a knowledgeable team of chimney technicians who offer a range of services such as chimney repairs, chimney masonry, chimney inspections, and much more. Don’t hesitate to contact us for your chimney needs! Now, let’s discuss whether or not chimney liners are required by code.

Are Chimney Liners Required by Code in MA?

Yes, modern code within the Commonwealth of Massachusetts requires all masonry chimneys to be lined. This complies with the Massachusetts State Building Code, Section 780 CMR 6001.8. Even chimneys and fireplaces that were built prior to the requirement are subject to the adopted code.  A missing or damaged flue lining is identified as a safety concern, so it does not comply with the retroactive or “grandfathering” rule.  

What is a Chimney Liner?

A chimney liner is the inner layer of the passageway that goes through the flue of the chimney. The chimney flue is the tunnel within the chimney, often made of clay, metal, or ceramic. The flue is meant to contain the byproducts of combustion, and direct flue gases up and out of the chimney, outside. The chimney liner protects the flue and chimney walls from heat and corrosion. It is extremely important that you have your chimney lined. Not having one is sure to cause structural damage to your chimney.  

Why Are Chimney Liners Required by Code?

Chimney liners protect both the air quality and the chimney structure. Smoke and heat transfer are common concerns when using your fireplace without a proper lining.   Carbon monoxide is also a frequent threat when using your heat and hot water, if the flue is unlined or even lined with defects.  Chimney liners ensure that byproducts like smoke and exhaust will exit your home, rather than invade the clean air within the living space. 

A new liner can also be a long-term financial benefit.  With prices of oil and gas skyrocketing, a properly sized liner promotes energy efficiency so you use less fuel. 

How Do I Install a Chimney Liner?

We do not recommend installing a chimney liner on your own. Chimney liners come in all different shapes and sizes and venting materials differ depending on the application – it’s best to leave it to the professionals.  A proper flue inspection is also needed prior to installing a liner to check for obstacles or obstructions that would restrict the insertion.

Are you a Boston, MA area homeowner in need of a new chimney liner? Give us a call! Call upon a professional, experienced team to ensure your home and chimney will be taken care of. 

Contact Best Chimney Services for your Chimney Needs!

At Best Chimney Services, we handle all of your chimney needs. We offer chimney sweeps, commercial chimney work, and much more. If you’re concerned about your chimney liner and the status of your chimney liner, book a chimney inspection with us so we can find a solution as soon as possible. Contact us to get started! 

The post Are Chimney Liners Required by Code? appeared first on Boston's Best Chimney.

How Much Does Air Conditioning Cost?

At Lindemann, we understand that one of the most frequently asked questions by our clients is, “How much does air conditioning cost?” The query might seem straightforward, but various factors influence the final price. In this article, we’ll break down the complexities so you can make an informed decision for your home or business.

Initial Purchase vs. Operational Costs

Navigating the realm of air conditioning costs involves understanding both the upfront and the ongoing expenses associated with these systems. The initial purchase and installation represent the one-time investment you make to bring comfort into your space. In contrast, operational costs are the recurrent expenses ensuring that this comfort is consistently maintained throughout the lifespan of the unit.

Initial Purchase and Installation

  • Unit Type: Air conditioning units come in different styles and capacities. For instance, window units will typically cost less than central air conditioning systems or ductless mini-splits.
  • Size/Capacity: The size of the unit (measured in BTUs or tonnage) you require depends on the size of the area you want to cool. A larger home or space generally requires a more powerful system, thus increasing the cost.
  • Features: Advanced features like smart thermostats, zoned cooling, or energy efficiency add to the cost but can save money in the long run.
  • Installation: Installation prices can vary based on the complexity of the job. For instance, a building that already has ductwork will typically cost less to outfit than one that requires new ducts. Moreover, specialized services like ours at Lindemann ensure high-quality installation, which may differ in cost from standard HVAC service providers.

Operational Costs

  • Energy Efficiency: A higher SEER (Seasonal Energy Efficiency Ratio) rating means the unit operates more efficiently, which can lead to lower monthly bills. However, these units might have a higher upfront cost.
  • Maintenance: Regular servicing, which we at Lindemann proudly offer, ensures the unit runs optimally. Maintenance costs can include cleaning, filter replacements, and periodic check-ups.
  • Usage: How frequently you use the AC and the temperature settings you choose will significantly impact your monthly bills.

Potential Additional Costs

When assessing the costs of an air conditioning system, it’s essential to factor in not just the obvious expenses. Some less apparent but equally crucial potential additional costs can make a significant difference in the final amount you pay:

  • Permits: Depending on your locality, certain regulations might necessitate permits or permissions to install specific types of HVAC systems. This could involve safety checks, compliance assessments, or other regulatory mandates. The cost of such permits can vary widely based on regional and local governmental standards.
  • Old System Removal: If you’re upgrading from an old system, there’s the task of removing and properly disposing of it. Some old units might contain materials or refrigerants that are now considered environmentally harmful. Proper disposal ensures safety and compliance with current environmental regulations.
  • Upgrades: When installing a new AC system, especially if it’s a modern, high-tech unit, your existing electrical system may require upgrades. This might involve enhancing your electrical panel to handle the added load or integrating new wiring.
  • Additional Components: Depending on the design of your home, you might need to invest in extra components such as additional ductwork, vents, or drainage systems. These can be crucial to the efficient functioning and longevity of your system.

Lindemann’s Pricing Guideline

Understanding the investment you’re making in your cooling system is essential. At Lindemann, we aim to provide not just quality but also clarity. Here’s a more detailed breakdown of potential costs:

Window Units

These are typically the most straightforward and least expensive option. Depending on brand, efficiency, and capacity, they range from $150 to $600. However, their cooling capacity is often limited to one room or a defined space.

Central Air Conditioning Systems

Central air conditioning systems are a popular choice for entire homes, these systems offer efficient and even cooling. The costs, inclusive of installation, typically range from:

  • Basic units: $2,500 to $3,500. These offer standard cooling without many advanced features.
  • Mid-range units: $4,000 to $5,500. These often include energy-saving modes, better efficiency ratings, and possibly some smart home capabilities.
  • High-end units: $6,000 to $7,500. Top-of-the-line models, they often feature the highest efficiency ratings, advanced noise reduction, integrated smart home capabilities, and extended warranties.

Ductless Mini-split Systems

Ductless Mini-splits are ideal for homes without ducts or for those wanting to cool specific zones or rooms. The costs, including installation, typically range from:

  • Single zone units: $1,500 to $2,500. These are designed to cool one room or area.
  • Multi-zone units: $3,000 to $5,000. These allow for cooling multiple rooms or zones with individual controls.

The Lindemann Difference

At Lindemann, we believe in transparency and value for money. Our team of professionals is dedicated to advising you on the best solutions for your needs, ensuring energy efficiency, and optimizing cost savings in the long run.

We offer regular maintenance packages that not only ensure the longevity of your unit but also help in maintaining its efficiency, leading to lower operational costs.

Final Thoughts

While the cost of air conditioning has various components, investing in a high-quality system and ensuring regular maintenance can save significant money in the long term. Reach out to Lindemann today to get a detailed estimate tailored to your needs and learn how we can help make your space comfortable, no matter the season.

Common Chimney Problems and How to Prevent Them

Homeowners often worry about their chimney’s condition and potential issues that may arise. These issues can be inconvenient and costly to fix. Fortunately, there are steps you can take to prevent common chimney problems and ensure the safety and functionality of your chimney. In this article, we’ll discuss some of the most common chimney problems and how to prevent them.

4 Signs That Your Chimney Is Badly in Need of Attention

If you’re unsure of whether your chimney needs immediate maintenance, then look out for any of these four signs:

1.     When the Silent Killer of Chimneys Strikes

Creosote is a black substance that builds up inside the chimney due to burning wood. It’s highly flammable and can cause fire if not removed. Creosote buildup is one of the most common chimney problems and can be prevented by regular cleaning and maintenance.

To prevent creosote buildup, you should have your chimney inspected by a professional at least once a year. Burning only seasoned wood and avoiding burning trash or other materials can also help prevent creosote buildup.

2.     When Water Does the Damage

Water damage can cause significant problems for chimneys, including structural damage, mold growth, and deterioration of the chimney liner.

Water can seep into the chimney through cracks or gaps in the masonry, leading to rusted metal components, deteriorated bricks, and even structural damage. Such chimney leaks are often caused by damaged or missing chimney caps, cracked or deteriorated chimney crowns, or damaged flashing.

To prevent chimney leaks, you should have your chimney inspected by a professional at least once a year. You should also install a chimney cap to prevent water from entering your chimney and repair any damage to your chimney’s crown or flashing as soon as possible.

3.     When Your Chimney Becomes a Critter Condo

Birds, squirrels, raccoons, and other animals can easily enter an unprotected chimney. Once inside, they could block the chimney, leading to poor ventilation, which can cause dangerous gases like carbon monoxide to build up inside the home. It can also prevent smoke from properly venting, leading to a smoky fireplace and potential fire hazards. Nests and debris left behind by animals can also be a fire hazard.

To prevent animal infestations, you should install a chimney cap with a wire mesh screen to prevent animals from entering the chimney. If an animal does make its way into the chimney, contact an expert to safely remove it and repair any damage.

4.     When the Draft Hits

A properly functioning chimney should create a draft that draws smoke and other gases from your home. If you’re experiencing draft problems — smoke coming back into your home when you light a fire, difficulty lighting a fire, and a smoky smell — it could be a sign of a blockage in the chimney, a damaged flue liner, or other issues.

Draft problems often stem from chimney blockages caused by debris such as leaves, twigs, or animal nests. Damaged flue liners or chimneys that are too short or too tall can also cause draft issues. Additionally, negative air pressure in the home may prevent the chimney from effectively drawing out smoke and gases, leading to draft problems.

If you’re experiencing draft problems, it’s important to consult a professional who can assess the problem and recommend a solution. Depending on the cause of the problem, you may need to have your chimney cleaned, repaired, or even rebuilt.

How to Prevent Common Chimney Problems

It can be devastating to discover that your chimney needs serious repairs, but there are ways to prevent it from getting there. And it starts with properly taking care of the chimney.

Regular Chimney Maintenance is Key

Regular chimney maintenance is critical to prevent common chimney problems. It is recommended that you have your chimney inspected professionally once a year to ensure it is functioning properly. An expert can clean the chimney of any creosote buildup, which can cause chimney fires. They can also inspect the chimney for signs of damage that could lead to a fire or carbon monoxide poisoning.

You should also keep an eye out for signs of chimney problems, such as smoke or soot buildup, a strong odor coming from the chimney, or a buildup of debris in the chimney. You should contact a professional immediately if any of these signs are present.

Understand the Proper Use of Your Chimney

It’s very important to use your chimney properly to avoid problems. Only burn dry, seasoned wood in your fireplace or stove. Don’t use wet or green wood because it can cause more buildup and make a fire more likely.

To prevent chimney fires, it is important to avoid burning paper, cardboard, or other trash in your fireplace or wood stove. These materials can produce hot embers that can ignite creosote buildup in the chimney, which can lead to a dangerous fire.

It is imperative to take caution and never leave a fire unattended. Be sure to use a fireplace screen at all times to prevent any sparks from escaping and causing any potential damage to your home.

Installing Protective Measures

Installing a chimney cap is an easy and effective way to prevent common chimney problems. A chimney cap can keep rain, snow, and debris out of the chimney, reducing the risk of fires and carbon monoxide poisoning.

To ensure the longevity of your chimney, it’s highly recommended that you install a chimney liner. A chimney liner can also help improve the efficiency of the fireplace or wood stove by reducing heat loss. This will help protect your chimney from the damaging effects of combustion gases and prevent any potential safety hazards. It’s a small investment that can save you a lot of trouble in the long run.

Also, you should ensure the chimney is properly insulated to prevent heat loss and reduce the risk of condensation buildup in the chimney. This can help prevent chimney fires and carbon monoxide poisoning.

Want to install, inspect, or clean your chimney? Contact our certified chimney sweep professionals today to schedule a quick consultation.

The post Common Chimney Problems and How to Prevent Them first appeared on Southern Chimneys.

This post first appeared on https://southernchimneys.com

Top Tips for Fall Gas Fireplace Maintenance

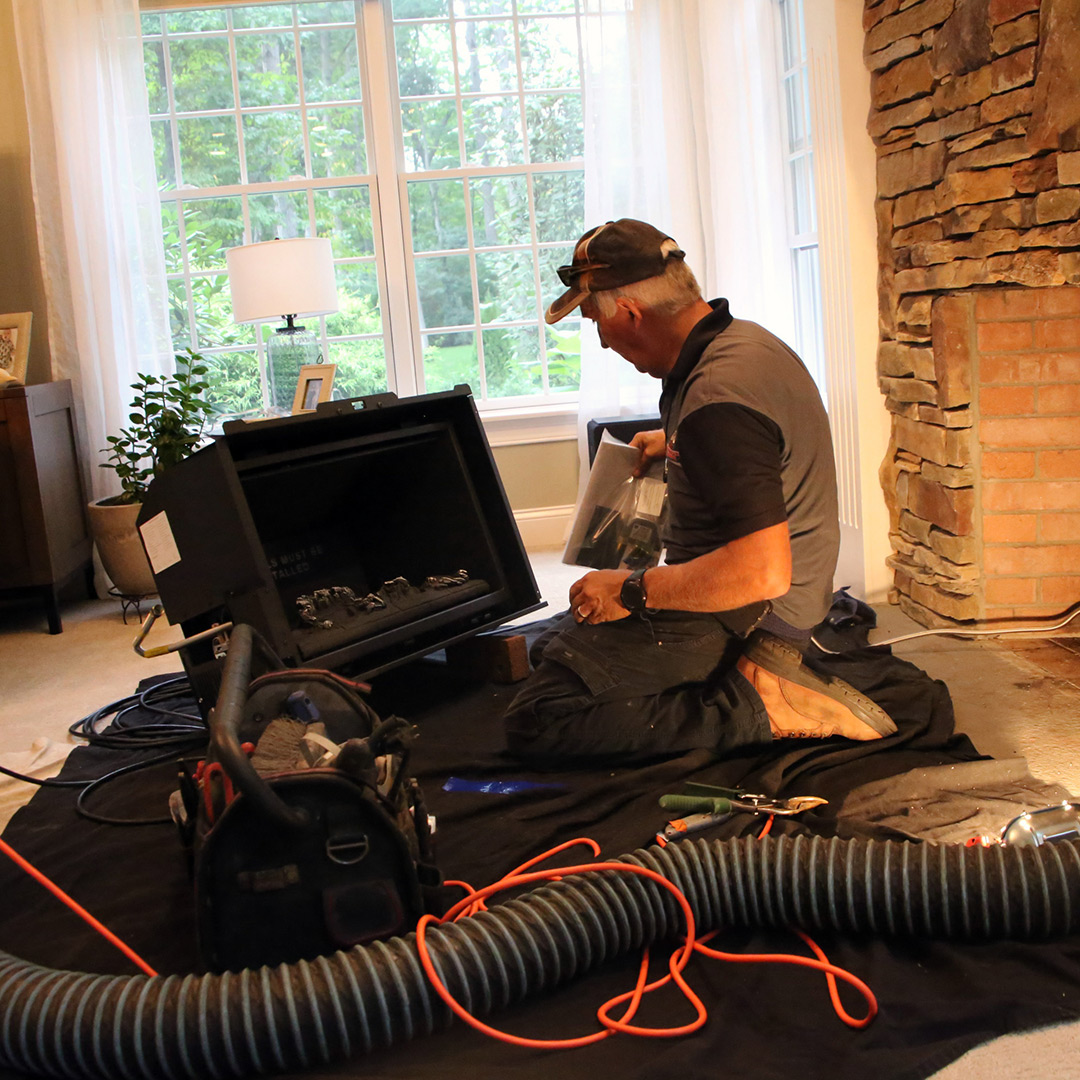
Football is back, and that means fall is around the corner. And besides leaves turning, fall brings cooler temperatures, meaning many people will start using their fireplaces to remove the chill. This post delves into the top gas fireplace maintenance tips to prepare your system for fall and the long winter.

gas fireplace in Newington CTRead the Manual

We’re all guilty of not reading instruction manuals. However, manufacturers include these with major appliances because they include vital safety and operation information. Different gas fireplaces have different requirements regarding maintenance, so before using the fireplace, it’s a good idea to give the manual a quick read to familiarize or re-educate yourself about what you should and shouldn’t do.

Check the Gas Lines

Look for signs of gas line wear and tear, loose connections, or damage because it could put your family at risk of carbon monoxide poisoning or a fire. If you notice anything odd or concerning, call a fireplace professional immediately. Gas line repair isn’t something you should trust to do yourself; it’s always safer to hire a pro.

Inspect the Glass and Seals

Check the glass door for cracks and the gaskets for leaks. Broken glass or leaky gaskets must be replaced immediately to prevent toxic gasses from entering the home.

Test the Safety Features

Modern gas fireplaces have safety features, like a thermocouple or thermopile. These devices shut off the gas supply if the flame goes out to prevent leaks. It’s crucial to test these features before using your fireplace.

Clean the Logs and Firebox

During summer, dust, and debris can accumulate on the logs and firebox, reducing your fireplace’s efficiency. Use a soft brush to gently remove dirt, not a vacuum cleaner because it can damage the logs.

Check the Ventilation

A blocked vent is the number one cause of fires and carbon monoxide poisoning with gas fireplaces, so checking the ventilation system for obstructions is essential. 

Perform a Smell Test

Turn the fireplace on and check for any unusual odors that could indicate a gas leak or that the fireplace isn’t venting properly. If you smell sulfur or rotten eggs odor, shut the fireplace off and call a professional immediately. 

Schedule Professional Maintenance

Experts agree that you should schedule maintenance by a certified professional at least once a year before using your fireplace for the season. Professionals will perform a thorough system inspection and can detect issues you might not be aware of — issues that could negatively impact performance and safety.

chimney inspections in Rocky Hill CT

Test the Smoke and CO Detectors

If you use a gas fireplace, you should have carbon monoxide and smoke detectors installed. These simple devices can save lives, so you must test them periodically to ensure they work. Manufacturers recommend replacing your smoke alarms every ten years from the manufacturing date and replacing CO detectors every 5–7 years, according to the manufacturer’s recommendation. 

Call the Experts at Northeastern Chimney

Northeastern Chimney is the best choice for chimney, fireplace, and stove needs in Central CT. We’re a fully licensed and certified company that’s served homeowners since 1984. Contact us today to schedule your fall gas fireplace inspection and maintenance at 860–233–5770.

The post Top Tips for Fall Gas Fireplace Maintenance appeared first on .

This post first appeared on https://www.mychimney.com

What to Do About Crumbling Chimney Bricks

Have you noticed some chipping, flaking or crumbling in the bricks of your chimney? Are some of the mortar joints beginning to deteriorate? If you’ve noticed any of this, now is the time to have it addressed before more serious damage occurs. Northeastern Chimney of West Hartford, CT, would like to share a little about what it means when chimney bricks crumble, what can happen because of it, and how to resolve the problem.

chimney brick repairs and tuckpointing in West Hartford CTCommon causes of crumbling bricks

Bricks are strong, but they’re not invincible. Various things can cause damage to them, including:
• Extreme air temperatures and freeze-thaw cycles
• Hail storms
• Lightning
• Earthquakes
• Inferior-quality bricks and mortar used in construction
• Poor construction practices

These and other causes can lead to spalling, a situation where the surfaces of the bricks begin to flake and fall apart. If ignored, bricks can become loose and eventually fall out of the masonry.

Bricks also can be damaged when improperly compressed mortar doesn’t allow for their natural, subtle movement. This can cause cracking and deterioration.
Incoming water through the bricks’ porous surfaces can begin a cycle of ongoing damage that affects just a few bricks or many bricks throughout the chimney structure.

Schedule timely brick repair

Watch for these signs of trouble with your chimney’s bricks and mortar:

White stains (efflorescence) on the masonry: This means water is penetrating the bricks and leeching out salts.

Crumbling mortar joints: This will lead to structural instability.

Bricks with surface abnormalities: Could include cracks, chips, flakes, gaps, missing sections and more.

A chimney that appears to lean to one side: A leaning chimney will not right itself and may eventually collapse.

Brick and mortar debris: If you see any of this on the roof, it means damage exists somewhere in the masonry.

If these issues are allowed to go unchecked, you could eventually end up facing:
• Widespread water damage throughout the masonry structure
• A chimney collapse
• Damage to the chimney liner, fireplace damper and firebox
• Rotting in walls, ceilings, flooring and the attic
• Roof damage
• Dangerous mold growth that may spread to other parts of the home

Fixing damaged chimney bricks

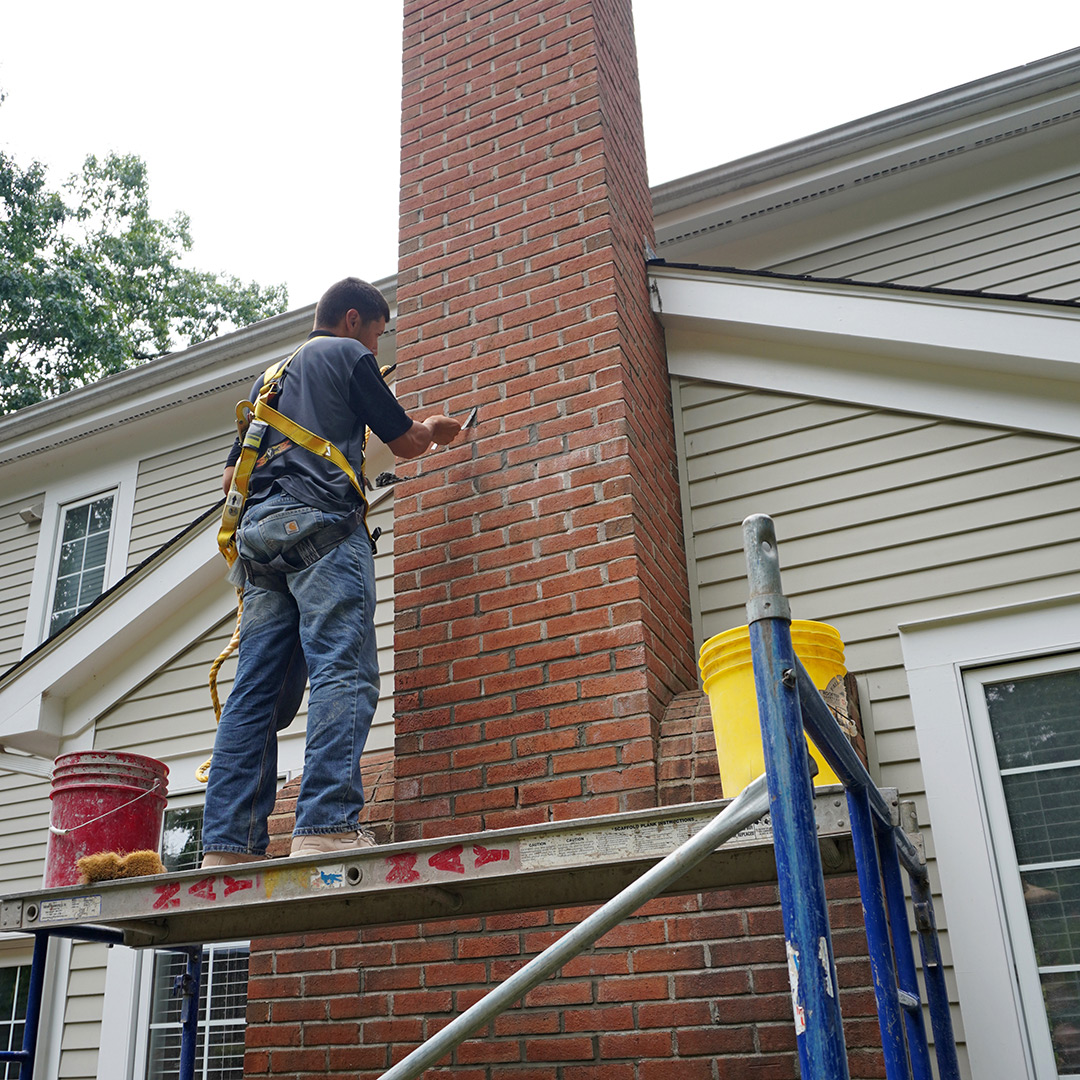
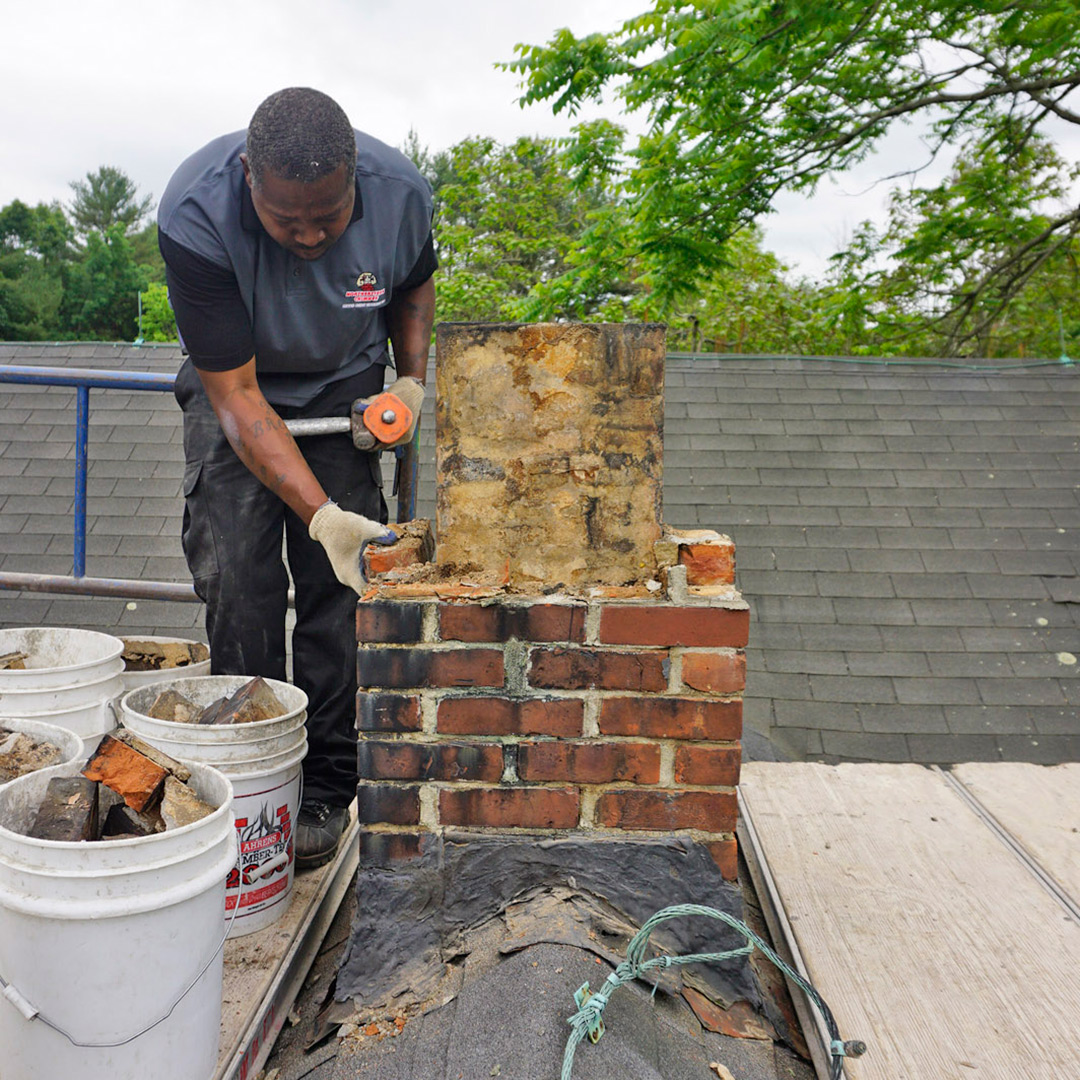
Repairing the crumbling or spalling bricks of your chimney is not a job for an amateur or novice. Only a licensed, trained chimney mason should undertake this project. If the work isn’t done correctly with the right tools and materials, you could end up with worse problems than you started with.

There are several strategies commonly used to address damaged chimney bricks and mortar.

Brick replacement: If select bricks are compromised, your mason can replace just those bricks with top-quality new bricks in the same color as those around them.

Tuckpointing: When the mortar that holds the bricks together begins to crumble, a process called tuckpointing removes the decayed mortar and replaces it.

Chimney rebuilding in Bristol CTChimney rebuilding: In extreme cases, your mason can rebuild parts of the chimney or the entire structure.

Chimney crown repair: Although not technically a part of the masonry, the concrete chimney crown at the top of the chimney is prone to cracking. It can be patched, sealed or rebuilt.

Chimney sealing: After all repair and rebuilding work is finished, your chimney masonry should be sprayed with a powerful water sealant to keep water off the surfaces.

Call your Connecticut chimney repair experts

Northeastern Chimney of West Hartford is ready to help with all your chimney brick issues and other chimney troubles. Speak with a chimney expert today at (860) 233-5770 or get in touch with our handy contact form.

The post What to Do About Crumbling Chimney Bricks appeared first on .

This post first appeared on https://www.mychimney.com

How Do I Clean My Air Conditioning Unit?

Initial Thoughts

At Lindemann, we understand how vital it is to have a smoothly running and efficient air conditioning (AC) unit, especially during those sweltering summer days. Over time, an AC unit can gather dirt, dust, and debris which can hinder its performance. To help you maintain the efficiency and longevity of your unit, we’ve compiled a comprehensive guide on how to clean your air conditioning unit.

Why Cleaning Your AC Unit is Essential

A clean air conditioning system runs more efficiently, reduces energy costs, and ensures that the air in your home is free from potential allergens and pollutants. When dust and debris accumulate, they obstruct airflow, causing the system to work harder. This not only increases your energy bill but can also lead to system malfunctions or reduced lifespan.

Safety First: Pre-cleaning Preparations

When it comes to handling and maintaining any electrical equipment, prioritizing safety is paramount. The AC unit, though designed for everyday use, contains delicate components that can be hazardous if mishandled. Not only do we want to protect the integrity of your system, but your personal safety is of utmost importance. Thus, before diving into the cleaning process, it’s vital to take a few precautionary steps.

  • Disconnect Power: This is the most crucial step. Before you start cleaning or even touching your AC unit, ensure you turn off the power to the unit at both the switch and the circuit breaker. This prevents accidental startups and protects you from potential electrical shocks.
  • Wear Appropriate Clothing and Gear: This might sound unnecessary for cleaning, but wearing gloves can protect your hands from sharp fins and coils. Safety goggles are also recommended if you’re using any liquid cleaners, which might splash.
  • Gather Necessary Supplies: Having all your cleaning supplies ready and within arm’s reach will prevent unnecessary movement around the unit, reducing the risk of accidental damage. You’ll need a soft brush, a garden hose, coil cleaner (available at HVAC supply stores), a fin comb, rags, and a replacement air filter.
  • Survey the Area: Ensure the area around the AC unit is clear of any obstacles or tripping hazards. If you’re cleaning an outdoor unit, be wary of wet or slippery ground.

Step-by-step Guide to Cleaning Your AC Unit

The heart of ensuring a long-lasting and efficient air conditioning system lies in its regular maintenance. Cleaning your AC unit might seem like a daunting task, given its intricate components and design. However, with a methodical approach, it’s a task that can be accomplished with precision and ease. Let’s delve into a detailed, step-by-step guide to ensure you achieve the best results without overlooking any vital parts.

1. Cleaning the Exterior Condenser Coils and Fins

  • Accessing the Unit: Begin by removing the protective grill and other outer panels. This will expose the coils and fins that are prone to accumulate outdoor debris.
  • Brushing Off Debris: Using the soft brush, gently brush away any loose dirt, leaves, or other debris from the coils and fins. Remember to brush in the direction of the fins to avoid causing any damage.
  • Applying Coil Cleaner: Spray the coil cleaner as per the product’s directions. Ensure you’re using a cleaner suited for external coils. Allow it to sit for the time specified on the label before rinsing.
  • Rinsing the Coils: Gently rinse the coils using the garden hose. Use a gentle water flow to avoid damaging the fins or pushing dirt deeper into the unit.
  • Straightening the Fins: Bent fins can restrict airflow. Use a fin comb to straighten them gently, ensuring you match the fin spacing with the correct comb size.

2. Cleaning the Interior Evaporator Coils

  • Locating the Coil: The evaporator coil is usually located in the main duct junction above the furnace or within the indoor unit of split systems.
  • Dusting the Coils: Gently dust off any loose debris using your soft brush, ensuring you don’t push the dirt further into the coil.
  • Applying Cleaner: Apply the coil cleaner, ideally one designed for indoor use which minimizes odors and harsh chemicals. Let it foam and soak according to the manufacturer’s directions.
  • Wipe and Clean: Use rags to clean off the residue. If the buildup is substantial, you might need to repeat the process.

3. Replace or Clean the Air Filter

  • Locating the Filter: The filter is usually found in the return air duct or blower compartment. Ensure you know whether your unit uses disposable or reusable filters.
  • Cleaning or Replacing: If it’s a reusable filter, vacuum it first, and then wash with a mild detergent. Ensure it’s thoroughly dry before reinstalling. If disposable, replace with a filter of the same size and type.

4. Cleaning the Drain Pan and Drain Line

  • Location: The drain pan sits below the evaporator coil and collects condensation.
  • Cleaning the Pan: Over time, the pan can accumulate dust, mold, and algae. Clean it using soap and water or a 50/50 solution of white vinegar and water.
  • Clearing the Drain Line: Algae and mold can clog the drain line. To clear it, attach the hose of a wet/dry vacuum to the drain outlet (typically located outside your house) to suck out any obstructions.

5. Cleaning the Blower Component

  • Accessing the Blower: Found within your air handler cabinet, turn off power before attempting to access.
  • Cleaning: Use a soft brush to dust it. If there’s significant buildup, consider removing the blower to clean each blade thoroughly.

6. Reassembly and Testing

  • Putting it Together: Carefully replace all panels, grills, and screws. Ensure everything is securely in place to prevent rattling or loose parts when the system is on.
  • Reconnect the Power and Test: After ensuring the unit is reassembled correctly, restore power. Turn on the system to ensure it runs smoothly, listening for any unusual sounds.

Maintenance and Professional Checkups

While cleaning your AC unit yourself can be beneficial, having a professional HVAC technician from Lindemann inspect and clean your system annually guarantees a thorough job. A technician can also detect potential issues early on, ensuring that your AC runs optimally for years to come.

Final Thoughts

A clean air conditioning unit is not only about efficiency; it’s also about the health and comfort of your home. While the process may seem intricate, with a bit of diligence and regular maintenance, you can ensure that your AC unit remains a cool and refreshing force during those hot months.

If you have any further questions or would like to schedule a professional servicing, Lindemann is here for all your chimney, fireplace, and HVAC system needs. Stay cool and stay safe!

(877) 959-3534