How to Tell If a Chimney Is Blocked

How to Tell If a Chimney Is Blocked

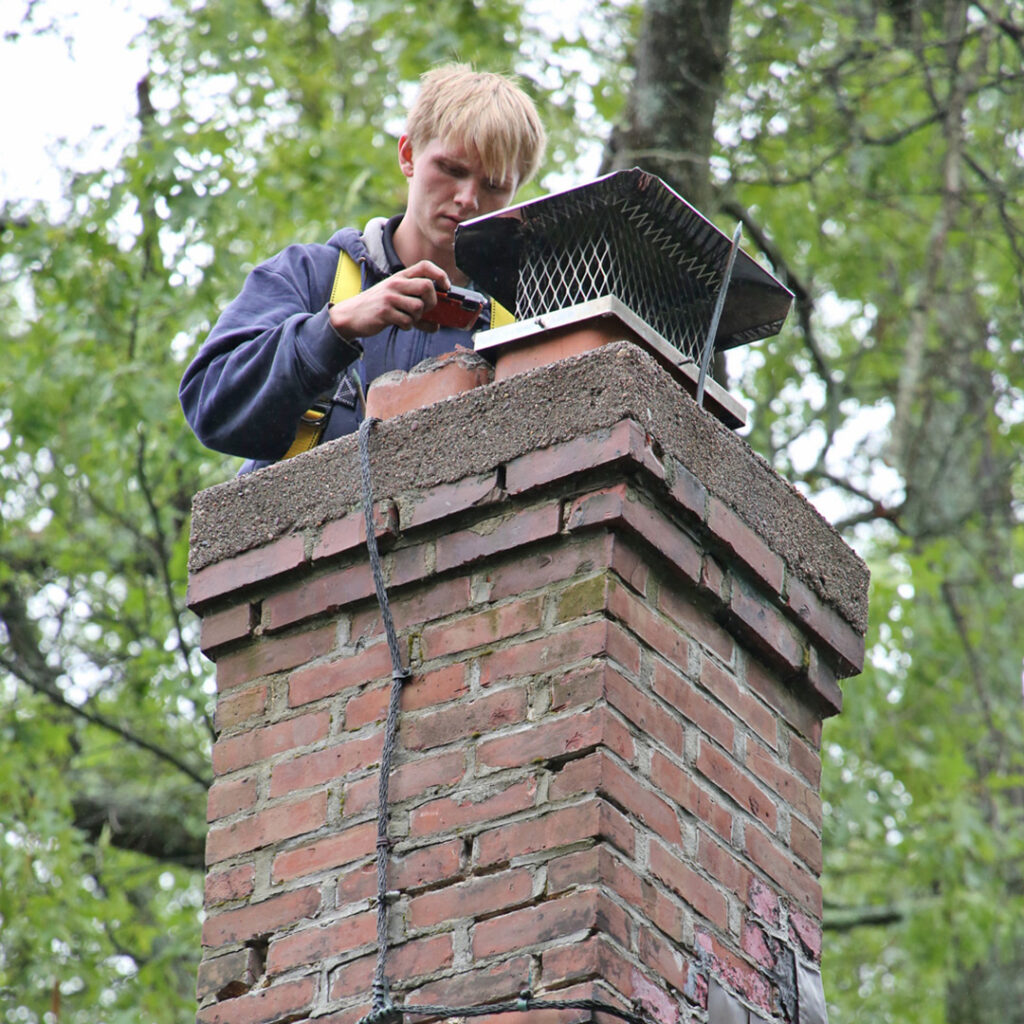
A clogged chimney can quickly become a serious health and safety risk for your family and home, so annual chimney inspections and cleaning by chimney cleaning services providers is essential.

How can you tell that your chimney is blocked? Here are some of the warning indications of a flue obstruction:

  • Your CO detector raises an alarm.
  • The fireplace fills with smoke.
  • Difficulties starting a fire
  • Fire burns fast
  • Black, tarry flakes within the flue.
  • Strange odor in the firebox

Another indicator of a clogged chimney is the presence of hot embers, sparks, or heavy black smoke. This hazardous situation demands prompt attention from a skilled chimney technician. The professional will come in handy in preventing a chimney fire from coming about.

Pay special attention to your outdoor chimneys during the winter. A substantial frost or ice buildup could indicate an obstruction, as moisture in a clogged chimney can freeze.

Make sure there are no visible symptoms of obstructions or damage to the chimney’s architecture. It may include cracks and loose bricks, contributing to more blockages.

During the winter, take extra precautions to protect your chimney. There is a potential that the moisture can become stopped and freeze, resulting in a noticeable buildup of ice or frost, which could indicate a blockage.

You should note any evident damage to the chimney’s construction, such as cracks or loose bricks, because they might cause blockages and jeopardize the chimney’s structural integrity.

What can cause a chimney blockage?

Animals inside the chimney

Animals will not only clog a chimney but also emit a bad stench. Birds, raccoons, and bugs are among the most common offenders for freeloading off your fireplace unit.

They will build a nest inside the unit when hunting for a home. When they accomplish this, they will begin to store their food inside, resulting in numerous types of droppings lining the inside of the chimney.

Creosote buildup

Almost anything can accumulate inside your chimney. Creosote is one of the most bothersome substances. This is produced when you burn untreated wood inside your fireplace. These particles will then ascend via the chimney and clump together along the edges of your flue.

Natural causes

Consider when a storm or severe winds pass across your neighborhood. Your lawn chairs wind up three doors down, and you have a yard of leaves to rake.

What you don’t consider is how the airborne particles can become stuck inside your chimney. This is frequently the same debris in your gutters, including garbage, leaves, and twigs.

What can go wrong when your chimney is blocked?

When your chimney becomes obstructed, air cannot move through efficiently. This creates a draft, trapping heat and smoke within the home.

When heat becomes trapped and interacts with the blockage, it might produce sparks that ignite the chimney or flue fire.

This also permits dangerous gases, such as carbon monoxide, to become trapped within your home.

CO is odorless and colorless, so you won’t know how much is around you until you start to feel the symptoms.

When you breathe it in, it begins to combat oxygen levels in your bloodstream. Doctors equate CO poisoning symptoms to those of the flu without a temperature.

If you consume even a small amount, you will experience headaches, nausea, and balance and visual issues.

If you breathe in too much, it can impair your breathing and necessitate an oxygen mask and a brief hospital stay.

If you believe that the location you are in is experiencing this problem, flee immediately. Don’t bother about turning off the unit. Even if you can do so, the room will take a long time to air out, so you are better off just staying outside.

To avoid being caught by surprise, install CO alarms inside their houses to alert them when levels go too high.

You should use these in conjunction with smoke detectors. You should distribute them throughout the floor layout and on several floors if the house has more than one storey.

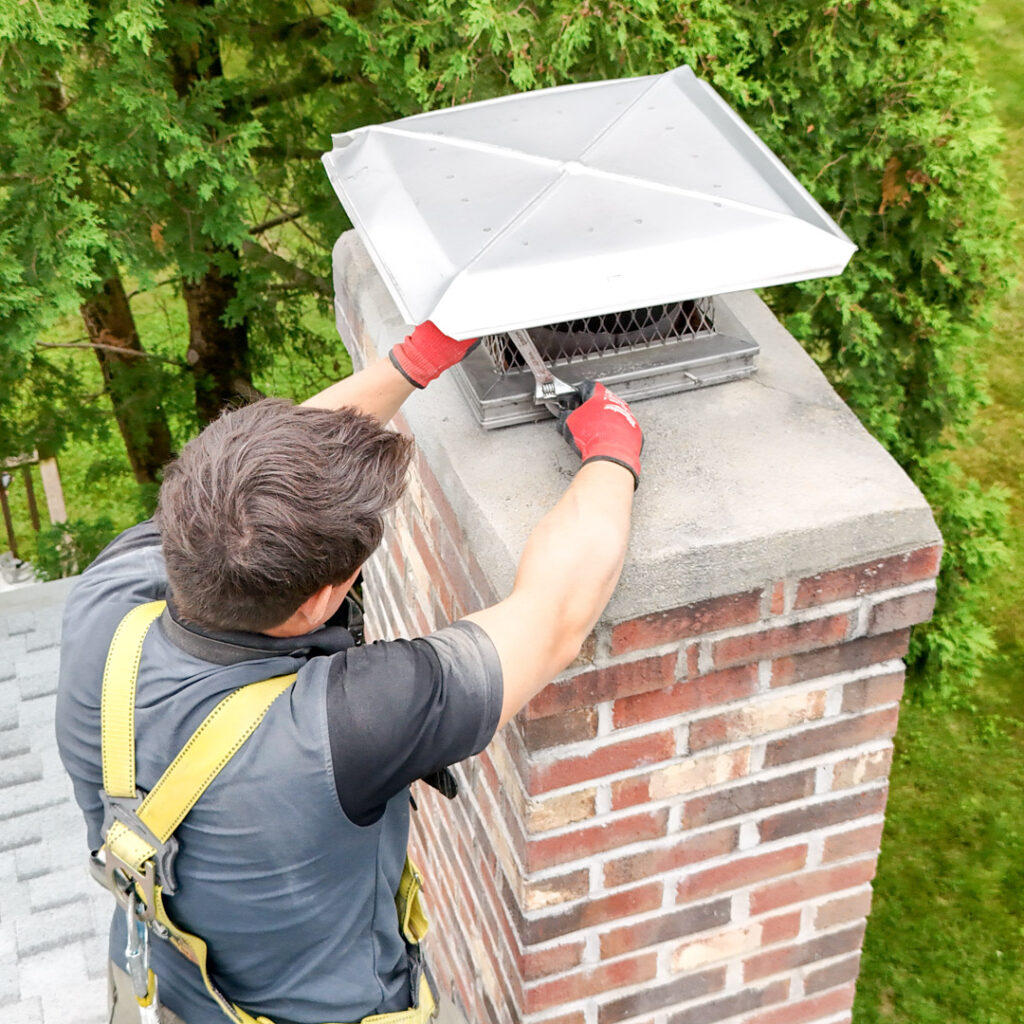
You also should have a chimney cap fitted to protect the open hole at the top. A chimney cap will serve a variety of purposes.

Chimneys are extremely sensitive to mold, so keeping water out of them is essential.

If your chimney catches fire, a chimney cover will help keep as many sparks as possible from spreading to neighboring objects.

How to remove a chimney blockage

Hiring a chimney sweep Bowie is the most effective approach to clear a blockage. You should have at least one per year, but having two is a good idea if you use your chimney frequently during the season.

One should be done before the burning season to have a fresh start, but the second should be done if there is a lot of accumulation after winter.

Sweeps are typically slow at this period and may include a discount. To be prepared for their arrival, make sure all furniture has been moved away from the unit and that you have not lit a fire in at least 24 hours to allow it to cool.

Safety comes first when removing the blockage. A blocked or obstructed chimney can allow hazardous gasses, such as carbon monoxide, to accumulate in your home.

Because they are colorless and odorless, these gases are difficult to identify without specialized equipment.

Professionals have the knowledge and resources necessary to identify and manage these issues, ensuring the safety of your loved ones in your home.

Attempting to clear a chimney obstruction without the necessary skills and supplies might be hazardous.

This is because getting up on the roof or inside the chimney flue without sufficient safety precautions could result in an accident or injury.

You should hire professional experts with the necessary training to manage these circumstances effectively, decreasing the risks associated.

The post How to Tell If a Chimney Is Blocked first appeared on First Class Chimney Services.

This post first appeared on https://www.firstclasschimneyservices.com

What To Do About a Chimney Leak?!

A chimney can be an obvious place where a chimney leak can occur. The chimney extends to the sky, many times as the highest point of your home. Not to mention, there’s a hole at the top that needs to be covered, and cement and bricks that are porous! It’s pretty obvious that chimney leaks can occur all year round.

What are some signs of a chimney leak?

  • A pool of a water in the fireplace
  • White discoloration on the outside of your chimney
  • Musty odors coming from the chimney
  • Dampness in your home
  • The dripping sound of water
  • Stains on the ceiling near the fireplace

A not so obvious or visual reason for a chimney leak include deterioration on the outside of your chimney. Do you notice any of these indicators of a chimney leak in your home? If your answer is yes, call Superior Chimney as soon as possible! As summer begins in the Chicagoland area, we will only experience more rain storms, and the damage from water leaks will only get worse with time. 

5 Reason for a Chimney Leak

  1. You don’t have a chimney cap, or it’s broken. We talked a lot about chimney caps in our past blogs. A chimney needs a cap for the same reasons a house needs a roof!  They’re so important in keeping your chimney in tip-top shape. A chimney cap keeps most of the rainwater from falling into the flue, and pooling in the fireplace. A damaged chimney cap will cause water to leak into your home.
  2. Cracks in the chimney crown. A chimney crown is the cement part of your chimney that keeps water from dripping onto the bricks, stone or siding. If the cracks in the chimney crown are big enough, water will drip through. Cracking on the chimney crown is not uncommon, but it’s important to keep up with the maintenance of repairing them. Hairline cracks are bad enough, the bigger the cracks get, the worse the leaking!
  3. Condensation. If you’ve already replaced your chimney cap and crown and still suspect a chimney leak, then condensation might be your problem. There may be a structural problem with your chimney, and a professional will have to check to make sure warm gasses are not becoming stuck in the flue, and creating condensation leaks.
  4. Gaps in the flashing. Flashings seal the base of your chimney. They’re meant to stop water from getting into your home. But, the flashing doesn’t last forever. If there’s a weathered seal, or the flashing is lifting up, water will make its way in.
  5. Masonry Cracks. This is a common reason for a chimney leak. Cracks in masonry are caused by the freeze thaw cycle in fall, winter and spring. Water is absorbed in the masonry and creates cracks. The cracks become bigger over time, and eventually will lead to chimney leaks.

Repairing a Chimney Leak

Worried you have a chimney leak? Maybe you noticed something in your home. Superior Chimney certified technicians can help. Our chimney inspections are thorough and professionally presented. Call us to book an inspection at 877-244-6349.

This post first appeared on https://www.superiorchimney.net

A Smelly House… After Spring Cleaning?

Worried about removing the fireplace smell this year? Once you’ve finished with scrubbing your home from top to bottom, you might have noticed a strange smell still coming from around your fireplace. It can be a strong or subtle odor that seems impossible to get rid of! Maybe you’ve tried to put some baking powder and vinegar in the fireplace, or double dosed the fireplace with cleaning liquids, yet the smell still won’t go away. Well, recently in the Chicagoland area, we’ve had plenty of humid weather. Humid weather doesn’t help with the fireplace smell. The more rain and water the chimney is exposed to, the more intense the smell becomes. So, is it possible to remove the fireplace smell, even with this humid weather?

A Simple Answer: Yes!

The answer is yes! It’s entirely possible to remove the fireplace smell year round, even in humid, hot weather. Creosote is a dark, oily substance that forms when wood is burned. It is made up of various chemicals that give it a distinct, pungent smell. When creosote builds up in a chimney or fireplace, it can create a strong, unpleasant odor that can stick around in your home. A simple douse down of cleaning liquids like bleach or vinegar and baking powder won’t do the trick, because creosote is built up in the smoke chamber & chimney flue, not the fireplace firebox. The chimney flue is a long exhaust flue that connects the fireplace to the outside, removing smoke and harmful chemicals from your home. Creosote naturally builds up over the course of winter time. The more you use your chimney, the more creosote builds up. As the air from the outside moves down through the flue, it pushes down the musty smell of creosote into your home. 

Solving A Smelly Home

Luckily, our certified chimney technicians can help remove the creosote from the flue. Chimney professionals can check for pressure problems and cracks in the masonry around the flue, to make sure the creosote doesn’t get stuck in there. Did you know that if the creosote gets stuck in the cracks of your chimney, you might experience a chimney fire? Creosote does not only smell bad, but is also flammable. It’s really important to get your chimney checked by a certified technician. 

Think You Can Spot All the Cracks?

Cleaning your chimney is a bit like playing Eye-Spy, but with a twist. Chimney technicians at Superior Chimney don’t recommend you to clean the creosote on your own. If you miss a crack, the smelly creosote will become a danger when you light up your fireplace again. Take caution when checking your chimney flue for creosote buildup. Or, simply call a certified chimney professional for an inspection.

At Superior Chimney, we specialize in identifying cracks in your chimney, malfunctioning parts, or further damages. With a proper chimney flue and fireplace sweep and inspection, the smell of creosote can fade away from your home, and leave you with how your home should be smelling; like cleaning liquid and air freshener!

Call us at Superior Chimney today for an appointment at 877-244-6349 for an inspection to find out how to be rid of fireplace smells.

This post first appeared on https://www.superiorchimney.net

Why Is My Chimney Leaning? 

Exactly what is going on? My chimney seems to be leaning. I’ve had no weather events to cause such a lean. So, what is going on?

leaning chimney in Canton CT

Most commonly it is due to the foundation, but let’s discuss other common reasons.

  • Your chimney is poorly constructed. Not all companies are created equal, unfortunately.
  • Age has taken over and the masonry has started to break down.
  • Newer homes have cement chimney footings and are stronger. If you own an older home, you may have footings that cannot support the chimney. The weight of a chimney may be causing the lean.
  • The size of the chimney footing may not be appropriately sized to support the chimney in your home. Often the material used is not the best quality. This can cause faulty footings.
  • Soil erosion may be a cause of a footing being displaced, causing a lean to your chimney.
  • Proper drainage can be a cause as well. If you have water that stands at the footing it can cause the soil to move.  

We talked about the causes of a leaning chimney. Now let us discuss the signs that you need to look for.

What Are The Signs Of A Leaning Chimney?

You can see that the chimney is leaning. If you notice the chimney leaning it is time to place that call to Northeastern Chimney Inc.

You may see water or condensation in your firebox. Or you may see it on the ceiling around your chimney. These are signs that you have an issue with water, and it may be contributing to a leaning chimney.

If you see that the smoke is not exiting the chimney as it used to. You may have a leaning chimney. Try to make all the adjustments that are needed to correct this. Be sure you are burning dry wood, and you have proper ventilation. Also, try warming the chimney before lighting a fire. If you have tried all the tricks to get the smoke to exit and are still having no luck. Call us for an inspection. We can give you answers.

You are starting to notice crumbling bricks and mortar. As a leaning chimney adjusts, it moves ever so slightly. This causes the bricks to shift and the mortar to become loose. 

chimney inspections and cleaning in St Windsor LocksDo you believe that your chimney is leaning?

Your best attack would be to call Northeastern Chimney Inc. for a full inspection. You don’t want something like a leaning chimney to go for too long. Once you start to see changes, it does not mean that the issues have just begun. 

Schedule your inspection or cleaning soon by calling Northeastern Chimney Inc. at 860-233-5770. We will be able to book an appointment that works with your schedule. We have all the equipment needed for all sorts of chimneys.

Our certified chimney technicians provide quality chimney sweep services including chimney repairs, chimney cleaning, and chimney rebuilding for residents in West Hartford, East Windsor, Farmington, Glastonbury, Wethersfield, Marlborough, Cromwell, and the surrounding Central Connecticut area.

The post Why Is My Chimney Leaning?  appeared first on .

This post first appeared on https://www.mychimney.com

What Causes Soot Build-Up 

What is Creosote?

Before we can talk about what causes soot buildup, we need to discuss what creosote is. Creosote is the buildup of burnt wood and coal. It is a dangerous byproduct that stays in your chimney until it is removed. Creosote solidifies and sticks to your chimney.

soot build up in your home in Canton CTWhat Causes This Build-Up?

There are many contributing factors to why creosote builds up in your fireplace. It could be from unseasoned wood, poor maintenance, or inadequate oxygen. Let us discuss some of the causes.

  • By not burning the right type of wood. Burning wood that is wet or not seasoned will only cause concerns later on. Also, smoke that billows from your fireplace. Only burn well-seasoned or cured wood. Wood should be seasoned for at least 6 months before burning. Seasoned wood burns the best. 
  • Burn hardwood. Wood such as oak, ash, birch, or maple. These woods will burn the hottest, allowing the resin from the burning to go right up the chimney.
  • Be sure that the fire is getting enough oxygen. The damper should be opened before starting a fire. Open the glass doors slightly. This will ensure proper oxygen for the fire. 
  • Warm up a cold flue. This will avoid condensation collecting in the chimney which encourages creosote. Light a rolled-up piece of newspaper. Place it up the chimney to warm the chimney a bit before actually lighting the fire. This will prevent the condensation buildup which starts when a fire is started in a cold chimney.
  • A fireplace and chimney that has accumulated creosote will continue to build up. Have an annual chimney sweep to clean out any creosote that accumulated over the year. 

What Harm Can Creosote Cause?

Being a byproduct of slow-burning wood, creosote can be dangerous in several ways. 

  • Skin irritation. Creosote can irritate the skin. Severe eye Burning, rash, and itching as well.
  • Breathing. The respiratory tract can be jeopardized when breathing in coal tar creosote.
  • Fire hazard. The buildup of creosote in the chimney can cause a serious risk of fire. Signs of a creosote fire would be dense black smoke, and cracking and popping sounds. As well as an intense burning smell. A chimney fire can cause damage to the chimney lining beyond repair. It can cause a house fire.

chimney cleaning in Avon CT

If there is a concern of buildup of creosote in your chimney it is time to contact Northeastern Chimney. It is time for a chimney cleaning and inspection. Don’t delay. For the safety of you, your family, and your home. We are more than happy to help you with any concerns. 

Schedule your inspection or cleaning soon by calling Northeastern Chimney at 860-233-5770. We can clean your chimney no matter what bend or curve you have. We come with all the equipment needed for all sorts of chimneys. Our certified chimney technicians provide quality chimney sweep services including chimney repairs, chimney cleaning, and chimney rebuilding for residents in West Hartford, East Windsor, Farmington, Glastonbury, Wethersfield, Marlborough, Cromwell and the surrounding Central Connecticut area.

The post What Causes Soot Build-Up  appeared first on .

This post first appeared on https://www.mychimney.com

The Essential Guide to Exterior Chimney Care

Protecting Your Home and Hearth

It is hard to believe it’s June already and as the seasons change and we welcome the warmth of summer, it’s easy to forget about the fireplace and chimney that has kept us cozy during the colder months. Did you know that exterior chimney care is not just a winter concern? It’s a year-round commitment that can prevent costly repairs and ensure the safety of your home.

Why Exterior Chimney Care Matters:

Your chimney is constantly exposed to the elements, from the scorching sun to the freezing snow. This exposure can lead to deterioration, which not only affects the appearance of your home but can also pose serious risks.

Here are some reasons why exterior chimney care is crucial: (read more)

Prevents Water Damage:

Cracks or missing mortar can allow water to seep in, causing structural damage and mold growth.

Maintains Structural Integrity:

Regular inspections and repairs keep your chimney strong and functional.

Enhances Efficiency:

A well-maintained chimney provides optimal airflow, which is essential for efficient venting.

Ensures Safety:

Blockages or damage can lead to dangerous situations like chimney fires or carbon monoxide leaks.

Here’s a simple checklist to keep your chimney in top shape during the summer:

Inspect the Exterior:

Look for any signs of damage or wear and schedule repairs if needed.

Sweep the Chimney Flue:

Remove any debris to prevent blockages.

Check for Vegetation:

Trim any overhanging branches or vines that could damage the chimney.

Waterproofing:

Consider applying a waterproof sealant to protect against moisture.

Remember, chimney care is not just about aesthetics; it’s about safety and efficiency. By taking proactive steps now, you can avoid the rush of autumn repairs and enjoy peace of mind all year long.

Enjoy every moment of the warmer months and be prepared and protected to stay safe and Warm, all year through!

The post The Essential Guide to Exterior Chimney Care appeared first on Boston's Best Chimney.

The Importance of Post-Winter Industrial Stack Inspections

Once the harsh winter weather comes to an end and the warm spring temperatures arrive, it’s the perfect time to add a post-winter industrial stack inspection to your spring cleaning list for your chimney. A post-winter industrial stack inspection sets you off on the right foot for the season by verifying the stack’s state and its ability to operate efficiently all season long.

At Best Chimney Services, we prioritize our clients’ needs to ensure their chimneys are in good working condition throughout every season of the year. We have been providing residential chimney services and commercial chimney services since 1989. If you’re in the Boston area, we urge you to give us a call with any of your chimney needs. In the meantime, learn why we highly recommend a post-winter industrial stack inspection below.

Post-Winter Cleanup 

During the winter, commercial chimney stacks are in high demand venting the exhaust from using heat and hot water all season long day-in and day-out.  Needless to say, the more you use this equipment, the more your chimney stack will accumulate byproducts like soot, creosote, and carbon. Accumulation of these byproducts can lead to respiratory problems, or worse, carbon monoxide being released back into the building. A post-winter inspection will give you peace of mind that the system is in good working order.  

Assess for Damage

With harsh cold weather, conditions like snow, freezing rain, and below-zero temperatures are expected. However, this weather can worsen any existing damage on your chimney stack. Moisture from snow, ice, and rain can get into any cracks and seams in your chimney stack, increasing the damage. If you’ve noticed any new cracks, rust, or crumbling since the snow has melted, then it’s most likely a sign that your industrial chimney stack needs repair. When you book a post-winter inspection, a chimney technician will check for these problems in the cracks and gaps to see if any damage has developed. 

Internal Decay

The chimney flue vent’s main purpose is to contain the byproducts of combustion and carry them up and out into the atmosphere.  These byproducts consist of nitrogen oxides, carbon monoxide, sulfur dioxide, and other dangerous pollutants that would otherwise seep out of the passageway and back into the building envelope.  An inspection will allow a technician to identify if there is any cause for concern, and if so, how to remedy it to reduce this dangerous risk.

Reduces the Risk of Costly Damages

When chimney maintenance is ignored, you’re not only putting the people in your building at risk but also creating a headache for yourself. By prioritizing necessary inspections for your commercial chimney, you’re reducing the chances of problems arising from pre-existing damage or deterioration that you can’t spot yourself. Help avoid costly repairs by talking with your local chimney company today.

Book Your Post-Winter Industrial Stack Inspection with Best Chimney Services

Scheduling an inspection post-winter is essential for you to detect and address any damage or buildup caused by cold weather and usage. Give us a call today to get started on a routine path of chimney maintenance so that you don’t have to worry about the functionality or safety of your stack.

The post The Importance of Post-Winter Industrial Stack Inspections appeared first on Boston's Best Chimney.

Why Your Chimney Cap is Rusting

Your chimney cap plays a crucial role in protecting your home and chimney from the weather and outdoor elements, but what happens when your chimney cap is rusting? Rust on your chimney cap is something you want to take care of as soon as possible because ongoing rust can lead to costly structural issues within the chimney if ignored. 

At Best Chimney Services, we strive to provide excellent and knowledgeable chimney services for those in the Boston area. When you work with our technicians, they’ll help alleviate your chimney concerns and provide advice to keep your chimney in its best condition. Schedule an appointment with us today to stay up to date on your chimney’s maintenance. In the meantime, explore the common causes of chimney cap rusting and how to prevent it in the future, below.

Low-Quality Chimney Cap

Simply put, professionally installed chimney caps shouldn’t rust.  If you had a chimney cap installed made from low-quality materials or a cap lacking proper protective coatings, then that may be your cause for the rust. Low-quality chimney caps are more prone to rusting because they’re not made of durable metals. We recommend investing in a chimney cap made of high-quality materials, like stainless steel; this can significantly reduce the risk of corrosion.

Exposure to Moisture

One of the primary reasons for chimney cap rusting is exposure to moisture. Dealing with any form of moisture in your chimney is a danger, but it doesn’t always originate from exterior factors.   Condensation and water vapor are a natural byproduct of combustion, but when mixed with the other components of solid and liquid fuels, it creates a highly corrosive acid that deteriorates metal.  

Lack of Chimney Maintenance

If you’re neglecting regular chimney inspections, then it’s very possible that this is contributing to the formation of rust. Without proper cleaning and inspection, soot and tar fog mix with moisture and accelerate corrosion.

Harsh Weather

Harsh weather and environmental factors, such as salt air in coastal areas and constant humid weather, can expedite the rusting on your chimney cap.  Rain, snow, or even high humidity levels can cause water to build up on the chimney cap’s surface and cause these inferior metals to corrode. If you’re having this problem, we recommend swapping out your existing cap for a new stainless steel one.

How to Prevent Your Chimney Cap from Rusting

Regular Cleaning and Inspection

Schedule regular chimney inspections and cleanings to remove debris and identify any signs of rusting early on. Taking action early on can prevent and remove minor rust spots from developing into more significant issues.

Installation of Stainless Steel Chimney Caps

As we mentioned previously, the type of chimney cap you install matters. Consider replacing your current chimney cap with a stainless steel option to reduce the chance of rusting. These materials are highly resistant to corrosion and can provide long-lasting protection for your chimney.

Addressing Structural Issues

If rusting has already caused damage to your chimney cap, it’s essential to address these issues promptly. Consult with a professional chimney technician to assess the extent of the damage and determine the most effective repair or replacement options.

Call Best Chimney Services to Replace Your Chimney Cap 

Your chimney cap is integral to preserving your chimney’s operations, so don’t overlook its importance! Now that you understand why your chimney cap is rusting, you can prolong its lifespan and avoid having to replace it frequently. If you’re starting to notice your chimney cap corroding or rusting, give us a call today for help! 

The post Why Your Chimney Cap is Rusting appeared first on Boston's Best Chimney.

Where Is The Furnace Filter Located?

Understanding where the furnace filter is located is crucial for maintaining a well-functioning HVAC system. The furnace filter plays a significant role in ensuring the air circulating in your home is clean and free of contaminants such as dust, pollen, and other allergens. Regular maintenance of this filter not only improves indoor air quality but also enhances the efficiency and longevity of your furnace.

In this comprehensive guide, we will delve into the different types of HVAC systems, explain how to locate your furnace filter, and provide detailed steps for maintaining it. By the end of this article, you will have the knowledge needed to keep your HVAC system running smoothly and efficiently.

Understanding Furnace Filter Basics

Furnace filters are a critical component of your HVAC system. Their primary function is to trap airborne particles, preventing them from entering the system and being circulated throughout your home. This not only protects the mechanical components of the furnace from dust and debris but also ensures the air you breathe is clean.

Common Types of Furnace Filters

There are several types of furnace filters, each with varying levels of efficiency and cost:

  1. Panel Filters: These are the most basic and inexpensive type, typically made of fiberglass or polyester. They are designed to catch large particles but are not very effective at trapping smaller contaminants.
  2. Pleated Filters: Made from polyester or cotton paper, pleated filters have a larger surface area than panel filters, allowing them to capture more and smaller particles. They are more efficient and durable than basic panel filters.
  3. Electrostatic Filters: These filters use self-charging electrostatic fibers to attract and trap particles. They can be either disposable or washable and are very effective at removing small particles from the air.
  4. High-Efficiency Particulate Air (HEPA) Filters: HEPA filters are the gold standard in air filtration, capable of trapping 99.97% of particles that are 0.3 microns or larger. They are often used in environments where air quality is critical, such as hospitals.
  5. Electronic Filters: These filters use a small electrical charge to capture particles. While highly efficient, they can be more expensive and require regular maintenance to ensure they continue to work effectively.

Importance of Regular Filter Maintenance

Regular maintenance of your furnace filter is essential for several reasons:

  • Improved Air Quality: A clean filter ensures that dust, pollen, and other allergens are removed from the air, which is particularly important for individuals with allergies or respiratory conditions.
  • Increased Efficiency: A clogged filter forces your HVAC system to work harder to circulate air, leading to higher energy consumption and increased utility bills.
  • Prolonged System Life: Regularly replacing or cleaning your filter can prevent dust and debris from accumulating on the internal components of your furnace, reducing wear and tear and potentially avoiding costly repairs.
  • Reduced Environmental Impact: Efficient HVAC systems consume less energy, reducing your carbon footprint and contributing to environmental conservation.

Identifying Your HVAC System

Before you can locate your furnace filter, it’s important to identify the type of HVAC system you have. HVAC systems can vary significantly in design, and the location of the filter depends on the specific type of system installed in your home. Here’s a guide to help you determine your HVAC system type and understand its key components.

Overview of Different HVAC Systems

  1. Vertical HVAC Units
    • Upflow Systems: In an upflow system, air moves upwards through the unit. The blower compartment, located at the bottom of the unit, is where the furnace filter is typically found. This type of system is often installed in basements or utility rooms.
    • Downflow Systems: In a downflow system, air moves downwards. The filter is usually located in the upper blower compartment. This setup is common in homes where the furnace is installed in the attic.
  2. Horizontal HVAC Units
    • Horizontal units are designed to move air horizontally, either from one side of the unit to the other or across the length of the unit. These systems are often found in attics, crawlspaces, or garages where vertical space is limited. The filter is usually located in a sliding rack on the side of the unit.
  3. Air Handlers
    • Air handlers are used in systems where the heating component is separate from the cooling component. They are more common in warmer climates. The filter in an air handler is typically located in a built-in rack behind a door on the unit. Air handlers may also have central return air ducts with filter grills.
  4. Heat Pump Systems
    • Heat pumps are versatile systems that can provide both heating and cooling. They are often used in milder climates. The filter for a heat pump system is usually located in the return air register inside the home, often in a hallway near the center of the building.

Key Components of Each System

  • Blower Compartment: This is where the fan that moves air through the system is housed. In vertical units, it can be at the top or bottom, while in horizontal units, it’s on the side.
  • Return Air Duct: This duct carries air back to the HVAC unit to be heated or cooled. Filters are often placed in or near this duct.
  • Plenum: The plenum is a box that distributes the heated or cooled air to the various ducts in your home. In some systems, the filter may be located near the plenum.

How to Determine Your HVAC System Type

  1. Inspect the Unit: Look for labels, diagrams, or model numbers on your HVAC unit. These can provide clues about the type of system you have. The owner’s manual, if available, is a valuable resource.
  2. Check the Configuration: Observe how the ducts are connected to the unit. If air flows upward or downward, it’s a vertical unit. If air flows horizontally, it’s a horizontal unit.
  3. Consult a Professional: If you’re unsure, a professional HVAC technician can help you identify your system and locate the filter.

Locating the Furnace Filter in Different HVAC Systems

Finding the furnace filter in your HVAC system can sometimes be straightforward, but it can also be a bit tricky depending on the type of system you have. Here’s a detailed guide on how to locate the furnace filter for various types of HVAC systems.

Vertical HVAC Units

Upflow Systems

  • Location: In an upflow system, the air moves upwards through the unit. The furnace filter is typically located in the blower compartment, which is found at the bottom of the unit.
  • Access: To access the filter, you may need to remove the front panel or door of the blower compartment. The filter is usually inserted in a slot that slides out.
  • Steps:
    1. Turn off the HVAC system.
    2. Remove the front panel of the blower compartment.
    3. Slide out the old filter and note its size for replacement.
    4. Insert the new filter with the airflow arrows pointing towards the blower.

Downflow Systems

  • Location: In a downflow system, the air moves downwards. The furnace filter is located in the upper blower compartment.
  • Access: Similar to upflow systems, you need to remove the panel to access the filter.
  • Steps:
    1. Turn off the HVAC system.
    2. Remove the upper compartment panel.
    3. Slide out the old filter and check its size.
    4. Insert the new filter with the correct orientation.

Horizontal HVAC Units

  • Location: Horizontal units are designed to move air horizontally. These units are commonly found in attics, crawlspaces, or garages.
  • Access: The filter is typically located in a sliding rack on the side of the unit.
  • Steps:
    1. Turn off the HVAC system.
    2. Locate the side panel or sliding rack.
    3. Slide out the old filter and take note of its dimensions.
    4. Insert the new filter with the airflow direction arrows aligned correctly.

Air Handlers

  • Location: In air handlers, the filter is usually found in a built-in rack behind a door on the unit.
  • Access: The filter location can vary but is generally behind a small access door.
  • Steps:
    1. Turn off the HVAC system.
    2. Open the access door to reveal the filter.
    3. Remove the old filter and check the size.
    4. Insert the new filter, ensuring it fits snugly.

Heat Pump Systems

  • Location: Heat pumps often have a single large return air register inside the home.
  • Access: The filter is located inside the return air register, usually held by screws or knobs.
  • Steps:
    1. Turn off the HVAC system.
    2. Locate the return air register.
    3. Remove the screws or knobs to access the filter.
    4. Take out the old filter and note its size.
    5. Insert the new filter with the proper orientation.

Additional Tips for Locating Furnace Filters

  • In some homes, filters can also be found behind return air vents. These vents are typically larger than supply vents and are located on ceilings, walls, or floors.
  • To check, look for vents with a latch or screws that can be opened. If a filter is present, it will be behind the vent cover.
  • Larger homes or homes with complex HVAC systems might have multiple filters. Be sure to check all potential locations, including each return vent and the main HVAC unit.

Common Challenges

  • Obstructed Access: In some cases, the filter might be obstructed by other components, making it difficult to reach. Use tools like screwdrivers or nut drivers as needed to remove any panels or obstructions.
  • Hidden Filters: Filters can sometimes be hidden in less obvious places, such as behind ceiling vents or within ductwork. Carefully inspect all possible locations.

Step-by-Step Guide to Locating and Replacing Your Furnace Filter

Replacing your furnace filter is a straightforward process, but it can vary slightly depending on the type of HVAC system you have. This section provides detailed instructions to help you locate and replace your furnace filter for different types of systems.

Tools and Materials Needed

  • Replacement filter (make sure to note the correct size and type)
  • Screwdriver or nut driver (if needed)
  • Flashlight (optional, for better visibility)
  • Gloves (optional, for handling dusty filters)

Steps for Vertical HVAC Units

Upflow Systems

  1. Turn Off the HVAC System: For safety, ensure the system is turned off at the thermostat or breaker.
  2. Remove the Front Panel: Locate the blower compartment at the bottom of the unit and remove the front panel. This may require a screwdriver.
  3. Slide Out the Old Filter: Carefully slide out the old filter. Note the size and airflow direction indicated on the filter.
  4. Insert the New Filter: Insert the new filter, ensuring the airflow arrows point towards the blower.
  5. Replace the Panel: Secure the front panel back in place.
  6. Turn On the System: Turn the HVAC system back on and check for proper operation.

Downflow Systems

  1. Turn Off the HVAC System: Ensure the system is turned off for safety.
  2. Remove the Upper Compartment Panel: Locate and remove the panel of the upper blower compartment.
  3. Slide Out the Old Filter: Carefully remove the old filter, noting its size and airflow direction.
  4. Insert the New Filter: Place the new filter with the correct orientation.
  5. Replace the Panel: Secure the upper compartment panel.
  6. Turn On the System: Reactivate the HVAC system and ensure it is working properly.

Steps for Horizontal HVAC Units

  1. Turn Off the HVAC System: Turn off the system at the thermostat or breaker.
  2. Locate the Sliding Rack: Find the sliding rack on the side of the unit where the filter is located.
  3. Slide Out the Old Filter: Carefully remove the old filter, noting its size and direction of airflow.
  4. Insert the New Filter: Place the new filter into the sliding rack with the correct orientation.
  5. Secure the Rack: Ensure the sliding rack is securely in place.
  6. Turn On the System: Turn the system back on and check for proper operation.

Steps for Air Handlers

  1. Turn Off the HVAC System: Ensure the system is turned off at the thermostat or breaker.
  2. Open the Access Door: Locate the access door on the air handler unit and open it.
  3. Remove the Old Filter: Carefully remove the old filter, taking note of its size and airflow direction.
  4. Insert the New Filter: Place the new filter into the built-in rack, ensuring the correct orientation.
  5. Close the Access Door: Securely close the access door.
  6. Turn On the System: Turn the system back on and verify it is operating correctly.

Steps for Heat Pump Systems

  1. Turn Off the HVAC System: Turn off the heat pump system at the thermostat or breaker.
  2. Locate the Return Air Register: Find the return air register inside the home, typically in a hallway.
  3. Remove the Register Cover: Unscrew or unclip the cover to access the filter.
  4. Remove the Old Filter: Carefully slide out the old filter, noting its size and airflow direction.
  5. Insert the New Filter: Place the new filter with the correct orientation.
  6. Replace the Register Cover: Secure the cover back in place.
  7. Turn On the System: Turn the system back on and check for proper operation.

Safety Tips and Precautions

  • Turn Off the System: Always turn off your HVAC system before accessing or replacing the filter to avoid injury or damage to the unit.
  • Handle Filters Carefully: Old filters can be dusty and dirty, so handle them carefully to avoid spreading dust.
  • Check the Filter Size: Ensure you have the correct replacement filter size. The size is usually printed on the edge of the old filter.
  • Follow the Airflow Direction: Filters have arrows indicating the correct airflow direction. Ensure the new filter is inserted with the arrows pointing in the direction of airflow.

Importance of Regular Filter Replacement

Regularly replacing your furnace filter is essential for maintaining good indoor air quality and ensuring your HVAC system operates efficiently. Here are the key reasons why regular filter maintenance is crucial:

Impact on Indoor Air Quality

A furnace filter’s primary function is to trap airborne particles such as dust, pollen, pet dander, and other allergens. Over time, these particles accumulate on the filter, reducing its effectiveness. A clean filter ensures that the air circulating in your home is free of these contaminants, which is especially important for individuals with allergies, asthma, or other respiratory conditions.

  • Health Benefits: Clean filters help to reduce the amount of dust and allergens in the air, which can alleviate symptoms of allergies and respiratory issues.
  • Odor Reduction: Regularly changing the filter can also help reduce household odors, as it traps particles that can cause unpleasant smells.

Effects on HVAC System Efficiency and Longevity

A clogged or dirty filter forces your HVAC system to work harder to push air through, which can lead to several issues:

  • Increased Energy Consumption: When the system has to work harder, it consumes more energy, leading to higher utility bills. Regular filter replacement can help maintain efficient airflow and reduce energy costs.
  • System Wear and Tear: Overworking the system due to a dirty filter can lead to increased wear and tear on components such as the blower motor. This can result in more frequent repairs and a shorter lifespan for your HVAC system.
  • Preventing Overheating: A clogged filter can cause the system to overheat, which may trigger safety mechanisms that shut down the furnace to prevent damage. Regular filter maintenance helps prevent these shutdowns and keeps your system running smoothly.

Recommendations for Filter Replacement Frequency

The frequency with which you should replace your furnace filter depends on several factors, including the type of filter, your home’s environment, and individual needs:

  • Standard Recommendation: Most HVAC professionals recommend changing your filter every 90 days. However, this can vary based on specific conditions.
  • Homes with Pets: If you have pets, you may need to replace the filter more frequently, such as every 60 days, due to the additional pet hair and dander.
  • Allergy Sufferers: Individuals with allergies or respiratory issues should consider changing the filter every 30-60 days to ensure optimal air quality.
  • Environmental Factors: Homes in areas with high levels of dust, pollution, or pollen may also require more frequent filter changes.

Choosing the Right Furnace Filter

Selecting the right furnace filter is crucial for maintaining your HVAC system’s efficiency and ensuring the air quality in your home. Here’s a guide to help you understand the key factors to consider when choosing a furnace filter.

Understanding MERV Ratings

The Minimum Efficiency Reporting Value (MERV) rating is a critical factor when selecting a furnace filter. It indicates the filter’s ability to capture particles of different sizes. The MERV scale ranges from 1 to 20, with higher numbers representing filters that can capture smaller particles more effectively.

  • MERV 1-4: These filters offer minimal filtration and are typically used in residential settings where air quality is not a major concern. They can capture large particles like dust mites and pollen.
  • MERV 5-8: These filters provide moderate filtration and are suitable for most homes. They can capture smaller particles such as mold spores, pet dander, and dust.
  • MERV 9-12: Filters with these ratings are excellent for improving indoor air quality. They can trap finer particles, including some bacteria and smoke particles.
  • MERV 13-16: These high-efficiency filters are used in environments requiring very clean air, such as hospitals. They can capture very fine particles, including bacteria, tobacco smoke, and even some viruses.
  • MERV 17-20: These are HEPA (High-Efficiency Particulate Air) filters, used in clean rooms and environments that require the highest level of air filtration.

Selecting the Right Filter Type

Choosing the right type of filter depends on your specific needs, budget, and the type of HVAC system you have. Here are the most common types of furnace filters:

  • Fiberglass Panel Filters: These are the most basic and inexpensive filters, designed to capture large particles. They are disposable and need to be replaced frequently.
  • Pleated Filters: Made from polyester or cotton paper, pleated filters have a larger surface area to capture more particles. They are more efficient than fiberglass filters and last longer.
  • Electrostatic Filters: These filters use self-charging electrostatic fibers to attract and capture particles. They are available in disposable and washable versions and are highly effective at removing small particles.
  • HEPA Filters: As the most effective filters, HEPA filters can capture 99.97% of particles that are 0.3 microns or larger. They are used in settings requiring the highest air quality and are usually more expensive.
  • Electronic Filters: These filters use an electrical charge to attract and trap particles. They require regular cleaning and are more costly but offer superior filtration.

Balancing Cost and Efficiency

While higher MERV-rated filters offer better filtration, they can also be more expensive and may reduce airflow if your HVAC system is not designed to handle them. Here are some tips to balance cost and efficiency:

  • Assess Your Needs: If you have allergies, pets, or live in an area with high pollution, investing in a higher MERV-rated filter is worthwhile.
  • Check Your HVAC System Specifications: Ensure your system can handle the filter’s airflow resistance. Consult your HVAC manual or a professional if you’re unsure.
  • Consider Maintenance Costs: Higher-end filters might last longer and require less frequent replacement, potentially saving money in the long run.

Final Thoughts

A well-maintained furnace filter not only enhances the performance of your HVAC system but also contributes significantly to a healthier home environment. Regular inspection and replacement of the filter ensure that your system runs efficiently, consumes less energy, and provides cleaner air. By following the guidelines and tips provided in this article, you can take proactive steps to maintain your HVAC system and enjoy a comfortable and healthy living space.

Remember, the key to a long-lasting and efficient HVAC system lies in regular maintenance and being informed about the components that keep it running smoothly. Keep an eye on your furnace filter, replace it as needed, and consult with HVAC professionals if you have any doubts or require assistance. Your effort in maintaining your furnace filter will pay off in improved air quality, lower energy bills, and a more reliable heating and cooling system.

Does A Gas Furnace Use Electricity?

When winter approaches, many homeowners start thinking about their heating systems and their efficiency. One common question is whether gas furnaces use electricity. This is a vital concern because understanding the energy dynamics of your heating system can help manage costs and ensure safety.

That’s why we made this guide: to explain the various ways gas furnaces utilize electricity, compare them with other heating systems, discuss the impact of power outages, and offer tips on improving energy efficiency. By the end, you’ll have a comprehensive understanding of how your gas furnace operates and how to optimize its performance.

How Gas Furnaces Work

Gas furnaces are a staple in many homes, providing reliable and efficient heating. They function through a series of well-coordinated components working together to produce and distribute heat. Here’s a breakdown of how they work:

  1. Thermostat: The process begins when the thermostat detects a drop in room temperature and signals the furnace to turn on.
  2. Ignition System: Modern furnaces use an electronic ignition system to ignite the burners. This can be a hot surface igniter or an intermittent pilot.
  3. Burners: Once ignited, the burners create a flame that heats up the heat exchanger.
  4. Heat Exchanger: The heat exchanger is a crucial component that transfers heat from the burning gas to the air without mixing the combustion gases with the air that enters your living space.
  5. Blower Motor: A blower motor then forces air over the heat exchanger, warming it before it’s distributed throughout the house via ductwork.
  6. Exhaust System: Finally, combustion gases are expelled through the flue, ensuring safe ventilation out of the home.

Electricity Usage in Gas Furnaces

Although gas furnaces primarily burn natural gas to produce heat, they still rely on electricity for several key functions:

  • Blower Motor: The blower motor is the most significant user of electricity in a gas furnace. It powers the fan that circulates air through the furnace and into the home. The power consumption of blower motors varies, with older models typically using around 400 watts and newer, variable-speed models using as little as 75 watts.
  • Ignition System: The electronic ignition system, which includes components like the hot surface igniter or spark igniter, requires electricity to function. While the igniter uses a small amount of electricity, it is crucial for starting the heating process.
  • Control Board: This is the brain of the furnace, managing all operations from ignition to shutdown. The control board coordinates the different components and ensures the furnace runs efficiently and safely.
  • Flame Sensor: This device ensures the burners are lit. If no flame is detected, it shuts off the gas supply to prevent leaks and potential explosions. This sensor also needs electricity to operate.
  • Safety Switches and Sensors: Various safety switches and sensors throughout the furnace, such as limit switches and rollout switches, monitor the system and shut it down in case of any issues. These components require a constant supply of electricity to function.

The average electricity consumption of a gas furnace ranges from 600 to 800 watts, but this can vary based on the efficiency of the furnace and how often it runs. Here’s a summary of factors affecting electricity usage:

  • Age of the Furnace: Older models tend to be less efficient, consuming more electricity.
  • Type of Blower Motor: Single-speed motors consume more power compared to variable-speed motors.
  • Usage Patterns: Continuous operation of the blower motor for air circulation increases electricity consumption.
  • Maintenance: Well-maintained furnaces run more efficiently and use less electricity.

Comparing Gas Furnaces to Other Heating Systems

Understanding how gas furnaces compare to other heating systems can help you make informed decisions about your home’s heating:

  • Electric Heaters:
    • Electricity Usage: Electric heaters convert electricity directly into heat, typically using more electricity than gas furnaces.
    • Efficiency: While electric heaters can be highly efficient, the cost of electricity is usually higher than natural gas, making them more expensive to operate over time.
    • Initial and Operating Costs: Lower initial costs but higher operating costs due to electricity prices.
  • Heat Pumps:
    • Electricity Usage: Heat pumps use electricity to transfer heat rather than generate it. They are highly efficient, especially in moderate climates.
    • Efficiency: Can be more efficient than gas furnaces in certain conditions but lose efficiency in very cold weather.
    • Cost-Benefit Analysis: Higher initial costs but lower operating costs in mild climates.
  • Oil Furnaces:
    • Electricity Usage: Like gas furnaces, oil furnaces use electricity for blower motors and ignition systems.
    • Efficiency: Generally less efficient than gas furnaces due to the higher cost of oil and maintenance requirements.
    • Environmental Impact: Burning oil releases more pollutants compared to natural gas.
  • Wood Stoves:
    • Electricity Usage: Do not use electricity directly, but may require it for blowers or fans if they are equipped.
    • Efficiency: Highly efficient in producing heat but require manual operation and maintenance.
    • Cost and Environmental Impact: Lower operating costs but higher environmental impact due to wood smoke.

Impact of Power Outages on Gas Furnaces

Gas furnaces, while primarily powered by natural gas, rely on electricity to operate key components. This reliance becomes particularly evident during power outages. Understanding how gas furnaces behave in such scenarios can help homeowners prepare and ensure continued heating when it’s needed most.

  1. Electricity-Dependent Components:
    • Thermostat: Without electricity, the thermostat cannot signal the furnace to start, effectively shutting down the heating process.
    • Ignition System: Modern furnaces use electronic igniters that require electricity to light the burners. Without power, these igniters cannot function.
    • Blower Motor: This motor circulates warm air throughout the house. In the event of a power outage, the blower motor stops, halting the distribution of heat.
    • Control Board: Acts as the furnace’s brain, coordinating operations. Loss of power renders the control board inoperative, stopping all furnace functions.
  2. Maintaining Heat During Power Outages:
    • Generators:
      • Portable Generators: Can be used to power the furnace. However, they need to be properly connected to the furnace using an appropriate transfer switch or direct wiring setup.
      • Standby Generators: These are wired directly into the home’s electrical system and automatically kick in during a power outage, providing a seamless transition and continuous power supply.
    • Alternate Heat Sources:
      • Wood Stoves: Provide a reliable, electricity-free heat source.
      • Propane Heaters: Portable and effective, but require proper ventilation to avoid carbon monoxide buildup.
      • Pellet Stoves: Efficient and can operate without electricity if equipped with a battery backup.
  3. Safety Considerations:
    • Proper Ventilation: Essential for any alternate heating source to prevent carbon monoxide poisoning.
    • Carbon Monoxide Detectors: Should be installed and functioning to alert residents of dangerous gas buildup.
    • Regular Maintenance: Ensuring the furnace and alternate heating sources are well-maintained reduces the risk of malfunctions and ensures safety during an outage.

Energy Efficiency Tips for Gas Furnaces

Optimizing the efficiency of your gas furnace not only reduces electricity usage but also extends the system’s lifespan and lowers utility bills. Here are several strategies to enhance energy efficiency:

  1. Regular Maintenance:
    • Professional Inspections: Schedule annual inspections to ensure all components are working efficiently.
    • Filter Replacement: Replace or clean filters regularly to maintain proper airflow and reduce strain on the blower motor.
    • Blower Motor Checks: Ensure the blower motor is functioning smoothly, without obstructions.
  2. Thermostat Optimization:
    • Programmable Thermostats: Set lower temperatures at night or when the house is unoccupied to save energy.
    • Smart Thermostats: These devices learn your schedule and adjust heating patterns automatically, optimizing energy use.
  3. Upgrading to High-Efficiency Models:
    • Variable-Speed Motors: These motors adjust their speed based on heating needs, using less electricity compared to single-speed motors.
    • Modern Furnaces: Newer models are designed to be more energy-efficient, using advanced technology to reduce electricity and gas consumption.
  4. Improving Home Insulation:
    • Seal Drafts: Ensure doors and windows are properly sealed to prevent heat loss.
    • Insulate Walls and Attics: Proper insulation helps maintain consistent indoor temperatures, reducing the furnace’s workload.
  5. Optimizing Airflow:
    • Unblock Vents: Ensure that all vents are open and unobstructed to allow for efficient airflow.
    • Ductwork Maintenance: Check and seal any leaks in the ductwork to prevent heat loss and ensure efficient air distribution.

Safety Considerations

Ensuring the safe operation of gas furnaces is paramount. Proper safety measures can prevent accidents and ensure efficient functioning.

  1. Regular Inspections:
    • Professional Checks: Schedule regular inspections by certified technicians to identify and fix potential issues.
    • Carbon Monoxide Detectors: Install detectors near the furnace and throughout the home to alert you to dangerous gas levels.
  2. Electrical Safety:
    • Circuit Requirements: Ensure the furnace is connected to the appropriate circuit with the correct amperage to prevent overloads.
    • Overload Protection: Install overload protection devices to safeguard against electrical surges that can damage the furnace or cause fires.
  3. Proper Ventilation:
    • Exhaust Systems: Ensure that flues and vents are clear of obstructions to allow safe expulsion of combustion gases.
    • Ventilation Fans: Use fans to maintain airflow and prevent the buildup of hazardous gases.
  4. Maintenance of Safety Features:
    • Flame Sensors: Regularly check and clean flame sensors to ensure they function correctly, preventing gas leaks.
    • Limit Switches: Inspect and test limit switches to make sure they are working properly to shut down the furnace if it overheats.

FAQs About Gas Furnace Electricity Usage

Homeowners often have various questions about the electricity usage of gas furnaces. Here are some common FAQs to help clarify these concerns:

How Much Electricity Does a Gas Furnace Use?

  • On average, gas furnaces use between 600 and 800 watts of electricity. This can vary based on the model, efficiency, and usage patterns.

Can a Smart Thermostat Reduce Electricity Usage?

  • Yes, smart thermostats can significantly reduce electricity usage by optimizing heating schedules and adjusting temperatures based on your habits and preferences.

Is It More Cost-Effective to Run a Gas Furnace or an Electric Heater?

  • Generally, gas furnaces are more cost-effective than electric heaters, especially in regions with high electricity prices. While electric heaters convert electricity directly into heat, gas furnaces use less electricity and are often cheaper to operate in the long run.

What Happens to My Gas Furnace During a Power Outage?

  • Without electricity, key components like the blower motor and ignition system won’t function, causing the furnace to shut down. Backup power sources like generators can keep the furnace running during outages.

How Does Home Insulation Affect Furnace Electricity Usage?

  • Proper insulation reduces the workload on the furnace by maintaining a consistent indoor temperature, thus lowering electricity usage. Insulating walls, roofs, and floors, as well as sealing drafts around doors and windows, can significantly enhance efficiency.

Final Thoughts

While gas furnaces primarily rely on natural gas to generate heat, they do require electricity for various essential components. Understanding how these components work and their electricity consumption can help homeowners make informed decisions about their heating systems. Gas furnaces use electricity for the blower motor, ignition system, control board, and other safety features, which are critical for efficient and safe operation.

Remember, regular maintenance and upgrades not only enhance efficiency but also contribute to a safer and more cost-effective heating solution. Stay informed and proactive in managing your gas furnace, and you’ll reap the benefits of a well-maintained, efficient, and reliable heating system.

(877) 959-3534