Category: Uncategorized

The Effects of the Freeze/Thaw Cycle on Your Chimney

Freeze chimney Thaw repair in Prairie Village, KSWinter can be damaging to chimneys, especially in areas that experience above-average levels of precipitation. The freeze-thaw effect is the repetitive process of surface moisture freezing and thawing. It is a condition that usually occurs in winter and is especially damaging to porous materials like clay and cement that are used in the construction of brick masonry chimneys. During winter precipitation, the porous brick masonry absorbs the moisture from rain or snowfall. When external temperatures drop below freezing, the moisture turns into ice. As these ice crystals expand, it causes tiny cracks to develop in the brickwork.


When the temperature rises above freezing, melting snow and ice thaw into water. As the temperature falls below 32 F again, the moisture absorbed by the porous brick material freezes into ice, further expanding the cracks in the bricks. The accumulation of more rain and snow fills these more extensive cracks and crevices, accelerating the damaging effects of the freeze-thaw cycle.

The effects of the freeze-thaw cycle may be hardly noticeable in one season. However, the repeated effect season after season can take a heavy toll on the masonry. The widening cracks cause the bricks to chip or spall and crumble. The moisture also softens and erodes the mortar resulting in gaps in the joints. The spalling bricks and absence of mortar can cause entire pieces of brick to dislodge from the chimney, compromising its structural integrity. Without intervention to mitigate and repair the damage, the stack is in danger of a partial or total collapse.

professional chimney masonry repairFreeze-Thaw Chimney Repair

An experienced chimney mason can repair damaged bricks and mortar to restore the chimney. When the damage is caught in the early stages, it can often be easily corrected by tuck-pointing. The mason will replace the decaying mortar and fill in the missing mortar with a durable bonding material. Cracks in the brickwork will also be filled in. The brick and mortar repair will be color-matched to the existing bricks and mortar to complete the restoration process. In cases with extensive masonry damage, the chimney may require a partial or complete rebuild.

Preventing Freeze-Thaw Damage

The best way to protect your chimney is to help avoid freeze-thaw damage. An annual chimney inspection can help spot minor damage before more extensive problems arise. Also, applying a waterproof sealant that locks out moisture can help protect the masonry from water damage. It is highly recommended that this be done only by a qualified chimney professional. They will use a breathable, water-soluble solution that will protect the masonry without trapping the water vapors. Any brick damage will need to be repaired before waterproofing. Also, it will be necessary to re-apply the waterproof sealant every few years to maintain its water-repellant strength.

The post The Effects of the Freeze/Thaw Cycle on Your Chimney appeared first on Fluesbrothers Chimney Service.

3 Things You Need to Know About Your Spring Chimney Sweep

Now that spring is here, many Boston homeowners are thinking about their next home improvements. One of those improvements on your checklist should be a spring chimney sweep.

Here are some important things to know about your Boston chimney sweep in 2020:

1. You Can Get No-Contact Estimates

First, it’s important to address the COVID-19 situation as of the spring of 2020. The CDC strongly recommends social distancing, and Best Chimney is offering no-contact estimates for your springtime chimney sweep.

This means you may be able to keep your scheduled appointment with us or schedule a new estimate as needed.

2. Tend to the Heating Flues

Did you know there may be a secondary flue (tunnel) that connects to your chimney? One comes from your fireplace, but you may also have a second flue that connects to the furnace/boiler.

Even if you didn’t light a fire in your chimney this year, it’s still important to check the flues for combustible deposits. Hot gases from the boiler can also cool too quickly, causing it to condense and drip back down into the flue. This can turn dangerous especially if it lets off carbon monoxide—a poisonous gas that can cause sickness to people in your home.

You might think that your HVAC company would handle this issue, but most of the time, they do not inspect the chimney. This means that a potentially dangerous situation can go undetected.

3. Check for Sound Brickwork

Even though the winter was relatively mild here in Boston, temperatures still got cold enough to activate the freeze and thaw cycle. This cycle can cause bricks to crack or crumble allowing water to enter the home. The mortar may also loosen, which compromises the structural integrity of the chimney.

Get Your Spring Chimney Repairs from Best Chimney

For your safety, we are offering no-contact estimates! Please contact us to learn more and get scheduled for your spring chimney sweep.

The post 3 Things You Need to Know About Your Spring Chimney Sweep appeared first on Boston's Best Chimney.

Everything You Need to Know About Your Gas Fireplace

Do you have a gas fireplace in your home? A gas fireplace gives the luxury of lighting a fire at the click of a button. Dating all the way back to 1895, gas fireplaces still serve as a staple in our homes today.

Whether you have a gas fireplace or you’re thinking of getting one installed, this quick guide will serve you with everything you need to know.

What are the Types of Gas Fireplaces?

While gas fireplaces have the same basic concept in terms of function, they are not all created equal in terms of installation.

The different types of gas fireplaces include:

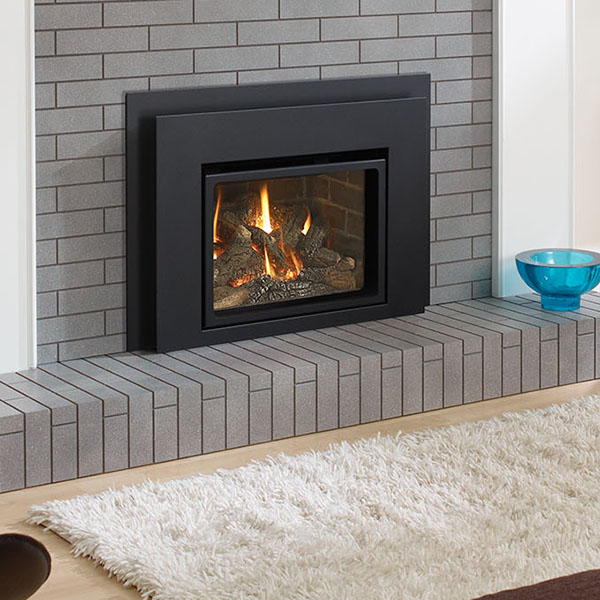
  • Log set: These gas fireplaces come with a stack of ceramic logs that look like wood. The gas burner is placed in the firebox to look like real burning logs.
  • Insert: This type sits inside a metal box that is designed to fit your existing masonry fireplace.
  • Built-in: A built-in gas fireplace also sits inside a metal box but it comes with its own free-standing construction. It typically doesn’t require to go inside an existing fireplace.

Although ceramic wood is the most popular and common option for gas fireplaces, log alternatives include gas, coal, and stone.

Once you select the type of gas fireplace you want for your home, another major consideration is cost.

How Much Does a Gas Fireplace Cost?

The cost of a gas fireplace depends on the type you are getting for your home. It also depends if the fireplace has a vent or if it’s vent-free.

As a general range, you can expect to pay anywhere between $500 to $5,000 installed for a standard unit. However, Angie’s List notates that the cost can be as high as $5,500 if you are converting a traditional fireplace to a gas fireplace. This is because a new gas line needs to be installed, which increases the price due to additional labor.

After your new gas fireplace is installed, it’s important to know how to maintain it for both safety and aesthetic purposes.

How to Care for a Gas Fireplace

One of the benefits of a gas fireplace is that there is not much of a mess to deal with. Since the wood isn’t real, there is no ash to bother with or clean up.

However, gas fireplaces require at-home maintenance such as:

  • Cleaning the glass to prevent fogging. If you don’t clean the glass, you may be permanently unable to see through it and enjoy the ambiance of your fire.
  • Once the glass is clean, check for chips or cracks.
  • Make sure the ceramic logs are not deteriorating and crumbling.

Choose Best Chimney to Convert Your Fireplace

Does hassle-free sound good to you? Contact Boston’s Best for a free estimate to convert your wood-burning fireplace to gas today!

The post Everything You Need to Know About Your Gas Fireplace appeared first on Boston's Best Chimney.

Guide On How To Install A Cleanout Door

chimney cleanout door

A cleanout door on the outside of your masonry chimney aids in making it easy for you to access the chimney and remove any ash and soot that might be there.

This makes chimney cleaning very easy. If your chimney doesn’t have a cleanout door, you should consider installing one on the side of your chimney. To help you out, here are tips on how to install the door:

Wait for the chimney to cool

Before you do anything, you should let the chimney to cool. Once cool you should drill holes on the inside of each corner of the chimney using a ½ inch diameter, 18 inch long masonry hammer drill and masonry bit. You should drill holes that are 1 inch from the corner holes.

You should continue drilling holes and then use a chisel to chisel through the spaces between the holes. You should do this until you cut the entire opening from the chimney.

Mix mortar

You should mix mortar and water in a bucket according to the given directions. As rule of thumb you should ensure that the consistency resembles a thick soup. Once the consistency is ready you should scoop some of the mortar using a trowel and place an even ¼-inch layer at the bottom of the chimney opening. You should be keen and ensure that the chimney masonry repair work is perfect.

You should place another layer along the top flange of the cleanout door frame and then insert the cleanout door into the opening. For ideal results you should ensure that the door is flush against the chimney. To keep the cleanout door in place you should wedge a wood block against the ground and the centre of the door.

After the mortar has settled you should apply ½-inch bead of heat-resistant caulk around the door’s perimeter and the chimney.

Noteworthy tips

For you to get ideal results you should ensure that you use the right masonry cutting tools. To protect yourself you should use protective gear. For example, you should wear groves. You should also wear protective glasses to protect you from the broken masonry and clay tiling.

While you can easily install the masonry chimney cleanout door on your own if you have the right skills, it’s highly discouraged to attempt installing it if you don’t have masonry skills. For perfect results you should hire the services of a chimney contractor.

The post Guide On How To Install A Cleanout Door first appeared on First Class Chimney Services Maryland.

This post first appeared on https://www.firstclasschimneyservices.com

Guide On How To Fix A Leaking Chimney

Chimney leaking

A leaky chimney is not only harmful to your ceiling, it also puts you at the risk of developing respiratory problems due to growth of mold and mildew. To avoid this you should undertake leaky chimney repair as soon as possible.

How To Repair A Leaky Chimney

It’s usually challenging to identify the exact area where the chimney is leaking; therefore, you need to be very cautious. You should carefully check all the areas both inside and outside your house. The most common cause of the leak is the chimney cap. You should find if the cap has any cracks.

If the leaks are coming from the chimney cap you can coat the top surface of the cap with a waterproofing agent or remove the old cap and replace it with new materials. Another option of correcting the problem is fabricating a copper cap to fit the existing cap. If planning of installing the copper cap you should first coat the existing cap with a sheet-applied membrane.

In addition to the chimney cap, you also need to pay attention to the chimney flashing—the area where the brick joins the roof. You should inspect the flashing and ensure that it isn’t loose or hanging off the brick. A normal flashing should be properly secured to the roof and should be covered with shingles.

To repair chimney flashing, you should nail, caulk and tar the flashing back into place.

If you can’t identify where the leaks are coming from, you should consider coating all the exposed masonry surfaces on your masonry chimney with a clear waterproofing sealer. For ideal results you should apply two coats. Before you apply the second coat you should let the first coat dry. When buying the sealer you should ensure that you buy it from brick supply vendors.

Conclusion

These are tips on how to repair a leaking chimney. If you have inspected your chimney and fixed the problematic areas and still there are leaks, you should consider hiring a chimney contractor to help you in professional inspection of your chimney. The contractor will also help you in sealing the leaks.

The post Guide On How To Fix A Leaking Chimney first appeared on First Class Chimney Services Maryland.

This post first appeared on https://www.firstclasschimneyservices.com

Types Of Wood Stove Inserts

wood stove insert

A wood stove insert ensures that you are able to heat your home in the most cost-effective way possible. These wood stove inserts not only reduce your heating costs, they also provide your home with a beautiful design that complements your household. Are you planning of buying the inserts? Here are some of the most common inserts that you can go for:

Legacy C260

It’s one of the most expensive inserts in the market. It measure 48 inches by 33 inches and has a heating capacity of about 2,220 square feet. According to the manufacturers, it uses technology developed by NASA. Due to the technology, the inserts are the most efficient in the market.

The insert is made from heavy-gauge stainless steel which gives it an elegant, modern look.

Englander satin black insert

It’s designed for a moderately sized home. It comes with an extra-large glass door with an air mash, a blower, and a 30 inch by 42 inch fireplace back plate. The interior log space is capable of holding up to 20 inch logs. The Englander insert is very clean and efficient. According to the manufacturers, it produces 2.6 grams of emissions and 60,000 BTUs from a 1.8 cu. Ft. Firebox.

Napoleon insert

It’s E.P.A recognised and very clean. It burns only 3.7 grams per hour. It has the ability of heating up to 2,200 square feet which is one of the largest areas that an insert can heat. The insert comes with a full-view single-door design, thermostat sensor and an easy to clean firebox.

Important tips to remember

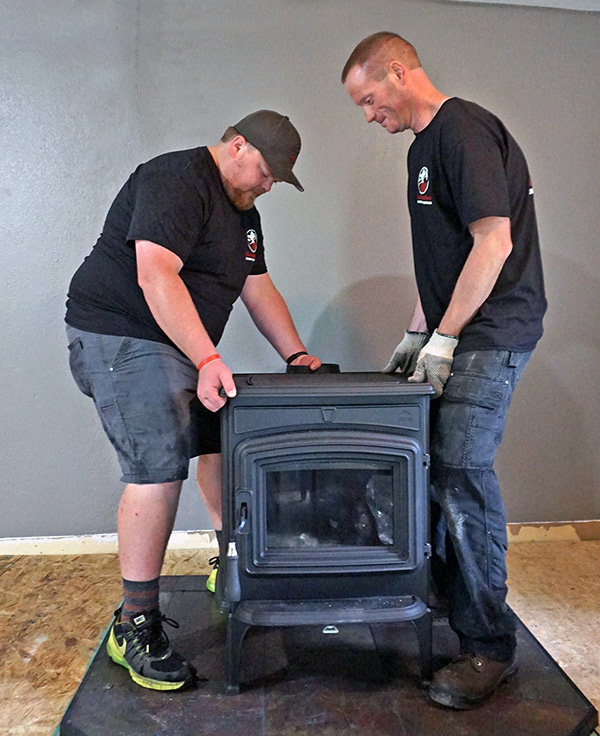
Regardless of the wood stove insert that you buy, you should ensure that it’s installed by a wood stove insert expert.

When you are lighting it, you should avoid using an accelerant such as gas or lighter fluid as this is dangerous not only to you, but also to the house.

To ensure that your insert is in good order, you should ensure that it’s cleaned and inspected by a certified wood stove insert professional. For ideal results, the inspection and cleaning should be done at least once a year.

The post Types Of Wood Stove Inserts first appeared on First Class Chimney Services Maryland.

This post first appeared on https://www.firstclasschimneyservices.com

Guide On How To Inspect Your Chimney

Chimney Inspection

You should undertake chimney inspection at least annually to prevent potential fire damage and other issues that might endanger your house and life. To help you out, here are some of the areas that you should inspect:

Firebox

This is the open space that contains the actual fire and it’s the first place that you should begin your inspection. There are some fireboxes that are lined with firebrick while others are lined with metal that resembles masonry bricks.

You should closely inspect the firebox for cracks. You should also inspect it for brick or mortar that might have fallen or got loose.

Flue

It’s the inside of the chimney and you should check it for blockage by any foreign object or a thick build-up of creosote. You should note that birds, mice and squirrels like building nests in them; therefore, you should closely inspect the flue and ensure that there is no blockage. Remember that even a small chimney blockage can prevent air flow thus increasing smoke danger.

Stovepipe

It’s the long vertical pipe usually attached to the chimney and rises up above the roof. You should inspect the stovepipe and ensure that it doesn’t enter the flue at a downward angle. If it enters the flue at an awkward angle you should adjust it so that it enters at an upward angle.

Soot

Soot has the potential of blocking air flow; therefore, you should get rid of it. You should scrape the soot using a round brush attached to a long pole. You can also clear it by lowering a bag of rough burlap (full of gravel) into the flue.

Carbon monoxide

There are a number of factors that can increase the volume of carbon monoxide in the chimney. One of the factors is downdraft. The buildup can also come up when the chimney is plugged up.

Carbon monoxide is very dangerous; therefore, you should be very cautious and ensure that there is no buildup. To inspect it you only need to use a carbon monoxide detector.

Measurements

To ensure that no smoke gets back into the house you should inspect the top of the flue and ensure that the cross-sectional size is similar to that inside of the flue. If the top opening is smaller, you should consider hiring a chimney repair professional to enlarge it.

The post Guide On How To Inspect Your Chimney first appeared on First Class Chimney Services Maryland.

This post first appeared on https://www.firstclasschimneyservices.com

How Often Should You Clean Your Chimney?

Chimney cleaning

There is no specific time when you should undertake chimney cleaning. To determine when to clean the chimney you need to regularly inspect the chimney. To inspect the fireplace you should use a fireplace poker or any other metal device.

You should use the poker to scrape away some of the creosote. If the creosote buildup is paper-thin, you don’t need to clean the chimney; however, if the buildup is 1/8 of an inch, you should consider undertaking the cleaning. If the buildup is 1/8-1/4 inch you should undertake immediate cleaning.

How to remove creosote from the chimney

Creosote is the residue that comes from wood that you burn in the fireplace. You should note that different types of wood leave different types of creosote buildup. For example, pine causes rapid buildup than other types of wood.

It’s important to remove the creosote buildup in order to reduce the draw of the fireplace and lessen its efficiency. If there’s a lot of buildup, you risk the creosote catching fire resulting to flue fire.

To remove the creosote you need to have a chimney brush that will easily fit the chimney flue. Before buying the chimney brush you should consult the chimney manufacturer’s manual to determine the flue size. In addition to the chimney brush, you also need to have 15-20 pound weight and a rope. You should ensure that the weight fits down the flue without cracking the tiles.

You should seal off the fireplace using a drop cloth and masking tape. You should also close the damper in order to trap creosote and soot that falls. To reduce draft while cleaning, you should shut all doors and windows.

Once everything is in place you should attach the chimney brush and weight to the end of the rope and move it up and down on each side of the chimney. You should confirm that you have cleaned the chimney using a flashlight.

To reduce creosote buildup you should use a chemical cleaner such as chimney sweeping log or liquid. The chemical coats the chimney walls with an acid that breaks up creosote particles. The cool thing is that you can easily find the chemical cleaners in home improvement stores.

Conclusion

While you can clean the chimney by yourself, its recommend that you avoid it if you don’t have the right tools. For ideal results, you should seek the services of a professional chimney cleaner.

The post How Often Should You Clean Your Chimney? first appeared on First Class Chimney Services Maryland.

This post first appeared on https://www.firstclasschimneyservices.com

Tips On How To Repair A Brick Chimney

chimney repair

Although, brick chimneys are durable, they tend to suffer minor structural damages that result from harsh, external weather conditions. The cool thing is that you don’t need to hire a professional to repair the damages for you. To help you out, here are tips on how to repair damages on brick chimney :

Clean The Debris

You need to clean and scoop-out all the debris on the chimney in order to identify the damaged areas. For a perfect look, you should remove even the loose bricks. You should use a hammer and chisel to break away any loose brick or mortar. To sweep-away the debris, you should use a paintbrush.

Wet The Area

Once the area is clean, you should moisten the repair spots by soaking a sponge in water and placing it on the repair spots. You should moisten the area until the surface is able to retain sufficient moisture for about 10-15 minutes. You should be cautious that you don’t drench the mortar. In addition to wetting the repair surface, you should also wet the replacement bricks.

Repair The Surface

You should mix two parts of sand and one part of cement in a wheelbarrow (this will be your new mortar). You should then place ½-inch thick layer of mortar on the first piece of brick that you want to use.

You should then place 1½ inches of mortar onto the area where you want to lay your brick,  place your brick on the repair area, and press it down to reduce the mortar size. To ensure that the brick is strongly in place you should spread mortar on the three sides of brick.

Repair The Cracks

If your brick chimney has cracks, you should knock out the cracked mortar using a cold chisel and hammer. For ideal results, you should break out about ½ inch of mortar along the brick. You should then wet the brick and mortar (left behind) and slide the new mortar into the cracked area.

To catch any falling mortar, you should place a trowel or piece of wood beneath the area that you are repairing. After filling the crack, you should smooth it out the area using the flat edge of the trowel.

Conclusion

These are tips on how to repair a brick chimney. You should be careful when removing loose bricks so that you don’t damage the entire chimney. If you feel that you don’t have the right chimney repair skills, you should hire a professional to help you out.

The post Tips On How To Repair A Brick Chimney first appeared on First Class Chimney Services Maryland.

This post first appeared on https://www.firstclasschimneyservices.com

What You Need To Know About Chimney Relining

Chimney Cleaning, chimney company, chimney relining, chimney maintenance, chimney repair,

Chimney relining is the process of replacing an old or damaged chimney liner.  There are four main reasons why you should consider relining your chimney.

Reasons To Reline Your Chimney

Upgrade: if you have recently upgraded your chimney, you should consider relining it. The upgrade can be installing a smaller wood stove or fire place insert. For your chimney to be efficient you should ensure that the flue area matches the lining.

Damaged liner: is your chimney’s liner damaged? You should consider relining a chimney. Signs that your liner is damaged include: cracks in the clay liner and presence of broken pieces.

Cooling of flue gas: a malfunctioning chimney liner results to low flue gas temperature thus the draft weakens. Signs of a malfunctioning chimney are: visible staining, rapid creosote formation and water condensation.

How To Reline The Chimney

You should start by cleaning the chimney thoroughly and remove all creosote deposits that might be present. You should also correct any structural problems that might be on the chimney. If you had a clay liner, you should remove it and install a new one.

You should note that installation of a chimney liner requires special skills; therefore, you shouldn’t try to install the liner by your own—you should hire the services of a qualified chimney liner installer.

Cost Of Chimney Relining

There are many factors that determine chimney liner cost. These factors include: type of liner, size of your chimney and the purpose of the liner.

There are many chimney liner materials that you can go for. The most common ones are: clay, cement casing, and stainless steel.

Stainless steel liner is the most common as it’s easy to install. The liner is ideal for a wide range of applications such as wood, oil, and gas burning.  For it to provide you with high levels of efficiency you should ensure that it’s well insulated.

Clay and cement casting liners are difficult to install thus require specialized skills. The cool thing with them is that they last for decades when properly installed and taken good care of.

Conclusion

This is what you need to know about chimney relining. Although, it’s expensive to reline your chimney, you will save a lot of money over the long haul. According to experts, you will save up to $300 per year when your chimney is properly lined.

The post What You Need To Know About Chimney Relining first appeared on First Class Chimney Services Maryland.

This post first appeared on https://www.firstclasschimneyservices.com

(877) 959-3534