Month: July 2023

The Importance of Good Chimney Venting

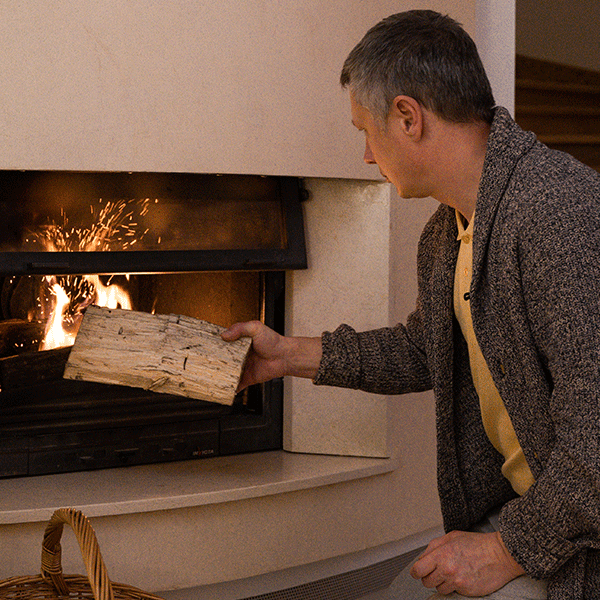
The goal of chimney ventilation is to assure the effective and safe removal of combustion byproducts from the interior of a building, such as carbon monoxide, sulfur dioxide, and other potentially dangerous gasses. A chimney is intentionally built vertically to allow the exhaust from your fireplace to rise up and escape out of the chimney flue. However, if a chimney is not properly vented, these harmful pollutants can seep back into your home. In this blog we will cover all of the chimney venting basics and how you can make sure your chimney is venting properly.

What are the Purposes of Chimney Venting?

Chimney venting serves several key purposes:

Exhaust Harmful Gases

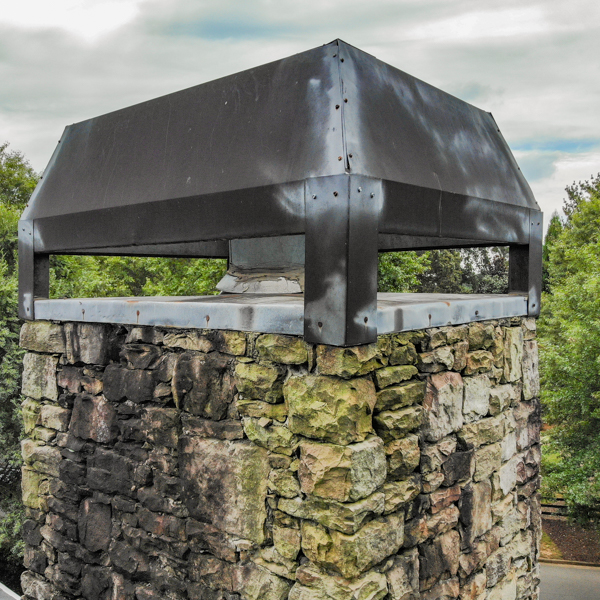
The flue lining is primarily used to carry flue gases up and out of your home or building. This can be exhaust from your fireplace, wood stove, boiler, furnace or water heater – all use the chimney for venting. According to common code, “the flue liner, chimney inner wall or vent inner wall shall be continuous and free of cracks, gaps, perforations or other damage or deterioration that would allow the escape of combustion products, including gases, moisture and creosote.”

Draft Enhancement

A chimney draft is the natural or induced flow of air through a chimney system. The movement of air is induced by the temperature difference between the air inside the chimney and the air outside the chimney and can be highly affected by a poor venting system. Similar to a straw with a hole in it, a continuous venting system that lacks gaps and obstructions is critical for suitable venting of combustion byproducts and the effective operation of fuel-burning appliances, including fireplaces.

Combustion Air Supply

Fuel-burning appliances require an adequate supply of fresh air to carry out the combustion process; tight rooms and basements restrict this important function. Inadequate airflow can result in incomplete combustion, lower efficiency, and the formation of hazardous byproducts such as carbon monoxide as we mentioned before. Makeup (combustion) air is a principal factor for proper draft and imperative for high efficiency or closed combustion units such as gas inserts.

Kinds of Chimney Ventilation

Steel

The most common type of chimney venting is steel. Steel, depending on alloy, can be used for all fuels and come in a variety of different sizes and shapes to meet your venting needs.

Plastic

Plastic venting, polypropylene and cPVC, are becoming more common with the popularity of modern high efficiency boilers. These heating appliances have low burning temperatures and produce more condensation than your standard atmospheric heating equipment, which makes plastic venting a great and cost effective choice.

Cerfractory Coating

Developed in Europe, Cerfractory coating is an ideal choice for fireplaces. Made of recycled and naturally occurring materials, when applied, Cerfractory restores the integrity of the chimney without reducing the venting area like steel products.

chimney cleaning

How to Ensure Proper Chimney Ventilation

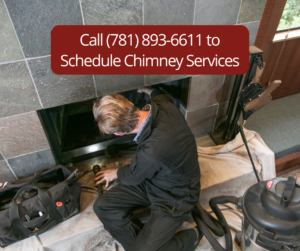
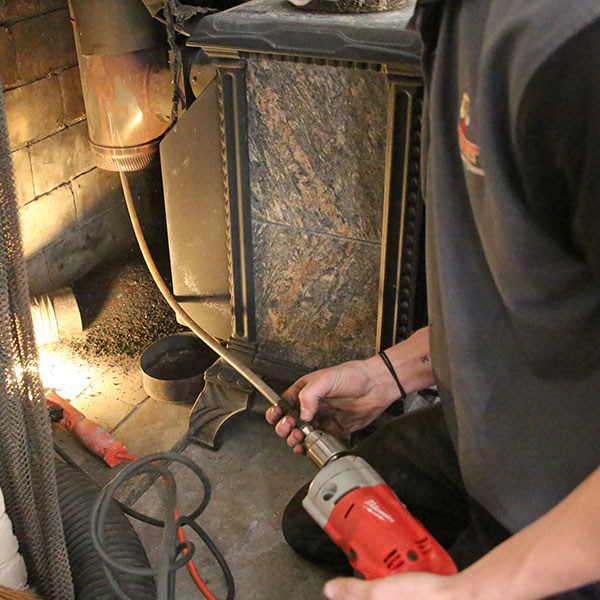
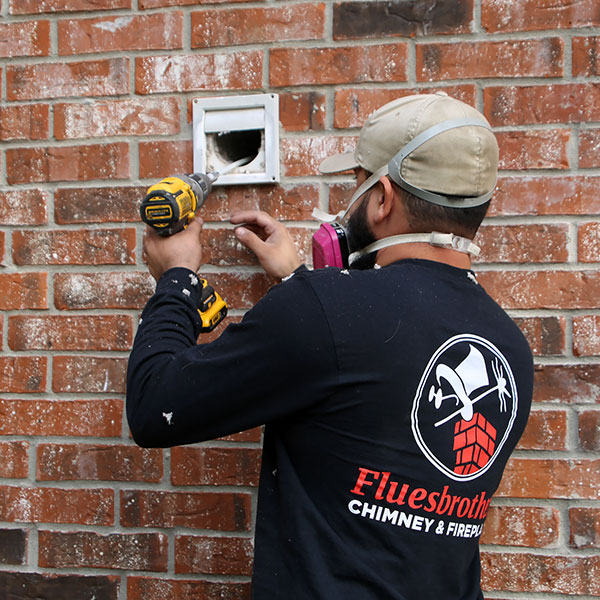
A poorly vented chimney can quickly cause major problems, so it is important that homeowners know what to look out for to ensure their chimney is safe to use. If your fireplace is becoming very smokey or if the smoke seems stagnant and unable to travel up the chimney this could be a sign of poor venting. Or if you notice the smoke is being pushed back into your home this is also a major warning sign. The best way to ensure that your chimney has a proper venting system is to get regular chimney inspections. A professional chimney inspector will make sure that there are no blockages and that everything is working how it’s supposed to. Let us help you out and give you peace of mind. Click here or give us a call to get started!

The post The Importance of Good Chimney Venting appeared first on Boston's Best Chimney.

Most Common Fireplace & Chimney Repairs

Owning a fireplace is not just about making memories next to a warm blaze in winter. It is critical to keep up with maintenance, such as tending to the most common fireplace repairs. When such things are neglected, the cost is far greater than it would otherwise have been. Homeowners are often simply unaware that chimneys need frequent monitoring. Moisture causes more problems than all other masonry issues combined. The following are among the most common fireplace repairs needed.

Chimney Cleaning and Sweeping in Newington CTCreosote Removal

If you have a wood-burning fireplace, chimney cleaning is usually needed annually because of creosote buildup. Creosote is a black, tar-like substance that is deposited in the chimney flue every time the fireplace is used. Creosote is the cause of some of the most common fireplace repairs that might be needed. There are dangers linked to creosote. Because the sooty substance is highly flammable, creosote increases the risk of hazardous chimney fires. If there is excessive creosote buildup, the chimney can become obstructed. A blocked chimney results in toxic fumes going inside the home instead of up and out of the chimney.

Leaky Chimney

If you’ve discovered that your chimney is leaky, it’s best to call certified chimney sweeps without delay. There are numerous possible causes of a chimney leak. The first step in addressing the problem will be to pinpoint the cause. A leaky chimney may be caused by the following, to give a few examples:

 The chimney flashing has come loose, or it has rusted
 The chimney crown has cracks in it
 The mortar on the chimney has been flaking and breaking off
 The chimney cap is damaged or missing

Flue Liner Damage

The chimney flue liner is an important safety component of the fireplace system. Of all the most common fireplace repairs needed, none are more critical than the repair or replacement of the flue liner. If there is any small breach in the liner, the fireplace should not be used until the problem is fixed. Flue liner repair is not usually practical because chimneys are typically built with clay tile liners. Repairing clay tiles involves a complete or partial chimney rebuild. A stainless- steel liner is the recommended type of replacement for a damaged flue liner.

Damaged Masonry

The mortar on chimneys expires after about 25 years, though bricks can last more than a century. Replacing mortar is among the most common fireplace repairs chimney sweeps make. When mortar deteriorates, it can allow water to infiltrate the chimney system.

Masonry Repairs in New Britain CT

Any brick that has water in it must be replaced because the water freezes and thaws in winter, causing movement of the spongelike brick interior. Eventually, the bricks will flatten, causing the chimney to lean and possibly collapse.

Call to Schedule Chimney and Fireplace Repairs

Northeastern Chimney LLC provides reliable services such as the most common fireplace repairs. Every technician is a certified chimney sweep, which means we can handle the uncommon and most difficult problems that arise. Contact us to get just the help you need for your fireplace and chimney. We fix leaky chimneys, repair damaged masonry, install flue liners, clean chimneys, perform chimney inspections, and much more.

Call us at (860) 233-5770 or contact us online to schedule a consultation today.

The post Most Common Fireplace & Chimney Repairs first appeared on .

The post Most Common Fireplace & Chimney Repairs appeared first on .

This post first appeared on https://www.mychimney.com

Beware of 4 Things with a Historic Home Chimney

Atlanta’s housing market boasts countless historic homes with unrivaled southern charm. Most of these homes are located in Atlanta’s most popular neighborhoods and fastest growing areas. We all know that purchasing a historic home comes with unique obstacles and is often filled with the unexpected. If you are willing to take on the challenges, owning a historic home can be incredibly rewarding. It is most common to first look at the interior of the home and consider what to expect, so let’s take it outside and look at what to expect from a historic chimney.   

Historic home chimney

Historic Home Chimneys May Not Have Flue Liners

Chimney flue liners are an extremely important component of the chimney, as they keep toxic gas, heat, and creosote inside the flue and outside of your home. Flue liners were not required by code until 1927, so most historic homes built prior to that date do not have them. Lighting a fire in a chimney without a flue liner can be dangerous to the health of you and your loved ones. Contact us if your historic home doesn’t have a flue liner or if you are unsure whether one has been installed. Our professionals will determine if a liner is in place and which type best suits your home if one is absent. We’ll also happily install the correct flue liner for you! 

Structural Damage to Historic Home Chimneys

The structure of historic home chimneys is composed of old weathered brick and mortar which usually cracks and decays over time. There are often loose and deteriorated bricks which is called “spalling”. Spalling causes the chimney to lean and possibly collapse. Few owners of historic homes realize the extent to which their chimney is in need of restoration, and how time sensitive it might be to complete. Structural repairs are the most important but there is often a lot of work required to bring a chimney up to current codes as well as cosmetic issues to address. It is important to have a professional inspection completed to address the structural problems, code adherence, and cosmetic issues. A professional chimney inspection can help you get ahead of masonry damage and avoid a full rebuild.    

Excess Creosote Forms in Historic Home Chimneys

Creosote forms every time you use your fireplace. If not consistently cleaned, buildup occurs, causing a fire hazard. This solid, flakey or sticky substance naturally builds up in your flue over time. Historic chimneys often host excessive creosote build up due to the age of the structure and lack of a chimney flue. It is difficult to remove the excess build up without harming the structural integrity of the chimney. Our professionals are trained in the delicate work of removing creosote buildup. We will ensure that your chimney is safely cleaned and structurally sound.  

Decorative Structural Interior Pieces in Your Historic Home

Historic homes often have built-in wooden bookshelves, cabinetry, or wood trim next to the chimney. These features might be beautiful but they are a fire hazard and against current code. It is understandable that homeowners want to preserve the historic decorative elements of the home without compromising their safety but it is a challenging task to do so. However, adjustments can be made to the chimney structure to accommodate for these historic decorative elements and allow them to remain in place. It is truly a rewarding project for our professionals to make your chimney safe while maintaining the characteristics provided by the decorative structural interior pieces.       

Historic chimneys require a lot of detailed work, but are one of our favorite projects. We would love to get yours up to current code while maintaining its unique character. Give us a call today to schedule a visit from one of our professionals.  

The post Beware of 4 Things with a Historic Home Chimney first appeared on Southern Chimneys.

This post first appeared on https://southernchimneys.com

Do Unused Chimneys Need Ventilation?

If you’re no longer using your chimney or fireplace, it’s logical to think that your chimney can be left alone – especially when you as a homeowner will always have a long list of to-do’s. However, even unused chimneys and fireplaces need to be added to that to-do list. Unused chimneys that don’t receive care can lead to mold in your home, damage your roof, and cause internal chimney deterioration which will cost you a headache and money in the long run.  

It’s an overwhelming problem, but it’s easy to avoid! The solution: chimney maintenance. Continue reading to learn why even unused chimneys need maintenance. If you get stressed along the way, we encourage you to contact us because we’re here to help!

What Is Chimney Ventilation?

Now that you know your unused chimney needs to be maintained, it helps to understand what chimney ventilation is first. But what is chimney venting and why do we need it? Chimney ventilation is the process in which your chimney releases the by-products from combustion out of your home. This process also allows the chimney to draw in air to balance the natural pressure plane of a home. The main takeaway is that even with unused chimneys,  ventilation is still important for home health. Read our blog to understand how a chimney works for more background.

Do Unused Chimneys Need Ventilation?

Yes! You wouldn’t think that your unused chimney needs ventilation, but actually, chimney ventilation is necessary to keep your home safe. And this is still true for fireplaces that aren’t used. Ventilation will keep your chimney from trapping and building up moisture inside the structure because it encourages air to travel in and out of your chimney. Build up of moisture will lead to mold that can spread into your home and affect your health, and it may not be fixable with a professional chimney cleaning. This can also lead to your chimney and roof damage that will be costly.   

What Vents Through a Chimney?

Even if you don’t use your fireplace, chances are your chimney is still being used to vent the heat and hot water.  Boilers, water heaters and furnaces all need a path to remove exhaust and gasses from the building envelope.  A secondary tunnel (flue) travels around that unused fireplace and down to the basement where the equipment is located. Learn about why chimney venting is important here or  Schedule an appointment to learn more about your chimney system.

Not sure if the heating appliances vent through the chimney?  Go down to where the equipment is located and see if the pipe coming off the appliance runs to the chimney base or sidewall.   If it’s the chimney base, you have a heating flue!

If You Want To Use Your Unused Fireplace 

If you want to start using your unused fireplace, it’s important that you verify whether or not you have a venting system and whether or not it’s working. This is something a team of chimney professionals can check on for you. But you should consider booking an appointment to take care of the problem sooner rather than later. The first will be booking a chimney inspection and providing an annual sweep of the flue (the passageway of the chimney). This inspection will help determine any other steps you’ll need to take in order to use your fireplace again. A chimney chemical cleaning may be recommended, or you may find out that you need to install a venting system. Whichever the next step is, we can help you during an appointment.

How do I Ensure Proper Ventilation For My Chimney?

The process of ensuring proper ventilation to a chimney is as easy as picking up the phone because that’s all you’ll need to do! Give us a call or Schedule your visual inspection here!

Contact Best Chimney for Your Boston Area Chimney Ventilation Needs

Best Chimney Services is ready to help with your chimney needs in the Boston, MA, area. Click here or call (781)893-6611 for inspections, repairs, installations, and more.

The post Do Unused Chimneys Need Ventilation? appeared first on Boston's Best Chimney.

Things to Do Before Starting Your First Fire

If you have a wood-burning fireplace, chilly weather has a silver lining: it gives you an excuse to make a blazing fire.

Fire becomes a fantastic focal point for a traditional or modern room. But before you start it, make sure you’re prepared. To help you out, here are ways given by chimney contractors to ensure that your chimney is ready for the fire:

Assess the situation

Not all fireplaces are visually appealing. Some have beaten-up mantels and ruined surrounds in older homes; in newer homes, they may need more personality.

In each case, a small alteration — or a few tweaks — can give a fireplace a new look without completely replacing it.

While you could replace your mantel with a new one, this isn’t always essential. Never underestimate the power of a good coat of paint.

If the mantel already has a finish or paint, lightly sand it to provide a smooth and even surface for the new paint to cling to. You should sand along the direction of the wood grain with a fine-grit sandpaper.

While at it, fill any cracks, gaps, or dents in the mantel with wood filler or putty. Sand it again after the filler has dried to make it flush with the rest of the mantel.

Priming is necessary, especially if you paint over a dark or shiny surface. A high-quality primer will improve the adhesion of the new paint and produce a more even finish.

When selecting the paint, choose a paint appropriate for your mantel’s material. Use a high-quality latex or oil-based paint with a finish of your choice. This can be satin, semi-gloss, or high-gloss on timber mantels.

If your fireplace gets exceptionally hot, ensure the paint is heat-resistant.

Begin by painting the edges and corners of the mantel with a brush, then cover the bigger areas with a roller. Apply thin, even layers of paint, allowing each to dry completely before applying the next. This prevents drips and creates a smoother finish.

Consider distressing or antiquing the mantel once the paint has dry if you want a vintage or aged look. You can achieve this by softly sanding specific sections or applying a glaze.

Add andirons

Andirons are metal supports that raise the logs inside the fireplace, allowing air to circulate beneath the logs and improving combustion.

A set of andirons or a fireplace grate is essential for getting air beneath logs and preventing them from rolling onto the hearth. They also improve both its looks and utility.

When choosing andirons, choose those that match the style and size of your fireplace. They are available in various materials, such as cast iron, brass, or stainless steel, and in various designs to complement diverse decor themes.

Obviously, you should measure the width and depth of your fireplace to ensure that the andirons you choose will fit snugly within. The andirons should be long enough to support the logs and have enough clearance beneath them to allow air to flow freely.

Once in place, check that the andirons are steady and securely placed. They should be level and not unstable because they will bear the weight of the logs when in use.

Add a fire screen.

If your fireplace lacks built-in doors or metal-mesh curtains, a fire screen is required to keep sizzling logs from shooting hot embers into the room.

There are many different styles to choose from, including flat-panel types that almost disappear while in use, folding models with numerous panels, and those that curve out into the room, which often seems more traditional and give easier access to the fire.

The most important thing is to use a style that is appropriate for the size of the firebox opening. It won’t accomplish its job if it’s too small, and it’ll look odd if it’s too huge.

The majority of fire screens are built of metal mesh. However, glass models are becoming increasingly popular. They provide a clear view of the fire and can block some of the heat, which may or may not be beneficial depending on the room.

Have a place for firewood.

You’ll need logs on hand to keep the fire going and a place to keep them. Many manufacturers sell metal racks and leather slings for holding a few logs by the fire, but almost any large-scale, attractive container will suffice.

You can also look for large, durable baskets made of natural materials that can hold at least a day-and-a-half’s worth of firewood. The beauty is that the buckets also collect dirt and wood shavings that fall from the logs, keeping the debris off the floor.

Clean the fireplace

Gather the appropriate cleaning tools before you begin. To protect the surrounding area, you’ll need a drop cloth or plastic sheet, a dust mask, gloves, a small shovel or scoop, a stiff brush or fireplace brush, a handheld brush or vacuum cleaner with a brush attachment, and a bucket.

You should sweep the internal walls and floor of the fireplace using a stiff brush or fireplace brush. This will aid with the removal of loose debris, soot, and creosote accumulation. To avoid damaging the surface of the fireplace, be thorough but delicate.

Use a glass cleaner or a vinegar-water mixture to clear soot or filth from your fireplace’s glass doors. Before shutting the doors, make sure they are totally dry.

If you haven’t used the fireplace in a while, inspect the chimney for any obstructions or signs of damage. Inspect the chimney for bird nests, trash, or creosote accumulation. If you’re worried about the state of your chimney, consider contacting a professional chimney sweep Ellicott City for an examination and cleaning.

Make it cozy

Place a large, soft chair or chaise longue directly next to the fireplace to create a cozy place to enjoy the fire.

You can also create spaces with cushioned stools that sit immediately in front of the hearth, just a few feet away from the flames.

As much as you want to get the most from your fire, ensure that the seats aren’t too close and are at risk of catching fire. You also should ensure that the seats are comfortable for you to sit in them for extended periods of time.

The post Things to Do Before Starting Your First Fire first appeared on First Class Chimney Services.

This post first appeared on https://www.firstclasschimneyservices.com

When’s The Last Time You Had Your Dryer Vent Cleaned?

When’s the last time you had your dryer vent cleaned? Although most folks in Independence, MO, Lenexa, KS, and throughout the KC KS/MO area know the importance of regularly cleaning their chimney to prevent a house fire, the dryer vent is often overlooked. This is unfortunate because your dryer vent is also an essential part of your home’s ventilation system. Our service cleans the entire dryer venting system, including the connector hose and ducts. This helps to remove moisture and lint stuck in those vents, hoses, and ducts, preventing it from sparking a fire.

Dryer Vent Cleaning in Lees Summit MO
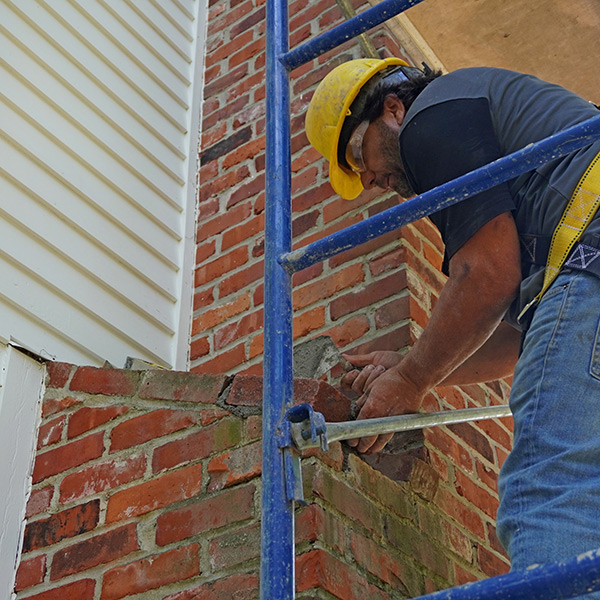
According to the US Fire Administration (USFA), nearly 3,000 clothes dryer fires occur annually. In addition to more than $233 million in property damage every year, these fires cause a number of injuries and fatalities.

Signs Your Dryer Vent Cleaning is Overdue

There are several signs to look for indicating that it’s time to have your dryer vent cleaned.

  • You smell a burning odor.
  • You hear the dryer making strange noises.
  • You see lint or debris around the dryer vent or connector hose.
  • Your laundry takes longer to dry.
  • Your clothes are damp.
  • Your energy bills are higher.

So, if you notice any of the above signs -OR- it has been over 12 months since your last dryer vent cleaning, it is time to schedule your next service call.

Dangers of Clogged Dryer Vents

A clogged dryer vent can put your home and family at risk for several severe hazards, including:

House fire: Lint is highly flammable, and a clogged dryer vent can trap hot air and debris, creating a fire hazard. Clogged dryer vents are among the leading cause of dryer fires in the US.

Carbon monoxide poisoning: A clogged vent causes carbon monoxide to build up in your home. Carbon monoxide is a toxic, colorless, odorless gas that can be fatal.

Damage to your dryer: When the dryer vent needs cleaning, the appliance must work harder than it should, which shortens its lifespan. It can also cause your dryer to overheat, damaging the appliance. The heat buildup can also spark a fire.

Higher energy bills: When the vent is blocked, your dryer operates less efficiently, resulting in a spike in energy bills.

Musty odor: A clogged dryer vent also traps moisture, leading to a musty smell in your laundry room. The higher humidity can attract mold spores, which can be hazardous to family members with allergies, asthma, and other respiratory issues.

How Often Should Your Dryer Vent Be Cleaned

While cleaning the dryer’s lint tray after every use is vital, the National Fire Protection Administration (NFPA) recommends professional dryer vent cleaning at least once yearly to keep your home and family safe. However, some experts recommend cleaning every six months or twice per year.

Professional Dryer Vent Cleaning and Inspections in Kansas City MO
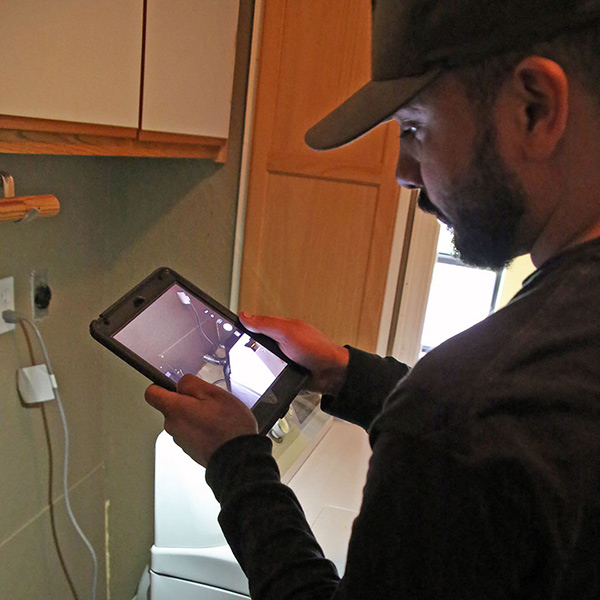
Kansas City Dryer Vent Cleaning Services

Professional dryer vent cleaning is the best way to minimize repairs and prolong the lifespan of your appliance while reducing the risk of fire. So, if it has been more than a year since your last cleaning, Call Fluesbrothers at (913) 236-7141 to schedule a visit, or use this handy form to contact us online today! We serve the entire Kansas City, KS/MO metropolitan area, including De Soto, KS; Overland Park, KS; Blue Springs, MO; and Lee’s Summit, MO.

The post When’s The Last Time You Had Your Dryer Vent Cleaned? first appeared on Fluesbrothers Chimney Service.

The post When’s The Last Time You Had Your Dryer Vent Cleaned? appeared first on Fluesbrothers Chimney Service.

Why You Should Close Your Damper During Summer

Your fireplace is a cozy centerpiece that served you well this past winter. It’s summer now, but that doesn’t mean you can ignore your fireplace. One item to check off your summer fireplace to-do list is to close the damper and keep it closed all summer, and in this post, we’ll tell you why.

Top Mount Chimney Damper in Prairie Village KS
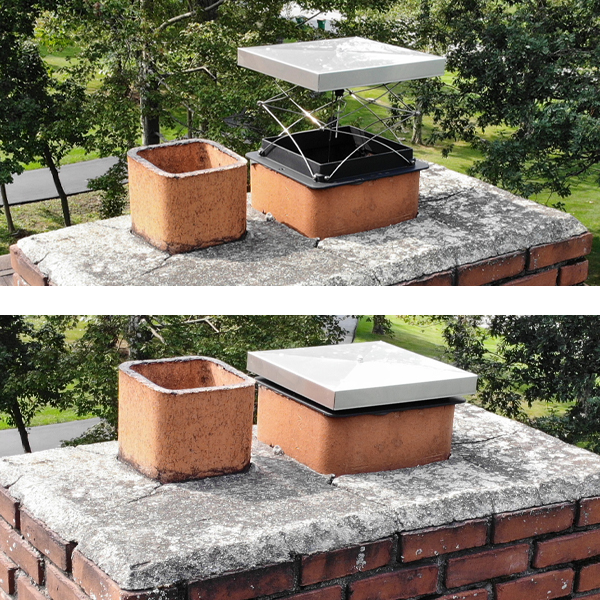
What is a Fireplace Damper?
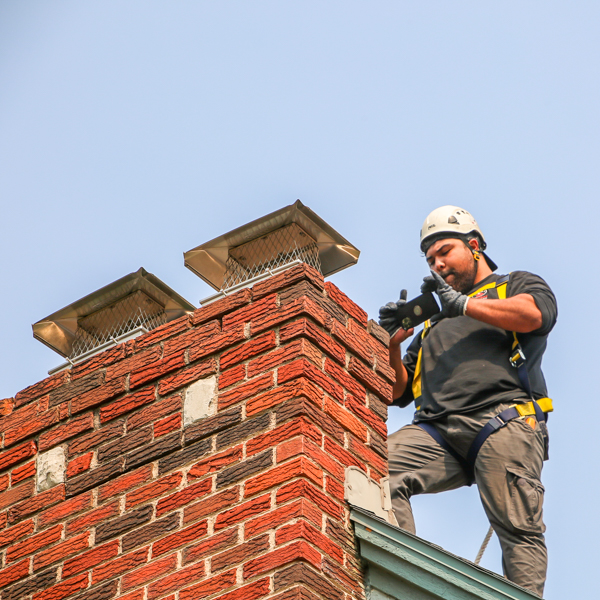
The damper is an essential component that rests above the firebox. This metal piece seals the fireplace from the chimney system. Most dampers are adjustable with a lever or handle, allowing you to control the airflow when using the fireplace. If the damper was installed correctly and is in good condition, it should form an airtight seal.

Damper Myths

Unfortunately, there are a lot of myths that encourage people to leave the damper open during summer, so let’s debunk those now.

Myth 1: An Open Damper Keeps Your Home Cooler

Contrary to popular belief, leaving the damper open doesn’t help your home stay cooler. The thought goes like this: Since heat rises, the warm air in your home will escape up the chimney, leaving your home cooler. However, an open damper can counteract your air conditioning system, allowing the outside air to enter and raise the temperature inside. This makes your AC system work harder and can lead to higher energy bills.

Myth 2: An Open Damper Airs Out the Chimney

Another misconception is that leaving the damper open during summer will help the chimney ventilate, reducing odors caused by soot and creosote buildup. But, an open damper can allow water to seep in, which makes the odors worse.

Myth 3: The Chimney Cap Is Enough

Some homeowners think that the chimney cap alone is enough to protect the chimney and firebox, so the open or closed damper doesn’t matter. It’s true that a properly-fitting cap will prevent debris, water, and critters from getting it; they won’t block airflow or drafts if the cap is ill-fitting or damaged.

Why You Should Keep Your Damper Open During Summer

Now that we’ve debunked the myths about leaving your damper open, here are the reasons to keep it closed.

Energy Efficiency

Closing the damper when you’re not using your fireplace is a good habit to get into in winter and summer because it can significantly impact your indoor temperature. In summer, an open damper can cause your HVAC system to work overtime to keep you cool, putting more wear and tear on the system and raising energy bills.

Preventing Foul Odors

If you own a fireplace, you know how smelly it can get after using it all winter. This odor goes away with a thorough chimney cleaning, but in the meantime, keeping the damper closed will prevent creosote and soot odors from overpowering your home.

Chimney Inspections in Leawood KSHome Protection

As mentioned, rainwater, debris, and animals can get into your home if your chimney cap is damaged or you don’t have a cap.

Call the Fluesbrothers

We’re the go-to chimney and fireplace company in Kansas City because we do it all — sweeping, inspections, repairs, installations, and rebuilds. Our technicians are certified by the Chimney Safety Institute of America and the National Fireplace Institute so that you can trust their work is done safely and up to professional standards. Call us today at 913–347–8611.

The post Why You Should Close Your Damper During Summer first appeared on Fluesbrothers Chimney Service.

The post Why You Should Close Your Damper During Summer appeared first on Fluesbrothers Chimney Service.

Chimney Maintenance: 5 Steps to Make Sure Your Chimney Is in Working Order 

If you have a chimney in your home, ensuring it’s in good working order is essential. An unchecked chimney can lead to various issues, including structural damage, health hazards, and even house fires.  

Fortunately, you can take some simple steps to ensure your chimney is functioning correctly. And in this blog, we’ll take you through 5 steps that’ll help make sure that your chimney is working at its maximum efficiency. 

Step 1: Check for Visual Signs 

Inspect the Exterior of the Chimney 

Take a walk around your home and inspect the exterior of the chimney. Check for cracks, missing bricks, or mortar joints in poor condition. If you notice any of these issues, it is essential to have them repaired as soon as possible. Moisture can seep into the chimney, causing more damage. 

Examine the Chimney Cap 

While you’re up on the roof, take a look at the chimney cap and make sure it’s in working order. The chimney cap is a metal or concrete cover that sits on top of the chimney. It prevents rainwater, debris, and animals from entering the chimney. Over time, the chimney cap can become damaged or rusted, allowing water and debris to enter the chimney. Therefore, examining the chimney cap for any signs of damage is essential.  

If you notice any issues, it is best to have it repaired or replaced as soon as possible. 

Step 2: Clear Obstructions 

Before you light your first fire of the season, it’s essential to make sure your chimney is free of any obstructions. Here are a few things you should do to clear any debris from your chimney. 

Remove Branches, Leaves, or Any Other Debris 

Check the area around your chimney for branches, leaves, or other debris that may have fallen onto your roof. Use a broom or brush to sweep away any debris that you find. If you leave debris on your roof, it can easily find its way into your chimney, causing a blockage that can be difficult to remove. 

Look for Bird Nests or Signs of Animal Activity 

Birds and small animals often make their homes in chimneys during the warmer months. Check your chimney for any signs of bird nests or animal activity. If you see any, you’ll need to remove them before you can use your fireplace safely. 

If you don’t clear obstructions from your chimney, you risk starting a fire in your home.  

Step 3: Evaluate Soot and Creosote Buildup 

It’s important to regularly evaluate the amount of soot and creosote buildup in your chimney. These substances can cause blockages, increase chimney fire risks, and reduce efficiency. 

Signs of buildup include: 

  • A strong odor coming from your chimney 
  • A buildup of black soot, or  
  • A buildup of a shiny, tar-like substance 

If you notice a significant amount of soot or creosote buildup in your chimney, it’s essential to schedule a cleaning as soon as possible. Ignoring the buildup can increase the risk of a chimney fire and cause damage to your chimney.  

Step 4: Assess Flue Functionality 

The damper or flue controls the flow of air and smoke through the chimney. If the damper or flue is closed, it can cause smoke and soot to enter your home, leading to health hazards and damage to your property. 

After opening the damper or flue, use a flashlight to inspect the flue. The flue is the interior part of the chimney that carries smoke and gases out of your home. Obstructions can prevent smoke and gas from exiting the chimney, leading to a buildup of carbon monoxide in your home. 

Also, check for any signs of damage, such as cracks or holes. Damage to the flue can also cause smoke and gases to enter your home, leading to health hazards and property damage. If you notice any damage, call a professional chimney sweep to repair it. 

Step 5: Ensure Safety Devices 

To ensure your chimney is safe, you must confirm that all safety devices are in working order. Here are some tips to help you confirm that these safety devices are working properly. 

Confirm the Chimney Cap is Secure and Undamaged 

The chimney cap prevents debris, animals, and rainwater from entering. A damaged or missing chimney cap can lead to water damage, blockages, and even fire hazards. Make sure that the chimney cap is not damaged. 

Test the Chimney Damper 

The chimney damper is a metal plate that helps to regulate the temperature and prevent downdrafts. To test the chimney damper, follow these steps: 

  1. Open the damper entirely and look into the chimney to ensure it is open. 
  1. Close the damper and ensure that it is fully closed. 
  1. Light a match and hold it up to the damper. If the smoke goes up the chimney, the damper is open. If the smoke stays in the room, the damper is closed. 

It is dangerous to have a malfunctioning damper since it can allow smoke and carbon monoxide to enter your home. In addition, your fireplace will be less efficient, resulting in rising energy costs. 

Inspect and Clean the Spark Arrestor Screen 

The spark arrestor screen is present at the top of the chimney, preventing sparks and embers from escaping and causing a fire. To inspect and clean the spark arrestor screen, use a ladder and climb to the roof to check for any signs of damage or blockages, such as rust or debris. 

A damaged or blocked spark arrestor screen can cause sparks and embers to escape, leading to a fire hazard. Inspecting and cleaning the screen regularly is important to ensure it works properly. 

If you don’t have the time or resources to do a full chimney sweep, you can hire a professional chimney inspection team to do it for you. It’s recommended to have your chimney cleaned at least once a year, but if you use your fireplace frequently, you may need to have it cleaned more often. 

Contact our experts at Southern Chimneys to book a chimney inspection.  

The post Chimney Maintenance: 5 Steps to Make Sure Your Chimney Is in Working Order  first appeared on Southern Chimneys.

This post first appeared on https://southernchimneys.com

Why Is My Chimney Discolored?

Over the years your chimney goes through a lot of abuse. Not only from the wear and tear that your chimney endures on a regular basis. There are noticeable stains that can be seen on your chimney. Some stains are normal from regular wear and tear, but there are stains that can be concerning. Let’s address a few common stains that may occur on your chimney.

Chimney Staining and Chimney Leaks in New Britain CT Common Reasons Why Stains Happen
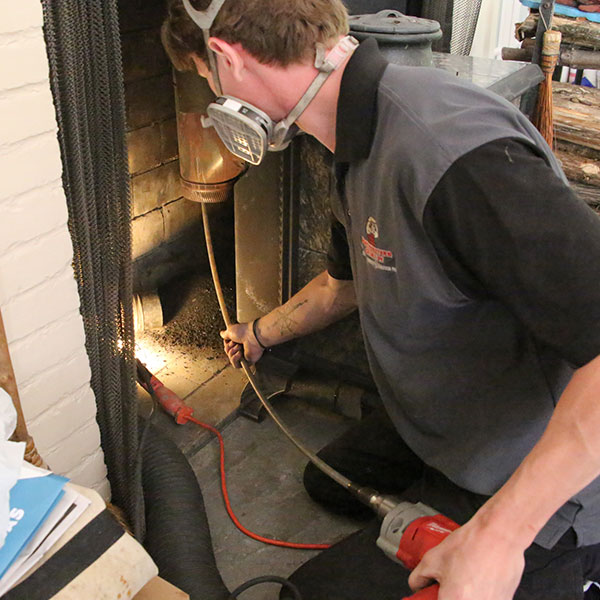
Some common reasons you may see stains on your chimney could be Algae Growth, Creosote, Corrosion / Rust, Mineral Salts, Mildew / Mold, Paint Run-Off, and Soot Build-Up. Each type of stain can be caused by a different factor.

Let’s talk about the various types of stains that you may see on your chimney.

Different Types of Stains

Black soot stains – Black and brown stains are often caused by excess creosote. Creosote is caused by regular use of the fireplace, as well as the use of green wood or unseasoned wood. A chimney not regularly swept will also cause black soot stains. Smoldering fires at low temperatures will cause creosote as well.

Dark Brown and Green Stains – This is typically a sign that there is mold growing in the chimney. Mold is caused by excessive moisture, like efflorescence. This can be caused by mold on the outside of the house. A clogged gutter can be causing the issue.

Red / Rust-Colored stain – Metal chimneys, antenna mounts, or other metal may have rusted leaving a reddish-brown color. A rusted cap may cause a rust stain on your chimney bricks. Over time they can deteriorate and cause problems.

White stains – Efflorescence is a mineral salt left on the surface of brick as water evaporates from it. This is caused by excessive moisture within the chimney structure. This is a normal occurrence that happens when water evaporates and then salt comes to the surface.

Green stains – Dark green stains on the outside of the chimney are caused by algae growth. This is seen in areas where water has been allowed to pool. Usually near the cap or where there is not an appropriate overhang.

Identifying these stains is important in the correction of any of these issues. First and foremost, once you identify these issues you need to reach out to a professional to help with the situation.

Chimney Sweeping in Rocky Hill CT

Annual Sweep and Inspection

That is your first step in identifying any problems that may occur. We service all of Hartford, Tolland, and Litchfield County. All our Chimney Technicians are CSIA certified. We are active in the National Chimney Sweep Guild (NCSG) and the Chimney Safety Institute of America (CSIA).

In addition, Northeastern Chimney, Inc. maintains a rigorous training schedule and a strict code of performance and ethics. As members of the NCSG, we stay on the cutting edge of the latest technologies in sweeping and masonry repair. Click on the logo to visit the NCSG website.

Every one of our chimney sweeps (not just the owner) are fully certified by the CSIA. That means that the sweep we send to your home has proven expertise in the sweep industry. Contact Northeastern Chimney, LLC at 860-233-5770 or send our office a message with our online contact form.

The post Why Is My Chimney Discolored? first appeared on .

The post Why Is My Chimney Discolored? appeared first on .

This post first appeared on https://www.mychimney.com

Stages Of Wood Combustion

Fire is one of the most potent forces of nature. Its recorded use dates some 420 million years ago (Silurian Period) when early man rubbed two charcoal sticks together to create this mysterious heat source known as fire. So, how is fire really produced, and what three ingredients MUST ALWAYS be present? Read on as we uncover the mystery and magic of the wood combustion process.

seasoned logs for wood burning fireplace in Newington CTThe Fire Triangle

For an object to combust into flames, three ingredients MUST be present: heat, fuel, and oxygen, aka The Fire Triangle.

Heat

Heat is required to start a fire. The heat can come from various sources, such as a match, a lighter, or a spark from a fire starter, such as kindling, twigs, or creosote

Fuel

Fuel is any material that burns. Common fuels include wood, paper, liquified petroleum (natural LP gas), and propane.

Oxygen

Oxygen is essential for combustion. Without oxygen, a fire will not be able to survive.

The fire will burn out if you remove any of these three ingredients. For example, if you remove the heat, the fire will cool down until it burns itself out. Without fuel, the fire will have nothing to burn. And if you remove the oxygen, the fire will not be able to breathe and die out.

Combustion Process Defined

The four stages of combustion are the ignition delay period, the period of uncontrolled combustion, the period of controlled combustion, and the afterburning period. These stages occur in all internal combustion engines, but they may vary in length and intensity depending on the type of engine and the fuel being used.

Ignition Delay Period: The ignition delay period is the time between the injection of fuel into the combustion chamber and the start of combustion. This period occurs because it takes time for the fuel to vaporize and mix with the air in the chamber. The length of the ignition delay period depends on the fuel type, the air temperature, and the engine’s compression ratio.

Period of Uncontrolled Combustion: Once the fuel starts to burn, it does so rapidly in uncontrolled combustion. This is also known as the flame front or the burn. The flame front propagates through the combustion chamber at a very high speed, and the pressure increases rapidly.

Period of Controlled Combustion: The combustion process becomes more controlled after the initial flame front. This is because the fuel and air are more thoroughly mixed, and the pressure in the chamber is higher. The combustion process in this stage is more efficient, producing less emissions.

Afterburning Period: The afterburning period is the final stage of combustion. It occurs when any unburned fuel or air dissipates. The afterburning period is typically very short.

Combustion Process of Wood-Burning Fireplaces

The four stages of combustion also apply to wood-burning fireplaces. When you light a fire in a fireplace (or heating stove), the wood goes through the same combustion process. Here are some tips for managing the four stages of combustion in a wood-burning fireplace:

Start with dry wood. Burn dry or “seasoned” hardwoods. It will result in a shorter ignition delay period with a more efficient combustion process.

Provide adequate air supply. Open the damper fully. A proper draft is essential for complete combustion. If the air supply is too low, the fire will not burn efficiently, resulting in more smoke, soot, and creosote buildup.

Wood Burning Fireplace Use in Simsbury CT

Manage the fire. You must tender the flames once the fire is established to maintain a controlled burn. This means adding more wood as needed and adjusting the damper to maintain sufficient airflow.

By understanding the four stages of combustion, you can help ensure your wood-burning fireplace burns safely and efficiently.

Professional Chimney Inspection & Cleaning

Keep your chimney and fireplace safe and efficient with the help of Northeastern Chimney. We are the premier provider of chimney inspections, cleaning, repairs, and installations in Greater Hartford and Central Connecticut. Our certified chimney sweeps will ensure that your chimney is operating properly and safely, so you can enjoy your fireplace all season long.

Call us today at (860) 233-5770 or contact us online to schedule a consultation. We look forward to helping you keep your home safe and warm.

The post Stages Of Wood Combustion first appeared on .

The post Stages Of Wood Combustion appeared first on .

This post first appeared on https://www.mychimney.com

(877) 959-3534