Month: November 2023

Can You Reface A Brick Fireplace?

When it comes to enhancing the aesthetic appeal and functionality of your home, the fireplace often plays a central role. But what if your once-charming brick fireplace now seems outdated or doesn’t blend with your evolving interior design? At Lindemann, we frequently encounter this question from homeowners: Can you reface a brick fireplace? The answer is a resounding yes, and we’re here to guide you through the process.

Understanding Fireplace Refacing

Fireplace refacing is an artful process of revamping the existing fireplace to give it a fresh, new look. This transformation often involves covering the old surface with new materials, such as stone, tile, or wood. The purpose of refacing is not just to update the fireplace’s appearance but also to improve its efficiency and durability.

The decision to reface a fireplace usually stems from a desire to update the home’s interior design or to repair aging and worn-out materials. Refacing offers a practical alternative to completely rebuilding the fireplace, saving both time and resources. Moreover, it allows homeowners to customize their fireplace to better reflect their current style and decor preferences.

The Refacing Process

Refacing a brick fireplace is a meticulous process that transforms the heart of your home. It begins with a thorough inspection to ensure the structural integrity and suitability of your existing fireplace. This stage is crucial for a safe and successful refacing project. The steps typically include:

  • Inspection and Assessment: A professional evaluates the fireplace’s condition, checking for any damage or issues that need repair before refacing.
  • Design Planning: Based on the inspection, a design plan is formulated, considering the homeowner’s preferences and the fireplace’s structural constraints.
  • Surface Preparation: The brick surface is cleaned and prepared to ensure a strong bond with the new materials. This may involve leveling the surface or applying a new layer of mortar.
  • Material Installation: The chosen refacing materials are meticulously installed. This step varies significantly depending on the material, whether it’s stone, tile, wood, or another option.
  • Finishing Touches: Once the main material is in place, additional touches like grout, sealant, or trim are added to complete the look and ensure durability.

Material Options for Refacing

Choices for refacing materials range from classic stone to contemporary tile, rustic wood panels, or even sleek metal finishes. Each material brings its unique aesthetic and functional benefits:

  • Stone: Offers a timeless, durable facade that complements various styles.
  • Tile: Provides endless design possibilities with various colors and patterns.
  • Wood: Adds warmth and rustic charm but requires careful consideration regarding heat resistance and safety.
  • Metal: Creates a modern, industrial look and is typically easy to maintain.

Design Considerations

Choosing the right design for your fireplace refacing is both an exciting and challenging task. It requires a balance between personal style, the architectural character of your home, and practical considerations. Your design choice sets the tone for your living space, making it crucial to select wisely. Here are key factors to consider:

  • Complementing the Home’s Style: Ensure the refacing complements the overall style of your home, whether it’s modern, traditional, or rustic.
  • Color Scheme: Select a color palette that blends well with the room’s existing colors or creates a striking contrast for a bold statement.
  • Material Texture and Pattern: The texture and pattern of the refacing material can add depth and character to the room. Consider how different textures interact with the room’s lighting and furnishings.
  • Scale and Proportion: The size and proportion of the refacing should align with the room’s dimensions and ceiling height. Oversized designs can overwhelm a space, while too small a design might not make the intended impact.
  • Functionality and Safety: Choose materials and designs that not only look good but also adhere to safety standards, especially in terms of heat resistance and durability.

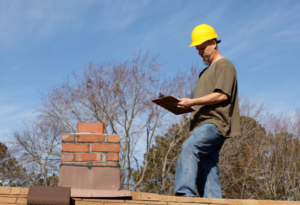
The Role of Professionals

For a project like this, professional expertise is indispensable. Experienced technicians from Lindemann can assess structural concerns, navigate the complexities of material choices, and ensure that the refacing adheres to local building codes. Our team ensures a seamless transformation with utmost attention to safety and quality.

Maintenance After Refacing

Once a fireplace has been refaced, maintaining its new appearance becomes a priority. Regular cleaning is essential, especially for materials like tile and stone, to prevent soot and dust buildup. For wood surfaces, occasional treatments or sealants may be necessary to protect against heat and moisture.

In addition to cleaning, it’s important to schedule regular inspections with professionals like those at Lindemann. These inspections can identify any potential issues early on, such as cracks or loosening materials, ensuring the fireplace remains safe and functional. Timely maintenance not only preserves the beauty of your refaced fireplace but also extends its lifespan, ensuring it remains a centerpiece in your home for years to come.

Final Thoughts

Refacing your brick fireplace can significantly change the ambiance of your living space. Whether seeking a modern update or a restoration to its former glory, Lindemann has the expertise to bring your vision to life.

Why Does My Furnace Keep Turning Off?

Welcome to Lindemann’s resource library, where we bring clarity to your chimney, fireplace, and heating & cooling queries. Today, we’re tackling a common concern among homeowners: “Why does my furnace keep turning off?” This issue, while frustrating, can often be attributed to a few key factors.

Safety Precautions

Safety should always be your foremost concern when dealing with furnace issues. Furnaces, if not properly maintained or operated, can pose significant risks. Below are critical safety precautions to follow, ensuring your home’s heating system operates safely and effectively.

  • Carbon Monoxide Detectors: Install and maintain carbon monoxide detectors near your furnace and in sleeping areas.
  • Don’t Ignore Smells or Sounds: If you notice strange smells or sounds coming from your furnace, shut it off immediately and call a professional.
  • Keep Flammable Items Away: Ensure no flammable materials are stored near the furnace.
  • Educate Your Household: Make sure all household members know how to shut off the furnace and who to call in case of an emergency.
  • Avoid DIY on Complex Repairs: While basic maintenance can be a DIY task, complex repairs should always be left to professionals.
  • Turn Off Gas and Power During Repairs: Always turn off the gas and power supply to your furnace before performing any maintenance.

Common Reasons Why Furnaces Turn Off (And Their Solutions)

Understanding why your furnace frequently turns off is crucial for maintaining a comfortable and safe home environment. Many factors, ranging from simple fixes to more complex issues, can contribute to this problem. Let’s explore the six most common reasons why furnaces turn off, providing insights into each issue and how they impact your heating system’s performance.

1. Thermostat Issues

The thermostat is the command center for your furnace. Incorrect settings or malfunctions can lead to frequent on-and-off cycles.

Solution

Check the thermostat settings and ensure it’s on “heat” and set to the right temperature. If the problem persists, consider consulting a professional for a thorough inspection.

  • Check Settings: Verify that the thermostat is set to ‘heat’ mode and the desired temperature is correctly set.
  • Battery Replacement: If the thermostat is battery-operated, replace the batteries to ensure proper functioning.
  • Wiring Check: Inspect the wiring for any loose connections or damages. This should be done by a professional.
  • Upgrade or Replace: Consider upgrading to a programmable thermostat for better efficiency and control.

2. Overheating

Furnaces have built-in safety features that shut them down when overheating is detected. This can be due to restricted airflow or a faulty heat exchanger.

Solution

Regular maintenance, such as changing filters and ensuring vents are clear, can prevent overheating. If overheating continues, it’s essential to get a professional assessment.

  • Air Filter Maintenance: Regularly replace or clean air filters to ensure proper airflow.
  • Clear Vents and Registers: Make sure all vents and registers are open and not blocked by furniture or curtains.
  • Professional Inspection: Have a technician inspect the heat exchanger and internal components for any signs of damage or wear.
  • System Balance: Ensure that the system is properly balanced for even heat distribution.

3. Faulty Flame Sensor

The flame sensor safeguards against unburned gas. A dirty or malfunctioning sensor can misinterpret signals, causing the furnace to shut off.

Solution

Cleaning or replacing the flame sensor is a job for a trained technician, ensuring your furnace operates safely and effectively.

  • Regular Cleaning: Periodically clean the flame sensor to remove any buildup of soot or debris.
  • Sensor Alignment: Check that the sensor is correctly aligned with the furnace’s flame.
  • Professional Assessment: If cleaning doesn’t resolve the issue, a technician should assess whether the sensor needs replacement.

4. Ignition Problems

Problems with the ignition system can lead to the furnace not firing up correctly, causing short cycling.

Solution

Ignition system issues are complex and require professional intervention to diagnose and repair.

  • Ignition System Cleaning: Regular cleaning of the ignition components to prevent buildup.
  • Component Check: Inspect and replace any faulty ignition components like the pilot light or electronic igniter.
  • System Calibration: Professional calibration of the ignition system for optimal performance.

5. Dirty Air Filters

Clogged air filters restrict airflow, causing the furnace to work harder and potentially overheat.

Solution

Regularly replacing or cleaning your furnace filters can prevent many issues related to airflow.

  • Routine Replacement: Change air filters every 1-3 months, depending on usage and type.
  • Upgrade Filters: Use high-quality filters for better performance and air quality.
  • System Check: After replacing the filter, check the system for improved airflow and operation.

6. High-Efficiency Furnace Venting Issues

High-efficiency furnaces need proper venting. Blocked or improperly installed vents can cause shutdowns.

Solution

Regular inspection and cleaning of vents are crucial. It’s advisable to have these checked by professionals.

  • Vent Inspection: Regularly inspect and clean the venting system to ensure there are no blockages.
  • Proper Installation: Have a professional verify that the venting system is installed and functioning correctly.
  • Check for Leaks: Ensure there are no leaks or cracks in the venting pipes.

Preventative Maintenance Tips

Regular maintenance is key to ensuring the longevity and efficiency of your furnace. By following some simple preventative measures, you can avoid common issues that lead to furnace malfunctions. Here are essential maintenance tips to keep your furnace running smoothly and efficiently.

  • Regular Filter Replacement: Change your air filters every 1-3 months to ensure proper airflow and prevent overheating.
  • Annual Inspections: Schedule a professional inspection and maintenance service annually, ideally before the heating season begins.
  • Keep Vents Clear: Regularly check and keep all vents and registers in your home unobstructed for efficient heating.
  • Test Thermostat Functionality: Regularly check your thermostat to ensure it’s working correctly and replace the batteries as needed.
  • Clean the Furnace Area: Keep the area around your furnace clean and free from debris to prevent fire hazards and improve efficiency.
  • Monitor Furnace Performance: Pay attention to any unusual noises, smells, or performance issues and address them promptly.

Final Thoughts

While some furnace problems can be resolved with simple checks and routine maintenance, others require the expertise of a professional. At Lindemann, we’re dedicated to ensuring your heating system runs smoothly and efficiently. If your furnace keeps turning off, don’t hesitate to contact us for expert service and peace of mind.

How Long Does It Take To Install A Furnace?

As winter approaches, the importance of a reliable heating system becomes increasingly evident. At Lindemann, we often encounter a common question from homeowners: “How long does it take to install a furnace?” This article aims to shed light on the factors that influence the installation time of a furnace, ensuring you’re well-informed and prepared for this essential home upgrade.

Factors Affecting Furnace Installation Time

Understanding the time it takes to install a furnace is not a one-size-fits-all answer. Several key factors can influence the duration of the installation process. let’s explore these variables to give you a clearer picture of what to expect during your furnace installation.

  • Type of Furnace: The installation time can vary significantly based on the type of furnace you choose. Traditional gas furnaces typically require more time due to the need for gas line connections, whereas electric furnaces might be quicker to install.
  • Size and Complexity of the System: Larger homes or those requiring a more complex system, such as zoned heating, will naturally take longer to outfit with a new furnace. The complexity of the ductwork and the specific needs of your home play a crucial role in determining the installation timeframe.
  • Preparation and Prior System Removal: If your home has an existing heating system, its removal can impact the overall installation time. Preparing the space and ensuring all old components are safely and efficiently removed is a vital step in the process.
  • Professional Expertise: The experience and skill of the installation team are pivotal. At Lindemann, our team of certified professionals ensures a swift and efficient installation, reducing any potential delays.

Typical Timeframe for Furnace Installation

Once you’re familiar with the factors that affect installation time, it’s helpful to know what a typical furnace installation timeline looks like. This section provides a general overview of the time frames you can expect for each phase of the installation process. Keep in mind that these are estimates and can vary depending on your specific circumstances.

Assessment and Planning (~2 Hours)

The initial phase of furnace installation involves a comprehensive assessment and planning, usually taking a couple hours. During this period, our experts at Lindemann will conduct an in-depth evaluation of your home’s heating requirements, the layout of your existing heating system, and any specific needs or preferences you might have.

This careful planning ensures that the installation process is streamlined and customized to your home’s unique characteristics, setting the stage for a smooth and successful installation.

Installation Process (Up To 8 Hours)

The core of the furnace installation, which is the actual installation process, typically spans 4 to 8 hours for most homes. The duration of this phase depends on various factors, including the complexity of your home’s heating system, the type of furnace being installed, and the specific installation requirements.

Our team at Lindemann focuses on efficiency and attention to detail during this stage, ensuring that your new furnace is installed with precision and care to deliver optimal performance and longevity.

Final Testing and Quality Check (~2 Hours)

Once the installation is complete, the final phase involves a thorough testing and quality check, usually completed within a couple hours. This crucial step involves a meticulous examination of the entire system to ensure that the furnace operates safely and efficiently.

Our technicians at Lindemann perform a series of checks, including testing the ductwork for proper air flow, calibrating the thermostat for accurate temperature control, and inspecting all safety features to guarantee a reliable and secure heating solution for your home.

Cost Implications Of A New Furnace

When it comes to installing a new furnace, understanding the cost is as important as understanding the time it takes. The price of furnace installation can vary widely, depending on factors like the type of furnace you choose, the size of your home, and the complexity of the installation process.

At Lindemann, we believe in transparency and will provide you with a detailed estimate that includes the cost of the furnace unit, labor, any additional parts or modifications needed, and potential unforeseen expenses. It’s important to consider that investing in a more efficient furnace can lead to long-term savings on energy bills, despite a higher upfront cost. We also offer various financing options to help make this crucial home improvement more accessible for our customers.

Safety and Compliance

Safety is our top priority in every furnace installation project at Lindemann. Our certified technicians adhere strictly to local building codes and industry safety standards to ensure your new furnace is installed safely and efficiently. We recognize that proper installation is critical not only for the furnace’s performance but also for the safety of your home and family.

This includes thorough testing for gas leaks in gas furnaces, ensuring proper ventilation, and checking all electrical connections. Additionally, we stay informed and compliant with the latest safety regulations and advancements in furnace technology, providing you with peace of mind knowing your heating system is installed with the utmost care and professionalism.

Final Thoughts

Understanding the timeframe for installing a new furnace helps in planning and preparing for the process. At Lindemann, we pride ourselves on offering efficient, professional furnace installation services, tailored to your specific needs. Remember, a proper installation is crucial for the longevity and efficiency of your heating system, so choosing the right professionals is key.

For more information or to schedule an installation, contact us at Lindemann. We’re here to ensure your home stays warm and comfortable all winter long.

My House Looks Like a Fireplace!

Installing a chimney smoke guard can be a crucial part of keeping your home safe during the winter. Have you ever been inside an old hut where ancient people used to live? If you have ever traveled Europe, you might’ve run across such huts called Skansen. Inside the Skansen are small fireplaces with handmade fireplaces and chimneys. A common problem the ancient people had was the toxic smoke getting stuck inside the house. The simplest way they removed the smoke was by keeping the doors and windows open. That method may have worked, and removed a decent amount of the smoke. But, it also got rid of the heat! Today, we have a more technologically based method to remove smoke from inside the home while also keeping the heat inside. Chimney smoke guards are often the solution. 

Why Might You Need A Chimney Smoke Guard?

If you notice any smoke inside your home after lighting up the fireplace, you might be in need of a chimney smoke guard. 

  1. Poor placement of the grate: One common cause of smoking problems is the improper placement of the grate in the firebox. If the grate is placed too far forward, it allows part of the fire to be too close to the front of the firebox. This can interrupt the flow of smoke up the chimney, leading to smoke entering the room.
  2. Oversized grate: An oversized grate can also cause smoking problems. When a large grate is used, it allows more firewood to be burned at once. This can result in a larger fire that is positioned too close to the front of the firebox, obstructing the proper flow of smoke.
  3. Partial obstruction of the flue: Another potential cause of smoking problems is a partial obstruction of the flue. Over time, debris such as raccoon, squirrel or bird nests, leaves, or creosote buildup can accumulate in the flue, restricting the passage of smoke. This blockage can force the smoke back into the room instead of allowing it to escape through the chimney.

How Can Chimney Smoke Guards Help?

Chimney smoke guards are efficient solutions to address a number of smoking problems in fireplaces. These guards are designed to improve the airflow and prevent smoke from entering the room. Properly positioning chimney smoke guards can create a barrier that redirects the smoke back up the flue. This helps to minimize smoke backup and ensures that the smoke is removed through the chimney. Using a chimney smoke guard can also help reduce the accumulation of soot on the face of the fireplace. By redirecting the smoke up the flue, it minimizes the chances of soot settling on the fireplace, keeping it clean for longer periods.

Need A Chimney Smoke Guard?

Installing a chimney smoke guard is a precise process that can be done by a Superior Chimney professional. It involves securing the guard near the lintel of the fireplace’s opening and ensuring it is properly aligned. It is more complex than it sounds, and chimney smoke guards are something that should be professionally installed. If the installation is done poorly, it can cause a worse smoking problem. Don’t let your home look like the inside of a Skansen! Call Superior Chimney today at 877-244-6349.

This post first appeared on https://www.superiorchimney.net

Holiday Gatherings… and Drafty Fireplaces?

This year’s Thanksgiving was filled with family gatherings, comfort food and… drafty fireplaces? There really is nothing quite like gathering around a cozy fireplace, eating food and talking to friends, but this year was a little bit different. A drafty fireplace was in the mix at our Thanksgiving dinner, sending damp and cold air into the home. How was that possible? The chimney was doing fine all summer. As the colder weather rolls through Chicagoland, some people are lighting fireplaces before getting their chimney inspected by a professional. Sometimes, we even hear that people are inspecting their own chimneys and unknowingly overlooking big problems! Now, they are experiencing drafty fireplaces and a heap of potential other issues.

How Do Drafty Fireplaces Occur?

A drafty fireplace is often caused by poor ventilation and/or insulation. When cold air enters through gaps and cracks, it can lower the temperature of your home, leading to discomfort and higher energy bills. Additionally, a drafty fireplace allows warm air to escape, reducing the efficiency of your heating system. 

Here are some examples of what a Superior Chimney professional will do or recommend to help drafty fireplaces:

1. Seal Cracks and Gaps

Inspect your fireplace for any cracks or gaps where air might be entering or escaping. Use heat-resistant masonry void filler or mortar to seal these openings. Pay particular attention to areas around the chimney, hearth, and mantel. By sealing these gaps, you can prevent drafts and conserve energy.

2. Install Fireplace Doors

Fireplace doors not only add aesthetic appeal but also serve as an additional barrier between your living space and the chimney. They can help to prevent drafts by keeping warm air in and cold air out. We recommend choosing doors that fit snugly and are made from heat resistant materials such as tempered glass or metal.

3. Use a Fireplace Insert

We recommend installing a fireplace insert. These inserts fit directly into your fireplace and provide better heat distribution. They often come with blowers or fans to circulate warm air throughout your home, reducing fireplace drafts.

4. Heat Reflective Shield For Your Fireplace

A fireplace heat shield can really improve the performance of your fireplace. Oftentimes, mortar joints begin to deteriorate and so do the fire bricks. We recommend repairing the fire bricks and installing a heat reflective shield. As much as 20% – to 40% more heat goes into your home instead of out, saving you money and reducing deterioration. 

Wrap Up The Turkey and Seal Up the Fireplace! Don’t let a drafty fireplace ruin your future holiday experiences. Your holiday guests will be coming for the Christmas meal soon enough! A drafty fireplace can be smelly and undesirable, bringing an uncomfortable atmosphere to the holiday dinner table. A chimney inspection by Superior Chimney can help you prevent chimney leaks, further damages and drafty fireplaces. It should be done once a year, ideally in warmer weather, to ensure there is no damage. However, now is not too late! An inspection can still be done in the winter months. It’s recommended to register for a chimney inspection today by calling Superior Chimney today at 877-244-6349.

This post first appeared on https://www.superiorchimney.net

What is a Level 3 Chimney Inspection?

Chimney inspections are necessary in order to keep your chimney in proper working order and to ensure that your home or building are safely heated. However, many property owners aren’t aware that there are three types of chimney inspections: Level I, II, and III. Each of these inspections can help prevent dangers like carbon monoxide leaks and chimney fires. They will also help keep your chimney running well and help avoid costly and time-consuming issues in the future.

At Best Chimney Services, we’ve been inspecting chimneys since 1989. Our team of knowledgeable chimney technicians is compassionate about keeping our clients’ homes safe. We offer a variety of residential chimney services and commercial chimney services to help a range of clients. We urge you to call us with any of your chimney concerns or questions! One of the necessary services we provide are level 3 inspections. In this blog we will discuss what a level 3 chimney inspection entails. 

When is a Level 3 Chimney Inspection Needed?

A level 3 chimney inspection is the most extensive and invasive chimney inspection out of the three types (I, II, and III). This inspection is needed when the findings of a level 1 or level 2 chimney inspection suggest that there could potentially be an unidentifiable fire or safety hazard lurking beyond the visible area.  It’s common for damage to be found if you’ve had a chimney fire or experienced any other big event that has negatively affected the chimney. Our chimney technicians recommend a level 3 chimney inspection when your chimney has experienced one of these events or if they suspect that there is a potential safety hazard that a prior inspection cannot identify.

What Does a Level 3 Chimney Inspection Involve?

The level 3 chimney inspection process is invasive because it involves all aspects of the level 1 and 2 inspections, as well as a range of tools to reach concealed areas.  This may include opening up walls or parts of the chimney structure.  The level 1 inspection comes first.

Level 1 Inspection

The chimney technician will conduct a basic level 1 inspection by examining the readily accessible components of your chimney to ensure they’re intact and functioning. They’ll also examine the structure and masonry for any water damage or creosote buildup. This step is fairly simple because it’s the most common and focuses on a visual inspection. Next, the chimney technician will conduct a level 2 inspection.

Level 2 Inspection

Level 2 inspections are common when you’ve made a change to your chimney or fireplace. The technician will take a video scan of the inside of the chimney to get a more in-depth look, while also inspecting the accessible parts of the chimney like the attic, roof, crawl space, and basement. From there, the technician will move on to inspect more concealed areas of the chimney – a level 3.

Level 3 Inspection

Depending on the hazard the technician finds during the first two inspections, they’ll need to look deeper into the chimney’s components to discover the source of the problem. The Chimney Safety Institute of America explains that this process can involve the removal of certain components, but that this is only done when necessary. This can include removing drywall, exterior walls surrounding the chimney, the chimney crown, or the interior chimney walls so that the technician can access the flue or other hidden parts. When the inspection is complete, the technician will be able to identify a solution to the problem and recommend the next steps to take.

How Often Do You Need a Chimney Inspection?

Now that you know what a level 3 chimney inspection involves, you may be wondering how often you should book your chimney inspection. Our goal is for you to need to book a level 3 inspection as infrequently as possible. To reduce the types of problems that trigger level 3 chimney inspections, you should book an annual level one chimney inspection with us. Our experts will use this more basic inspection to ensure that your chimney is being maintained and kept in proper, working order. We recommend booking with us at least once a year so your chimney never goes unchecked. However, if you’ve made any changes to your heat or hot water equipment recently, book a chimney inspection today so that we can ensure the installation was done well and that everything is working smoothly as a result. 

Call Best Chimney Services for All Your Inspection Needs

Chimney inspections are recommended in order to keep your home and family safe. By taking the initiative to book your annual chimney inspections with us, we can determine if a level 3 chimney inspection is needed sooner rather than later. You’ll also help us catch any problems before they can get too costly and unsafe. Call us today to get started!

The post What is a Level 3 Chimney Inspection? appeared first on Boston's Best Chimney.

How Often You Should Have a Commercial Chimney Inspection

Commercial chimney inspections are one of the most important services we offer as chimney technicians. When you put off these necessary inspections, your chimney and building can encounter costly damages and can experience long boiler shut down periods that directly affect tenants.

We urge our clients to book routine industrial chimney inspections with us so that they can avoid these problems. At Best Chimney Services, we’ve been dedicating ourselves to our clients’ chimneys since 1989. Our chimney technicians are certified by the Chimney Safety Institute of America (CSIA). If you’re looking for a team of reliable chimney technicians who will take care of your home or building, give us a call. In the meantime, learn how often you should have a commercial chimney inspection.    

Why Are Industrial Chimney Inspections Necessary?

From avoiding costly problems to keeping your residents safe, there are numerous reasons why your chimney needs to be inspected. The number one reason chimneys need to be inspected is to prevent carbon monoxide spillage and identify needed repairs to avoid it. An inspection helps us ensure that components of the chimney are functioning and that there are no visible hazards, like creosote buildup or obstructions, that are unsafe. Obstructions located within the venting area prevent the proper exhaust of commercial and industrial boilers. If this is found during an inspection, a technician would recommend a commercial chimney sweep to reduce risks. With a routine chimney inspection, our technicians can help you identify and avoid costly, dangerous problems like these.

How Often Should You Book an Inspection?

We recommend that you book a commercial chimney inspection annually. This is especially important if your commercial chimney is used often. With an annual inspection, our chimney technicians can ensure that all of your critical chimney components are in working order. You don’t want to jeopardize the safety of anyone inside or risk damage to your building by neglecting an appointment that’s only necessary once a year. However, if you notice anything wrong, like a cracked chimney, don’t wait until your annual inspection! We urge you to call us if you ever have any questions so that we can help and provide the right advice. 

What to Expect from an Industrial Chimney Inspection

There are different types of commercial inspections and they can be tailored to your needs.  From visual assessments to camera, drone and more, annual maintenance doesn’t have to be complex, but it should be consistent.  

During our industrial chimney inspections, we look for issues like:

If our chimney technicians come across any of these issues, they’ll determine the next steps to take care of the problem, keeping you informed every step of the way.

Call Best Chimney Services for Your Commercial Chimney Inspections

If you’re in the Greater Boston Area with a commercial or residential chimney, give us a call! We not only offer inspections but also commercial chimney sweeping, commercial stack repair and replacement, commercial chimney venting, and a range of residential chimney services. Book an appointment with us today to ensure your building and chimney are safe!

The post How Often You Should Have a Commercial Chimney Inspection appeared first on Boston's Best Chimney.

Snowfall Woes: Handle Snow in Your Chimney Like a Pro

With the arrival of cold weather comes snowfall and all the things you associate with it, like shoveling snow, clearing snow from your windshield, and even building snowmen. You may not think about the consequences of snow building up on your chimney. Do we have your attention now? Don’t worry; there is an answer. Here is a guide to snowfall woes: How to Handle Snow in Your Chimney Like a Pro.

The Unseen Damage of Snowfall on a Chimney

snow and water damage on chimneys in Shawnee KSThe Snow’s Weight

There are several types of damage that snow can cause to your chimney. Masonry chimneys are especially vulnerable to snow damage. It can build up on your chimney when it snows, causing it to bear extra weight. When the weight becomes too great, it can cause parts of your chimney to bow, which in turn can lead to expensive repairs. 

Melting Snow

Even more damaging than snow’s weight on your chimney is melting snow. Why? Because if you have a masonry chimney, its bricks or stone are baked by the sun nearly year-round. After a few years of baking in the sun, the bricks or stones start to break down, making them more porous and giving them a capillary action much like that of a sponge. When your chimney hasn’t been maintained by a qualified chimney sweep service, your chimney’s bricks or stones are likely porous. When it snows on your chimney, and the snow begins to melt, the chimney will absorb it; temperatures will probably drop below freezing the same night, causing the water the bricks or stones have absorbed to expand and cause them to break down further. After a few of these cycles, your chimney’s bricks or stones will begin to spall; you will see telltale signs such as a white powder on the outside of the chimney or pieces of brick or stone on the ground. When your chimney begins to crumble, it must be repaired immediately to prevent it from collapsing.

Rust from Snow

When snow invades your chimney, it will cause its metal components to become rusted to the point where they need to be repaired or replaced by a certified chimney sweep service.

chimney cap installations in Prairie Village KS
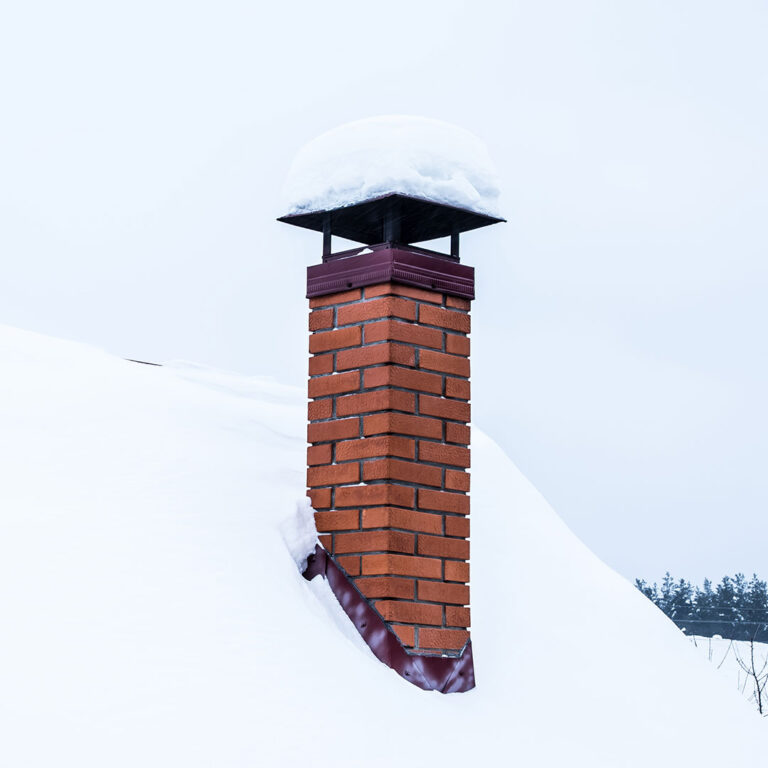
How Do You Protect Your Chimney from Snow?

The best way to protect your chimney from the ravages of snow and ice is to hire a professional chimney sweep service to winterize it. The best time to winterize your chimney is before winter, but that doesn’t mean it can’t be winterized in winter. The sooner you winterize your chimney, the less likely snow or ice will cause damage.

If your chimney lacks a chimney cap, one should be added. It adds an extra level of protection against snow, rain, or hail from getting inside your chimney and causing damage.

Fluesbrothers Is the Chimney Winterizing Expert

We have been winterizing chimneys just like yours for well over a decade in the greater Kansas City area. Call us today at 913-236-7141 or fill out our online contact form if you suspect your chimney has structural issues. One of our chimney experts will be happy to answer any questions you may have and schedule an appointment. Don’t wait until your chimney has extensive snow damage; get in touch now.

The post Snowfall Woes: Handle Snow in Your Chimney Like a Pro appeared first on Fluesbrothers Chimney Service.

5 Chimney Safety Tips for the Winter Season

As the winter wind howls outside, few things compare to cozying up by a roaring fire. But before you strike that match, let’s chat chimney safety.

You’ve heard the horror stories — creosote build-up igniting explosive chimney fires or unseen cracks letting smoke back inside. With a little know-how, though, you can stay toasty and smoke-free. From wood selection to flue maintenance, we’ll cover everything you need to safely enjoy that fireplace all season long.

So, pull up a chair, pour yourself a mug of cocoa, and get ready to learn the secrets to keeping your home warm and toasty this winter:

  • Choose the Right Type of Wood

The type of wood you burn significantly impacts chimney safety. Softwoods like pine and fir release more smoke and creosote, while hardwoods like oak and hickory produce comparatively less smoke.

Beyond just hardwoods versus softwoods, the specific type of fuel you use can impact creosote build-up and require different handling. For example, fruitwoods like apple produce more creosote than other hardwoods since the natural sugars don’t burn as completely.

Wet or freshly cut wood can contain 50% or more moisture and even if dried, causes more smoke and creosote issues. A moisture meter, while not pinpoint accurate, can provide a good general read. Wood should be below 20% moisture content for safe, efficient burning. Mixing seasoned and unseasoned wood is risky as wet fuel causes creosote build-up.

Make sure the wood  you use is fully seasoned or dried. This usually takes 6-18 months for hardwood, depending on storage. And wood stored indoors will take longer to season than if kept outside and covered.

As winter approaches, make sure to cut and prepare wood for burning. Split logs allow moisture to escape faster than rounds, so accumulate such logs and store them in dry places for easy access.

  • Take Proactive Steps to Facilitate Proper Ventilation

Proper ventilation is key to removing smoke and preventing creosote build-up or carbon monoxide poisoning during the winter. There are a few things you can do to help with ventilation.

Proper size of chimney flue: The chimney flue should be the right size for the appliance, typically 6 inches for 6-inch wood stoves or more.

Proper functioning of damper: Make sure dampers open fully for airflow. Close the damper when not in use to prevent dangerous backdrafts. In extremely cold weather, leave the damper open slightly and have a small fire to prevent condensation and creosote build-up inside the flue from the temperature differential.

Use chimney cap: Install and maintain capping and screens on terra cotta flues to block rodents and debris from entering. A chimney cap and rain collar to prevent moisture/snow entry that could cause cracking or damage. Inspect the cap periodically for damage or gaps, as rodents or bird nests near the chimney cap can become a fire hazard that can also block smoke from exiting.

Strategically install vents and windows: Consider installing an intake vent near the floor and an exhaust vent near the ceiling to encourage airflow through the home. Open windows slightly during operation as well. Negative pressure in tightly sealed homes can pull smoke down the chimney instead of up.

  • Monitor Indoor Air Quality

One of the most critical yet hazardous gases to look out for is carbon monoxide. It’s an invisible, odorless gas that can be deadly within hours of exposure. Install at least one carbon monoxide detector on each level of the home, especially near bedrooms where family members spend long periods.

Look for detectors certified to the latest UL 2034 standard, and never ignore low-battery chirps. Replace batteries twice annually, such as during daylight saving time changes. Detectors should be replaced every five years.

Place detectors at least 15 feet away from fireplaces and stoves to avoid false alarms from temporary spikes in CO levels during use. Mount them high up, such as on the ceiling, to catch any gases that may stratify near the roofline.

While carbon monoxide detectors near floor level are a must-have, consider additional sensors placed higher to catch any leaks. New photoelectric detectors can also monitor other air pollutants from incomplete wood combustion, like particulate matter and nitrogen dioxide.

If you’re using an air purifier, you can also install a sensor connected to an air purifier that automatically turns on as levels rise. This proactive solution can improve indoor air quality on smoky or cold days when extra draft is needed. You can even go as far as pairing detectors with ventilation and filtration for comprehensive indoor air monitoring during fireplace season.

  • Master the Art of Layering Logs

How you load wood into the fireplace or stove can affect draft and burn efficiency. The standard advice is to use a tic-tac-toe log layout, but there is an art to it. Experiment with different crisscross and log cabin patterns, varying the direction logs point and size of air gaps.

Pay attention to how each pattern influences the burn. More open designs may smoke less but require more frequent stoking.  Closed patterns may burn slower and hotter, but they produce less smoke. Experiment with different log sizes and arrangements to find the optimal setup.

Tighter configurations hold heat longer but could cause creosote build-up. Master various layouts to suit your fuel moisture, weather conditions, and desired burn time or intensity.

  • Don’t Forget Annual Inspections

No matter how well you maintain your fireplace or stove, cracks and damage can still occur in the chimney over time. An annual chimney inspection by a certified chimney sweep is essential for safety.

Look beyond essential creosote removal to check the flue, damper, and exterior termination for signs of corrosion or cracks that could allow carbon monoxide to enter the home. Catching issues early prevents costly repairs and potential accidents down the road. Make sure to schedule inspections before winter use each year so that your chimney and fireplace are ready and prepped to keep you warm.

Hire an Expert Chimney Sweep for Proper Winter Inspection

Keep your home warm, your family safe, and your chimney clean this winter with a professional inspection and cleaning.

Southern Chimneys has been keeping the chimneys of Atlanta in tip-top shape for decades. Our certified and insured sweeps can inspect your entire flue system, clean out any built-up creosote, make any necessary repairs — and ensure safe, efficient operation all season long.

Don’t risk a dangerous chimney fire: call us today to schedule an appointment. You’ll enjoy peace of mind knowing your home’s heart is in good hands, and you’ll extend the life of your fireplace for many cozy winters to come.

Stay toasty safely; call us at (678) 744-4046 to schedule your inspection today.

The post 5 Chimney Safety Tips for the Winter Season first appeared on Southern Chimneys.

This post first appeared on https://southernchimneys.com

(877) 959-3534