What Is A Ductless Mini-Split System?

What Is A Ductless Mini-Split System?

In the world of home heating and cooling systems, one type of system is gaining popularity at a remarkable rate – the Ductless Mini-Split System. Despite its increasing use in both residential and commercial spaces, the ductless mini-split system is still a mystery to many. This blog post aims to break down what a ductless mini-split system is, how it works, and why it might be an optimal choice for your heating and cooling needs.

Overview Of Ductless Mini-Split Systems

A ductless mini-split system is an HVAC (Heating, Ventilation, and Air Conditioning) device that provides a flexible and energy-efficient solution for regulating room temperature. Unlike traditional systems that require a network of ducts to deliver air throughout a building, a mini-split system bypasses this need, leading to the ‘ductless’ moniker.

The system typically consists of two main components: an outdoor compressor/condenser and an indoor air-handling unit, linked by a conduit. This conduit houses the power cable, refrigerant tubing, suction tubing, and a condensate drain.

How Does It Work?

The workings of a ductless mini-split system are quite straightforward. The outdoor unit acts as the heart of the system, pumping refrigerant through the conduit to the indoor units. These indoor units, installed in specific zones or rooms, absorb heat from the air and transfer it to the outdoor unit in cooling mode. The process is reversed for heating mode. This mechanism allows for efficient temperature regulation without the need for extensive ductwork, which can lead to energy loss.

Advantages Of Ductless Mini-Split Systems

In an evolving HVAC landscape, ductless mini-split systems offer a range of advantages that set them apart from traditional solutions. These advantages, ranging from energy efficiency to flexible installation, make them a compelling choice for many homeowners and businesses.

  • Energy Efficiency: Ductless mini-split systems boast higher energy efficiency compared to traditional HVAC systems. The absence of ducts prevents energy loss that often occurs due to leaks, holes, or poorly connected ducts. Moreover, mini-split systems use inverter technology, which adjusts the speed of the compressor to match the system’s output to the required capacity of the indoor unit.
  • Zonal Heating and Cooling: Unlike centralized systems, mini-splits allow for zonal climate control. Each indoor unit can be controlled independently, providing personalized comfort throughout your home or office.
  • Installation Flexibility: As they do not require extensive ductwork, ductless mini-split systems are easier and quicker to install. The indoor air-handling units are compact and can be wall-mounted, ceiling-recessed, or even floor-standing, depending on your preference and space availability.
  • Quiet Operation: Mini-split systems are known for their quiet operation, as the noisy components (compressors and motors) are located outside the home or office.
  • Improved Air Quality: With traditional HVAC systems, air ducts need to be cleaned regularly to avoid dust, allergens, and other pollutants. The absence of ducts in a mini-split system inherently reduces these issues, leading to better indoor air quality.

Is a Ductless Mini-Split System Right for You?

The choice to opt for a ductless mini-split system depends on various factors like the size of your space, the climate in your area, and your specific heating and cooling needs. They are a fantastic choice for small to medium-sized homes, office spaces, or any place where installing or extending ductwork may not be feasible. They’re also an excellent option for spaces that need specific temperature regulation, like a home office, a basement, or a sunroom.

To summarize, ductless mini-split systems offer an energy-efficient, flexible, and user-friendly solution to your heating and cooling needs. They are a testament to how technology continues to revolutionize our homes and improve our comfort levels. However, it’s crucial to seek professional advice before investing in a system to ensure it aligns with your specific needs and circumstances.

What to Consider Before Installation

Before moving forward with the installation of a ductless mini-split system, there are a few factors to consider:

  • Size and Load Calculation: It’s vital to choose a system that matches the size of your space and its heating and cooling load. An overpowered unit can lead to inefficiencies and energy wastage, while an underpowered unit might struggle to maintain the desired temperature. A qualified HVAC technician can perform a load calculation to determine the best system for your needs.
  • Installation Location: The positioning of both the outdoor and indoor units affects the system’s efficiency and operation. The outdoor unit needs a well-ventilated area free from debris, while the indoor units should be installed in locations that allow optimal air distribution.
  • Cost: While ductless mini-split systems can save you money in the long run due to energy efficiency, the initial cost might be higher than traditional HVAC systems. Ensure you consider both the upfront and long-term costs when making your decision.
  • Maintenance: Although ductless systems require less maintenance than their ducted counterparts, they still need regular cleaning and servicing for optimal operation. The filters in the indoor units should be cleaned or replaced periodically, and the outdoor unit should be inspected to ensure it’s free from obstructions.

Final Thoughts

The rise of ductless mini-split systems marks a significant step forward in the HVAC industry. They represent an evolution in efficiency, control, and flexibility, opening a range of possibilities for heating and cooling solutions. If you’re building a new home, considering a renovation, or simply looking for a better way to regulate your home’s climate, a ductless mini-split system could be a worthwhile consideration.

In this era of technological innovation, it’s exciting to see how advancements like ductless mini-split systems can make our homes more comfortable and energy-efficient. However, as with any significant home investment, it’s essential to research thoroughly, seek professional advice, and consider your unique circumstances and needs before making a final decision.

Do I Need Air Conditioning?

While air conditioning systems are standard features in many homes, offices, and cars across the world, there’s a frequent question we often find ourselves asking: Do we really need air conditioning? The answer isn’t as simple as you might think because it depends on a number of factors including your personal comfort, health needs, climate, and even your environmental views.

Personal Comfort and Health Needs

Air conditioning can contribute greatly to our comfort and wellbeing. During hot summer months, the cooling effects of an air conditioning system can be both a luxury and a relief. For some, a cooler environment aids in getting better sleep and enhances overall productivity.

Moreover, for people with certain health conditions, air conditioning can be more than just a comfort – it can be a necessity. Those who have chronic illnesses such as asthma, COPD, or other respiratory problems often find that air conditioning helps in maintaining a clean, pollen-free environment with stable humidity levels, reducing the risk of a flare-up. Similarly, for elderly individuals and those with heart conditions, cooling down can reduce strain on the cardiovascular system that often comes with extreme heat.

Climate Considerations

The climate where you live can greatly influence the need for air conditioning. For those living in hot, humid climates, an air conditioning system might seem indispensable, offering respite from intense heat and humidity. On the other hand, if you live in a cooler, dry area or a place with cool evenings, you may find that fans and natural ventilation are sufficient to keep your home comfortable.

Environmental Views

The environment is another critical factor to consider. Air conditioning units, particularly older models, can consume large amounts of energy and contribute to greenhouse gas emissions. If you’re environmentally conscious, you may want to weigh this against the comfort provided by an AC unit. Investing in energy-efficient models or other cooling alternatives such as fans or evaporative coolers might be a better option for you.

Cost Implications

The costs associated with air conditioning are multifaceted and extend beyond the initial purchase of the system.

  • Purchase and Installation Cost: The upfront cost of an air conditioning unit varies greatly based on the type and size of the system. A window unit may only cost a few hundred dollars, while a central air conditioning system can cost several thousand. Additionally, installation costs should be factored in, which can range from a few hundred to a few thousand dollars depending on the complexity of the job.
  • Maintenance and Repair Costs: Routine maintenance, including annual check-ups and cleaning, can add up over time. Moreover, potential repair costs should be taken into account. While many issues can be prevented with proper maintenance, unexpected failures can occur, leading to costly repairs.
  • Energy Costs: The ongoing energy costs of running an air conditioning system can be substantial, especially in hotter climates where the system is used extensively. The efficiency of your unit will greatly impact these costs. While energy-efficient models may cost more upfront, they can save a significant amount of money in the long run by reducing your energy bills.

Alternatives to Traditional Air Conditioning

While traditional air conditioning systems are the go-to choice for many, there are numerous alternatives that provide cooling with potentially lower costs and smaller environmental footprints.

  • Fans: An energy-efficient and affordable alternative, fans can significantly improve comfort levels by circulating air and creating a wind-chill effect. While they don’t reduce room temperature, they can make the environment feel cooler. This includes ceiling fans, pedestal fans, and smaller desk fans, each with their own cost and efficiency benefits.
  • Evaporative Coolers: These are excellent alternatives in dry, hot climates. Evaporative coolers work by passing hot air over water-saturated pads, causing the water to evaporate and effectively reducing the temperature. The cooled air is then circulated in the room. They use less electricity than traditional air conditioning and can be less expensive to install and maintain.
  • Geothermal Cooling: Geothermal cooling leverages the earth’s consistent underground temperature to cool your home. By using a series of underground pipes, it exchanges heat with the ground, cooling your home in the process. While the initial installation cost can be high, geothermal cooling is incredibly efficient, potentially saving significant money in energy costs over time.
  • Passive Cooling: Passive cooling involves architectural strategies to naturally cool homes without the use of mechanical systems. This includes strategic shading to reduce solar heat gain, insulation to minimize heat transfer, ventilation cooling to increase air movement, and window placement to optimize natural light without unwanted heat.

Conclusion

While air conditioning can offer comfort and health benefits, its necessity depends on a myriad of personal, environmental, and financial factors. It’s crucial to consider all these aspects when deciding if you need air conditioning. But rest assured, with the variety of cooling options available today, you can always find something that suits your specific needs and circumstances.

When Should You Repair Your Water Heater?

A water heater, although often overlooked, is a central aspect of our daily lives, providing the comfort of hot showers, clean dishes, and sanitised clothing. However, when something goes awry, it can be a significant inconvenience, even turning into a potential safety hazard. This blog post will guide you through the telltale signs your water heater needs attention and how to decide whether to repair or replace it.

Understanding Your Water Heater

First, it’s essential to understand the basic operations of your water heater. Whether it’s a gas or electric model, a water heater functions by heating cold water from a supply pipe and storing it until it’s needed. Regular maintenance can extend the lifespan of your water heater and ensure its optimal functionality, helping you avoid sudden disruptions or costly damage.

Signs Your Water Heater Needs Repair

There are several clear and subtle signs that your water heater might need repair. Here’s a more detailed look into some of them:

  • Insufficient Hot Water: This is typically the first and most obvious sign of trouble. If you’re noticing that your hot showers are shorter than usual, or there’s not enough hot water for your needs, your water heater might be struggling. This could be due to a malfunctioning thermostat or a failing heating element.
  • Water Temperature Inconsistencies: If your water temperature fluctuates unpredictably during use, this inconsistency could indicate a faulty thermostat, sediment build-up, or another internal issue that’s preventing the water heater from maintaining steady heat.
  • Noisy Water Heater: Unusual noises coming from your water heater, like rumbling, cracking, or popping sounds, can indicate a serious issue. These noises often result from sediment build-up in the tank, causing the unit to overwork and potentially leading to more serious damage over time.
  • Discolored or Foul-Smelling Water: If your water has a strange color, particularly a rusty hue, or an unusual smell, this can be a sign of corrosion inside the water heater or bacterial infection. This is a health hazard and requires immediate attention.
  • Water Leaks: Leaks around your water heater are a clear indication of a problem that can cause significant water damage to your property. A leak could be due to high pressure in the tank, a crack in the tank, or faulty connections.
  • Age of Your Water Heater: The average lifespan of a water heater is around 10-15 years. If your heater is within or beyond this range and causing regular problems, it’s time to consider a repair or even a replacement.

Deciding Between Repair and Replacement

When your water heater starts showing signs of distress, it can be difficult to decide whether to repair or replace it. Several factors come into play, such as the severity and frequency of the issues, the age of your unit, and whether it still falls under warranty.

Consider cost-effectiveness too. While repair may seem like the cheaper option initially, frequent repairs can add up, making replacement a more economical choice in the long run. Also, bear in mind the environmental impact. Newer models are often more energy-efficient, reducing your carbon footprint.

However, always consult with a professional before making a final decision. An experienced plumber can accurately diagnose the problem and suggest the most viable solution.

Preventive Measures to Extend Water Heater’s Lifespan

The decision between repairing or replacing your water heater depends on a variety of factors. Here are some key considerations:

  • Frequency and Severity of Problems: If your water heater is having occasional minor issues, a simple repair might solve the problem. However, if problems are severe or happening regularly, replacement might be the more reliable and cost-effective solution.
  • Age of the Heater: If your water heater is older than 10 years and constantly needs repairs, it might be more economical and energy-efficient to replace it with a newer model.
  • Cost-effectiveness: While the initial cost of repair might be less than replacement, frequent repairs can quickly add up. A new unit, although more expensive upfront, could save you money in the long run, especially considering newer models’ energy efficiency.
  • Warranty: Check whether your water heater is still under warranty. If it is, you may be able to get repairs or even a replacement at a significantly reduced cost.

Conclusion

Recognizing the signs of a failing water heater is key to avoiding the inconvenience and potential hazards of a breakdown. Although repairs can often fix the problem, sometimes a replacement is the more cost-effective and environmentally-friendly option. Regular maintenance, proper use, and preventive measures can help keep your water heater in good shape for years.

How Do Boilers Work?

In the cold winters, there’s nothing quite like the feel of a warm, cozy room heated by a boiler. But have you ever wondered how your boiler works? Understanding the inner workings of this essential appliance can help you maintain it better, spot potential issues early on, and ensure it runs efficiently. So, let’s unravel the mystery and find out just how boilers function.

Understanding the Basics

At the most fundamental level, a boiler is a closed vessel or system designed to heat water and convert it into steam or hot water, thus providing a means of heating a dwelling or other building. The term ‘boiler’ comes from an old term for a place where water is boiled. In contemporary usage, though, the term refers to a device that burns fuel to heat water, transforming it into steam or hot water, which is then circulated through pipes to radiators or underfloor heating systems.

Boilers can be found in a wide array of settings, from residential homes and commercial offices to large factories and industrial sites. They’re also a vital component in the operation of some ships and locomotives, providing the heat and steam necessary for their operations. Understanding how these boilers work, regardless of their specific application, requires knowledge of the key parts and their functions.

The Core Components of a Boiler

Before we dive into the specifics of how a boiler operates, it’s important to familiarize ourselves with its core components. Much like how an orchestra is composed of various instruments, each with its unique role, a boiler is made up of several parts, each contributing to its overall functionality.

  1. Burner: The burner is where the fuel (like natural gas, propane, or oil) is mixed with air and ignited, producing a flame.
  2. Combustion Chamber: This is where the burning fuel heats the water. The combustion chamber must withstand high temperatures and be properly sealed to prevent gas leaks.
  3. Heat Exchanger: The heat exchanger is essentially a pipe or a series of pipes where the heat from the burning fuel transfers to the water.
  4. Controls: These include thermostats, pressure controls, and safety valves. They help monitor and control the boiler’s operation to ensure optimal performance and safety.
  5. Exhaust Stack: Also known as the flue, it is a pipe that carries away exhaust gases from the combustion process.

Boiler Operation – Step-by-Step

Now that we’re familiar with the different components of a boiler, let’s go on a journey within the boiler itself. Picture yourself as a droplet of water making its way through the system. This step-by-step guide to the boiler operation will help us understand how each component interacts with others to bring heat into our homes and offices.

  1. When your room temperature drops below the thermostat setting, the boiler is triggered.
  2. The burner is supplied with fuel and ignites.
  3. Inside the combustion chamber, the ignited fuel produces heat.
  4. The heat is then transferred to the water through the heat exchanger, turning the water into steam or hot water.
  5. This heated water or steam travels via pipes to radiators or other heating systems, distributing warmth around your home or building.
  6. Finally, any exhaust gases produced in the combustion process are expelled safely through the flue.

Types of Boilers

Different types of boilers have different features:

  • Combination Boilers: These are compact, efficient units that provide both heating and hot water directly from the boiler, eliminating the need for a separate water tank.
  • System Boilers: They require a storage tank for hot water but are known for their ability to deliver a steady supply of hot water to multiple taps at once.
  • Conventional Boilers: These traditional boilers require both a cold water tank and a hot water storage cylinder, typically installed in lofts or airing cupboards.

How Boiler Efficiency is Measured

Boiler efficiency is a measure of how effectively the boiler converts fuel into heat. It’s usually expressed as a percentage – the higher the percentage, the more efficient the boiler. The boiler’s efficiency rating can be influenced by several factors, including its age, type, and maintenance schedule.

Boiler Maintenance and Safety

Regular maintenance is key to ensuring your boiler works efficiently and safely. Scheduling annual services with a professional technician can keep your boiler in top condition and help spot issues early. It’s also crucial to ensure that the area around the boiler is kept clean and free from any potential obstructions.

As for safety, remember that boilers involve combustion and can produce harmful gases like carbon monoxide. Therefore, always have a working carbon monoxide detector installed in your home. If you suspect a gas leak or other boiler-related issue, contact a professional immediately.

Conclusion

Boilers, often taken for granted, are workhorse appliances that play a pivotal role in our comfort during those chilly months. Understanding how a boiler operates not only satisfies our curiosity but also helps us better maintain our heating systems, ensuring they run optimally and safely. The intricate dance of components like the burner, combustion chamber, heat exchanger, and controls, together with the boiler’s different types and efficiency measurements, reveal a sophisticated and invaluable piece of technology in our homes.

Remember, while it’s essential to know the basics, handling your boiler’s maintenance, repairs, and safety checks should always be left to a professional. Stay warm, stay safe, and appreciate the silent comfort that your boiler provides.

When Is It Time To Replace Your Boiler?

The boiler is the heart of our homes, beating away to provide us with hot water and heat when we need it most. However, like all machinery, a boiler has its own lifespan, after which replacement becomes not just a choice, but a necessity. This article will guide you through understanding when it’s the right time to replace your boiler.

The Life Expectancy of Boilers

Generally, a well-maintained boiler should last between 15-20 years, but this can vary significantly depending on the type of boiler, quality of installation, and how well it’s maintained. Factors like its usage patterns, water quality, and your geographical location can also impact its longevity.

Warning Signs Your Boiler May Need Replacement

Boilers, like any mechanical equipment, communicate their health status through certain signs and signals. It’s essential to understand and pay attention to these warning signs as they could suggest that your boiler is on the brink of failure or has become inefficient.

  • Inefficiency: Rising energy bills or decreased heat output can be indications of boiler inefficiency. This inefficiency typically happens due to wear and tear or internal components failing.
  • Frequent Repairs: While occasional repairs are normal, if you find your boiler breaking down frequently or need to call in a technician regularly, it could be a sign that your boiler is reaching the end of its life cycle.
  • Unusual Noises: Boilers tend to make some noise, but if you start noticing unusual sounds such as hissing, clunking, or banging, it’s worth having a professional look at it.
  • Leaks: If you find water leaking from your boiler, don’t ignore it. Leaks often mean that internal parts are corroding or breaking down, which can lead to more significant problems.
  • Age: The age of your boiler plays a significant role in determining whether a replacement is due. If your boiler is nearing or has surpassed its average lifespan of 15-20 years, it’s time to start considering a replacement.

Considering Boiler Performance

Your boiler’s performance directly affects your household’s comfort, energy costs, and environmental impact. An underperforming boiler can result in uneven heating, an inconsistent supply of hot water, and increased energy usage. If your boiler struggles to maintain a comfortable temperature, or if you’re noticing hot and cold spots around your home, it’s a sign that your boiler is not working as it should.

Newer models tend to be more energy-efficient and reliable, reducing the risk of breakdowns and offering better performance. Modern boilers also typically use less energy to produce the same amount of heat, leading to lower energy costs. Upgrading to a high-efficiency boiler can, therefore, provide a higher level of comfort, lower your energy bills, and reduce your carbon footprint.

When to Repair Vs. When to Replace

The decision to repair or replace often comes down to cost. A general rule of thumb is if the repair cost is over half the cost of a new boiler, replacement is the better long-term solution. It’s also worth considering the boiler’s age – frequent repairs on an older boiler are often a sign that more issues are on the horizon.

Understanding Boiler Replacement

The process of boiler replacement involves more than just swapping out your old boiler for a new one. It requires careful planning and consideration. It’s important to choose a boiler that suits your home’s size and your family’s hot water and heating needs. Boilers come in different types and sizes, and the right choice can ensure you get the maximum efficiency and longevity from your investment.

The energy rating is a critical factor to consider. This rating gives you an idea of how efficient the boiler is at converting fuel into heat. A boiler with a high energy rating will consume less fuel for the same amount of heat, leading to lower energy bills and a reduced environmental impact.

Environmental Impact and Energy Efficiency

Old, inefficient boilers not only lead to high energy bills, but they also have a greater negative impact on the environment. Upgrading to a more energy-efficient model can reduce your carbon footprint and may even qualify you for incentives or rebates.

Conclusion

Knowing when to replace your boiler is crucial for ensuring the comfort, safety, and energy efficiency of your home. Pay attention to the warning signs and remember to carry out regular maintenance to prolong its lifespan. Remember, timely replacement can save not just money, but also avoid potential safety hazards. Stay warm, safe, and efficient!

When Should You Replace Your Furnace?

There’s no doubt about the central role a well-functioning furnace plays in our homes. It provides the warmth we need, especially during the cold winter months, and contributes to the overall comfort and convenience of our daily lives. However, like all machines, a furnace has a limited lifespan and will eventually need replacing. But when is the right time to replace your furnace?

Understanding the Lifespan of a Furnace

A furnace typically lasts between 15 to 20 years, but this can vary depending on several factors, such as the specific brand, how often it’s used, and how well it’s maintained. Regular and proper maintenance can significantly prolong the life of your furnace and keep it running at optimal efficiency.

Signs Your Furnace May Need Replacing

Recognizing the signs that your furnace may need replacing is crucial in preventing further damage and potential health risks. Below are some indicators that your furnace may be nearing the end of its lifespan:

  • Increased Heating Bills: If your energy bills are continuously rising despite consistent usage, your furnace’s efficiency may be declining, indicating that it may be time for a replacement.
  • Inconsistent or Insufficient Heat: If you notice some rooms in your home are colder than others or the furnace can’t keep up with your heating needs, it’s a clear sign your furnace is struggling.
  • Frequent Repairs: If your furnace needs frequent repairs, especially if those repairs are becoming increasingly costly, this is a strong indication that your furnace may need replacing.
  • Strange Noises or Smells: Unusual noises like rumbling, popping, or screeching, or strange smells coming from your furnace can signal serious issues.
  • Health Symptoms: Frequent headaches, burning eyes, nausea, or increased allergies could potentially be a sign of a carbon monoxide leak from an old or malfunctioning furnace. If you experience these symptoms, seek professional help immediately.

The Costs of Keeping an Old Furnace

Holding onto an old, failing furnace can become an expensive affair. As the furnace ages, its efficiency drops, leading to higher energy consumption and, consequently, increasing your heating bills. Furthermore, frequent repairs and part replacements can quickly add up. Comparatively, a new furnace, while an upfront investment, offers greater energy efficiency, reducing your monthly bills and potentially saving you money in the long run. Additionally, an older, less efficient furnace tends to have a higher environmental impact due to increased energy consumption.

Assessing Your Furnace’s Efficiency

Assessing your furnace’s efficiency can be key to determining whether or not it needs to be replaced. Here are several ways to evaluate it:

  • Monitor Energy Bills: An increase in your energy bills when your usage hasn’t changed significantly may suggest your furnace’s efficiency is decreasing.
  • Age of the Furnace: If your furnace is approaching or has surpassed its expected lifespan of 15 to 20 years, its efficiency is likely lower than that of newer models.
  • Uneven Heating: If some areas in your home are hotter or colder than others, it might be because your furnace isn’t distributing heat as efficiently as it should.
  • Frequency of Repairs: A furnace needing constant repairs is likely not operating at its maximum efficiency.
  • Professional Assessment: A heating professional can conduct a thorough efficiency test, examining your furnace’s combustion efficiency and ensuring it’s working optimally.

When to Consult a Professional

If you observe any of the signs mentioned above, it’s recommended to consult a professional. During a furnace assessment, professionals inspect the unit, identify any issues, and advise whether it’s more cost-effective to repair or replace the unit. Regular maintenance and professional checks are crucial, as they can detect problems early on, possibly extending the life of your furnace and keeping it running safely and efficiently.

Choosing a New Furnace

If you’ve determined it’s time to replace your furnace, several factors should guide your decision. Consider the energy efficiency of the new unit – higher efficiency means lower energy costs over the unit’s lifespan. The size and capacity of the furnace should be appropriate for the size of your home to ensure effective and efficient heating.

Brand and warranty are also significant factors; reputable brands often offer longer warranties and better post-purchase service. Once you’ve chosen your new furnace, prepare for the installation process, which typically involves removing the old unit, installing the new one, and testing it to ensure proper function.

Conclusion

Paying close attention to your furnace’s performance and knowing the signs of a failing unit can save you time, money, and a lot of inconvenience down the line. When the time comes, don’t hesitate to replace your furnace. An efficiently functioning furnace is not just about comfort; it’s also about safety and efficiency. If you suspect your furnace needs replacing, don’t delay in consulting a professional. Remember, an investment in a new furnace is an investment in a comfortable, warm, and energy-efficient home.

Why Consider A Custom Chimney Solution

Chimneys play a crucial role in the safety and functionality of a home. Besides providing an escape route for smoke from a fireplace or stove, chimneys add aesthetic appeal and character to a house. But have you ever considered the benefits of a custom chimney solution?

Understanding Custom Chimney Solutions

When we talk about custom chimney solutions, we’re talking about more than just a one-size-fits-all approach to chimney design and installation. A custom chimney solution is an innovative approach to chimney design, where the chimney’s specifications are meticulously tailored to meet the unique needs of your home. It’s a comprehensive plan that considers your home’s specific requirements while encapsulating your aesthetic preferences and addressing functional aspects. Here, we’ll break down what a custom chimney solution entails.

Defining Custom Chimney Solutions

A custom chimney solution is essentially a bespoke chimney designed to fit your home’s individual architecture and heating system. It is an end-to-end solution that includes consultation, design, materials selection, construction, and ongoing maintenance, all tailored to your unique specifications.

The Elements of a Custom Chimney Solution

A custom chimney solution encompasses various elements, each tailored to your needs. Let’s explore these in detail:

  • Design: A significant element of a custom chimney solution is the design. The design not only incorporates the chimney’s appearance but also its size, shape, and the placement within your home.
  • Materials: The materials chosen will significantly influence your chimney’s durability, functionality, and visual appeal. Common materials include brick, stone, metal, or a combination of these.
  • Safety Features: These can include elements like an optimized flue design for better draft and smoke evacuation, heat-resistant materials, and safety caps to prevent animal intrusion or embers escaping.

Tailoring to Your Needs

The real beauty of a custom chimney solution is how it is tailored to your specific needs. If you use your fireplace frequently, the chimney can be designed to handle that load efficiently. If you live in a region with harsh winters, the materials and design can be optimized for that. And if you desire a unique shape or finish to complement your home’s architecture, that too can be incorporated.

Reasons to Consider a Custom Chimney Solution

Chimneys are more than just functional components of a home – they are integral to the aesthetics, value, and safety of your property. Considering a custom chimney solution allows you to tailor this essential part of your home to your unique needs and desires. Let’s delve into the key reasons why a custom chimney solution is an option worth considering.

  • Aesthetics: One of the main reasons homeowners opt for a custom chimney solution is for its aesthetic appeal. The chimney is a prominent part of your home’s exterior, and a custom design can enhance its overall look.
  • Improved Functionality: A custom chimney solution is designed with your specific heating needs and house structure in mind. This means better draft, minimized smoke backflow, and optimum fireplace or stove performance.
  • Increased Home Value: A beautifully designed, highly functional chimney can significantly boost your home’s resale value. A custom chimney isn’t just a functional element; it’s a statement feature that potential buyers are willing to pay a premium for.
  • Enhanced Safety: Safety is paramount when it comes to chimneys. A custom chimney solution allows for enhanced safety measures, such as improved ventilation and superior fire resistance, to be integrated into the design.

The Custom Chimney Solution Process

Embarking on a custom chimney project is an exciting endeavor. Below is an in-depth look at the standard process, broken down into sequential steps.

  1. Initial Consultation: The first step in the process is to schedule a consultation with a professional chimney design and installation company. This session is where you get to share your vision, needs, and preferences.
  2. Site Survey: After the initial consultation, the professionals will conduct a thorough site survey. They will assess the current structure, location, and condition of your existing chimney (if any), along with other elements of your home’s structure and design.
  3. Design Phase: Once the necessary information has been collected, the design phase commences. Architects and designers will use the data gathered from the consultation and site survey to create a blueprint for your custom chimney.
  4. Cost and Timeline Estimation: After the design is finalized, the team will provide a detailed estimate of the costs and a timeline for completion. This breakdown includes costs for materials, labor, and any necessary permits or inspections.
  5. Construction and Installation: Once you approve the cost and timeline, the construction phase begins. Professionals will carefully follow the design blueprint, ensuring all safety standards and building regulations are met.
  6. Inspection and Commissioning: After the construction is completed, a thorough inspection will be conducted to ensure everything is built to code and that the chimney is safe for use.
  7. Maintenance Planning: The final step is establishing a maintenance plan. Regular maintenance is essential to ensure the longevity and safety of your chimney.

Conclusion

A custom chimney solution presents an opportunity to enhance your home’s aesthetic appeal, improve functionality, increase resale value, and ensure optimal safety. It’s a personalized approach to a vital part of your home. By working with a professional, you can create a solution that’s tailored to your specific needs and preferences.

How To Know If My Chimney Is Obstructed?

The cozy warmth from a crackling fire is a comfort that is hard to resist. However, the functionality of your chimney is a crucial aspect of enjoying this warmth safely. Understanding the signs of a chimney obstruction, as well as the risks associated with it, is a must for every homeowner. In this guide, we’ll explain how to identify if your chimney is obstructed and what actions to take.

Understanding Chimney Obstructions

A chimney obstruction refers to anything that impedes the free flow of smoke and gases from your fireplace to the outside environment. Common causes can range from bird nests, branches, leaves, and even an accumulation of soot or creosote. These obstructions pose dangers such as smoke damage, carbon monoxide poisoning, and even the risk of chimney fires.

Signs and Symptoms of a Chimney Obstruction

Recognizing the signs and symptoms of a chimney obstruction is crucial in ensuring the safety and efficiency of your fireplace. As you become familiar with the normal operation of your fireplace, you’ll be better able to detect anything out of the ordinary. This section will help you understand what to watch out for, from smoke backdrafts to unpleasant odors.

  • Smoke Backdraft: When your chimney is functioning properly, smoke should exit your home seamlessly. If smoke is blowing back into the room, this is a clear sign that something is blocking the chimney.
  • Poor Fire Performance: If the fire in your fireplace is struggling, seems smoky, or extinguishes quicker than usual, you may be dealing with a chimney obstruction.
  • Unusual Noises: Noises such as flapping, chirping, or scratching could indicate that animals or birds have made a home in your chimney.
  • Unpleasant Odors: A strong, unpleasant odor, particularly of something burning, can be a telltale sign of an obstruction in your chimney.
  • Buildup of Soot or Creosote: Soot and creosote are by-products of burning wood and can accumulate over time, potentially leading to an obstruction. Look for thick, black, or tar-like deposits in and around your fireplace.

Conducting a Basic Self-check for Chimney Obstruction

While professional inspections are invaluable, homeowners can perform a basic self-check to spot early signs of a chimney obstruction. This proactive step will help you maintain a safe environment and potentially detect issues before they escalate into serious problems. In this section, we’ll guide you through a simple visual inspection and a smoke test.

Visual Inspection

Begin with a basic visual check of your chimney. This includes looking for excess soot or creosote and checking for visible blockages. Use a flashlight to look up into the chimney from your fireplace.

Smoke Test

For a smoke test, light a small amount of newspaper and let it burn in the fireplace. Watch to see if the smoke rises and exits the chimney freely. If it doesn’t, it’s likely that you have an obstruction.

Remember, never attempt to clear a chimney obstruction on your own as it may lead to injury or damage.

When to Call in a Professional

If you notice any of these signs or are uncertain about the status of your chimney, it’s time to call a professional. Certified chimney sweeps have specialized tools and training to assess and safely clear obstructions. You can find certified professionals through the Chimney Safety Institute of America or similar organizations in your country.

Preventing Chimney Obstructions

Ensuring the smooth operation of your chimney goes beyond just identifying obstructions; it involves taking proactive steps to prevent them from occurring in the first place. Regular maintenance and a few strategic measures can significantly reduce the chances of dealing with blockages, fire hazards, or even costly repairs down the line. Let’s explore some ways to prevent chimney obstructions effectively.

  • Regular Maintenance and Cleaning: The importance of regular maintenance cannot be overstated. An annual professional chimney inspection and cleaning will help eliminate any soot, creosote, or debris that may have built up over time.
  • Install a Chimney Cap: A chimney cap acts as a guard, preventing birds, animals, and debris from entering your chimney. It also stops rain and snow from getting into the chimney, which can lead to moisture damage or the creation of a damp environment that encourages the buildup of creosote.
  • Use the Right Firewood: Always use seasoned hardwoods, like oak or maple, which burn hotter and cleaner. Avoid green or wet wood as they create more smoke and increase the accumulation of creosote in your chimney.
  • Keep the Chimney Interior Dry: Ensure there are no leaks and that your chimney cap is effective in keeping rain and snow out.
  • Regular Homeowner Inspections: In addition to annual professional inspections, conduct your own regular checks for signs of obstruction or buildup.

Conclusion

Remember, the signs of a chimney obstruction can include a smoke backdraft, poor fire performance, unusual noises, unpleasant odors, and a buildup of soot or creosote. If you spot any of these signs, act promptly. Regular inspections and maintenance are key to ensuring the safety and longevity of your chimney.

When Should A Chimney Be Rebuilt?

The chimney is more than just an architectural aesthetic. It plays an essential role in ensuring safety by venting smoke and dangerous gases away from your home. However, like any other part of your house, your chimney requires regular inspection and maintenance. In this blog post, we will explore the warning signs indicating your chimney needs repair, situations where it requires rebuilding, and steps to take in the rebuilding process.

Understanding Your Chimney: Components and Functionality

A chimney consists of several parts such as the flue, crown, liner, and damper. Each part plays a crucial role in ensuring your chimney functions correctly. The flue, for instance, guides the smoke out, while the crown protects the chimney from external elements. Regular maintenance is vital to ensure these components function seamlessly, facilitating a safe and efficient home heating system.

Warning Signs: When Your Chimney Needs Repair

It’s crucial to know what to look out for when inspecting your chimney for potential damage. Below are several warning signs that your chimney may need repairs:

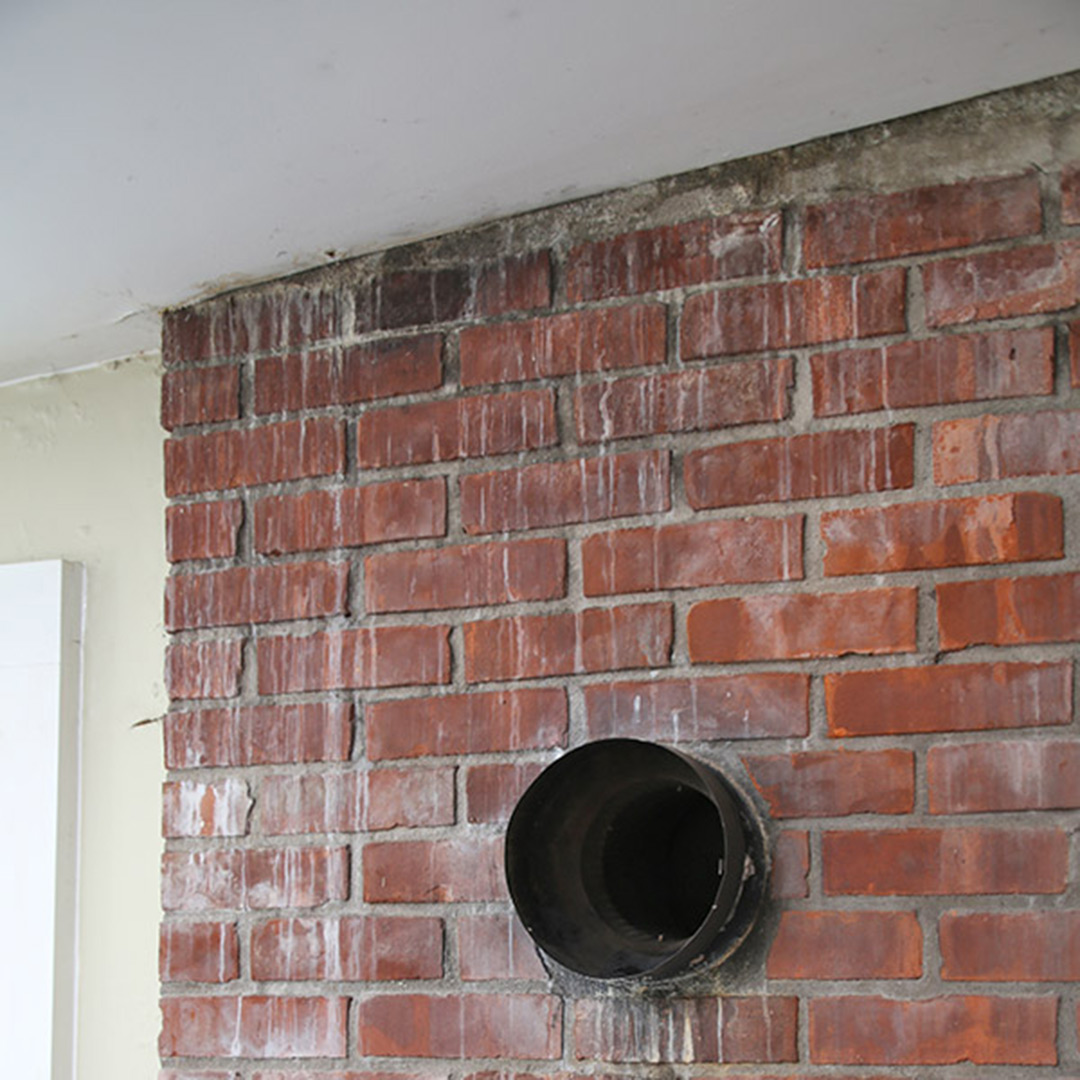
  • Mortar Damage: Deteriorating or missing mortar between the bricks is a serious concern. When the mortar breaks down, the bricks can loosen, causing structural instability.
  • Cracked or Missing Bricks: If bricks on your chimney are cracking, falling out, or missing, this indicates that the chimney is suffering from weathering and age. This could lead to the chimney leaning or collapsing if not addressed.
  • Leaning or Tilted Chimney: A chimney that is visibly leaning or tilting is a clear sign of structural failure, requiring immediate attention.
  • Damaged Chimney Crown: The chimney crown protects your chimney from weather damage. If the crown is cracked or damaged, it can allow water to seep into your chimney, causing further damage.
  • Efflorescence: This is a white, chalky residue that sometimes appears on the outside of a chimney. It’s a clear sign that your chimney is absorbing moisture, which can cause the bricks to deteriorate over time.
  • Rusted Firebox or Damper: If you notice rust in your firebox or on the damper, it means there’s excess moisture in your chimney.

Each of these signs suggests that your chimney may need repairs. It’s best to call in a professional for a thorough inspection when you notice any of these signs.

The Point of No Return: When Your Chimney Needs Rebuilding

In certain cases, damage to the chimney is so severe that simple repairs aren’t sufficient, and a complete rebuild is necessary. Structural instability, where the chimney is leaning or has significant cracks, is a clear sign that a rebuild is required for safety reasons.

Severe mortar damage, resulting in large parts of the chimney becoming loose or falling off, also necessitates a rebuild. Large cracks in the chimney flue are of particular concern, as they can allow heat to reach combustible parts of the house, increasing the risk of fire. Also, irreparable water damage can lead to the weakening of the entire structure, necessitating a rebuild.

The extent of damage can often only be accurately assessed by a professional who can then recommend whether a repair or a rebuild is necessary.

The Process of Chimney Rebuilding

If a complete chimney rebuild is the recommended course of action, here’s what you can typically expect, broken down into six steps:

  1. Initial Inspection: The process begins with a comprehensive inspection to determine the extent of the damage and the type of rebuild required.
  2. Removal of the Old Chimney: The next step involves the safe dismantling and removal of the old, damaged chimney.
  3. Foundation Preparation: After the old chimney has been removed, the foundation is prepared for the new structure. This may involve reinforcing or rebuilding the foundation as necessary.
  4. Construction of the New Chimney: Once the foundation is ready, the construction of the new chimney begins. This includes building up the bricks, setting the liner, and installing the damper and the crown.
  5. Inspection and Cleaning: After the new chimney is built, it is thoroughly inspected to ensure it meets all safety standards. The chimney is also cleaned to remove any debris from the construction process.
  6. Final Walkthrough: Finally, the professional will do a walkthrough with you, explaining the features of your new chimney and providing maintenance tips to prolong its lifespan.

Safety and Building Codes

During the entire process of rebuilding your chimney, it’s essential to follow local safety and building codes. These codes are designed to ensure that the chimney rebuild is safe, efficient, and long-lasting. They include guidelines for the materials to be used, the size and location of the chimney, the installation of the liner and damper, the proper construction of the chimney crown, and the suitable height for the chimney above the roof.

Hiring a certified professional is crucial in ensuring these codes are adhered to. A professional is not only well-versed in these codes but also has the necessary skills and experience to complete the rebuild effectively and safely. They will make sure your chimney has the proper clearance from combustible materials, sufficient height to ensure effective draft, and is built with suitable materials to withstand weathering and high temperatures.

Cost Implications

The cost of rebuilding a chimney can vary depending on factors such as chimney size, materials used, and the complexity of the project. It’s crucial to get an estimate from a professional before embarking on this process to ensure it fits within your budget.

Preventive Measures and Regular Maintenance

Regular maintenance and early detection of problems can prolong the life of your chimney. Annual inspections and cleanings can help identify minor issues before they escalate into significant problems that necessitate a rebuild. A well-maintained chimney not only lasts longer but also operates more efficiently and safely.

Conclusion

Recognizing when a chimney needs rebuilding is crucial for maintaining a safe home environment. Ignoring the warning signs can lead to severe risks, highlighting the importance of regular inspections and maintenance. Ensure your chimney is in good shape to enjoy cozy, safe fireside evenings with your loved ones.

What Is Chimney Tuckpointing?

What is Chimney Tuckpointing?

Chimney tuckpointing, also commonly referred to as repointing, is a method of renewing the ‘pointing,’ or external part of mortar joints, in the masonry construction of your chimney. The technique involves removing deteriorated or damaged mortar from the joints between bricks and replacing it with fresh mortar. This method doesn’t just improve the aesthetics of your chimney but also fortifies the structure, enhancing its overall durability and lifespan.

The term ‘tuckpointing’ originates from the 18th century England. Back then, the technique was used to mimic the appearance of rubbed brickwork that was often found in high-quality buildings. Masons would use two contrasting colors of mortar in the mortar joints of brickwork, one color matching the bricks to give an impression of very fine joints, and the other to provide a distinctive contrast. Over the years, tuckpointing has evolved into a key aspect of masonry maintenance and restoration, particularly for structures constantly exposed to the elements, like chimneys.

Why Chimney Tuckpointing is Essential

Chimney tuckpointing is far more than a cosmetic upgrade; it serves a crucial role in preserving the integrity and safety of your chimney and, by extension, your home. Over time, chimneys are subjected to a great deal of stress, from fluctuating weather conditions and temperature variations to the wear and tear of regular use.

All these factors can gradually degrade the mortar joints in a chimney. As the mortar deteriorates, it becomes increasingly susceptible to water infiltration, which can lead to more severe issues like mold growth, structural instability, and even the collapse of the chimney.

By ensuring that the mortar joints are in good shape through tuckpointing, you’re not only reinforcing the structure of your chimney but also safeguarding your home from potential water damage. Proper tuckpointing provides an impermeable barrier against water, reducing the risk of moisture seeping into your home. Without this vital maintenance process, the entire structure of your chimney could be compromised, leading to expensive repairs or, in extreme cases, a complete rebuild.

The Tuckpointing Process

Tuckpointing is a specialized procedure that requires a thorough understanding of masonry, as well as the right tools and techniques. It generally involves four main steps:

  1. Inspection and Cleaning: The first phase of tuckpointing involves a detailed inspection to assess the condition of your chimney. A professional will look for signs of damage, such as cracked or crumbling mortar, and identify areas in need of repair. They will then clean the chimney to remove any dirt, debris, or loose mortar, which could interfere with the tuckpointing process.
  2. Removing Old Mortar: The next step is to remove the damaged mortar. Using a grinder or a chisel and hammer, the old mortar is carefully extracted from the joints to a particular depth. This process needs to be done meticulously to avoid causing damage to the surrounding bricks.
  3. Applying New Mortar: Once the old mortar is removed, the new mortar is prepared. The mortar mix should closely match the original in terms of color, composition, and consistency to maintain the visual integrity of the structure. The new mortar is then ‘tucked’ or pushed into the joints using a tool known as a tuckpointer.
  4. Detailing for Aesthetic Uniformity: The final step involves striking or shaping the mortar joints to ensure a neat and uniform appearance. This step is not just about aesthetics; it also helps to seal the joints and make them more water-resistant.

Safety Considerations

Safety considerations are critical throughout the tuckpointing process. The work often involves working at heights and dealing with dust and debris. Therefore, proper safety gear, such as goggles, gloves, and respiratory masks, should be worn at all times. It’s also crucial to use the right tools correctly to prevent accidents or damage to the chimney.

In essence, tuckpointing is a meticulous craft that requires a trained eye and a skilled hand. While it might seem straightforward, achieving a professional and lasting result requires practice and precision. It’s about more than just removing old mortar and adding new; it’s about understanding the structure, composition, and history of the chimney, then using that knowledge to restore its strength and integrity while preserving, if not enhancing, its original aesthetic.

Although it might be tempting to view tuckpointing as a DIY project, especially for those handy around the house, it’s typically best left to professionals. The potential risks and the precision required often outweigh the cost savings of a DIY approach. When done correctly, tuckpointing can extend the life of your chimney, increase the overall value of your home, and save you money in the long run by avoiding more extensive and expensive repairs.

When to Consider Tuckpointing

Common signs that your chimney may need tuckpointing include deteriorating or loose mortar, visible cracks in the chimney structure, and water infiltration in or around your fireplace. The frequency of tuckpointing can depend on your geographical location and local weather patterns, emphasizing the importance of routine chimney inspections.

Hiring Professionals for Tuckpointing

While some homeowners may consider tuckpointing a DIY project, the precision, safety concerns, and proper material selection often necessitate professional expertise. When choosing a chimney tuckpointing service, consider their experience, reviews, and whether they’re certified by a relevant trade organization.

Cost Implications of Chimney Tuckpointing

Tuckpointing can be viewed as an investment in your home’s longevity. The cost can vary depending on the size of the chimney, the extent of damage, and your location, but it’s far less expensive than a chimney rebuild. More importantly, regular tuckpointing can increase your home’s value and prevent costly water damage.

Conclusion

Chimney tuckpointing, while often overlooked, plays a crucial role in maintaining the structure and safety of your home. By understanding the importance of this process and proactively taking care of your chimney, you can ensure a cozy and safe living environment while saving on potential future repair costs. So, when was the last time you had your chimney inspected?

(877) 959-3534