What Do You Need To Know Before Hiring A Chimney Sweep?

What Do You Need To Know Before Hiring A Chimney Sweep?

Even if you only use your chimney for a few months out of the year, it should still be inspected before the start of each season. There are five things to keep in mind when hiring a chimney sweep. The first tip looks at what the company includes with their basic chimney sweep package.

Chimney Sweeping New Britain CTWhat services do they perform during a sweep?

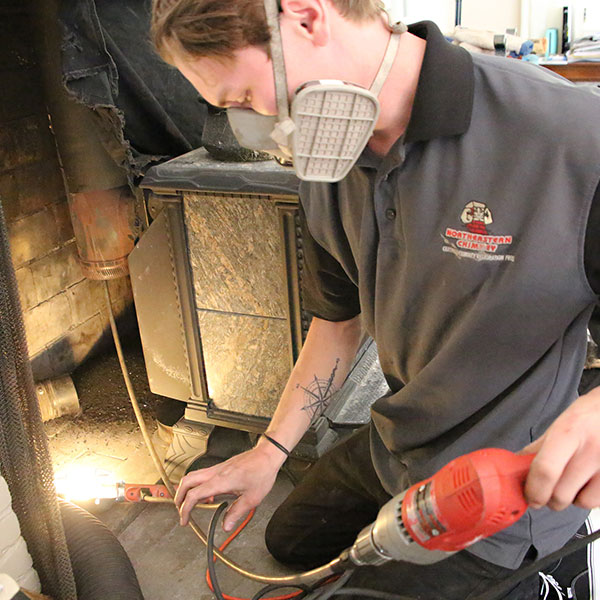
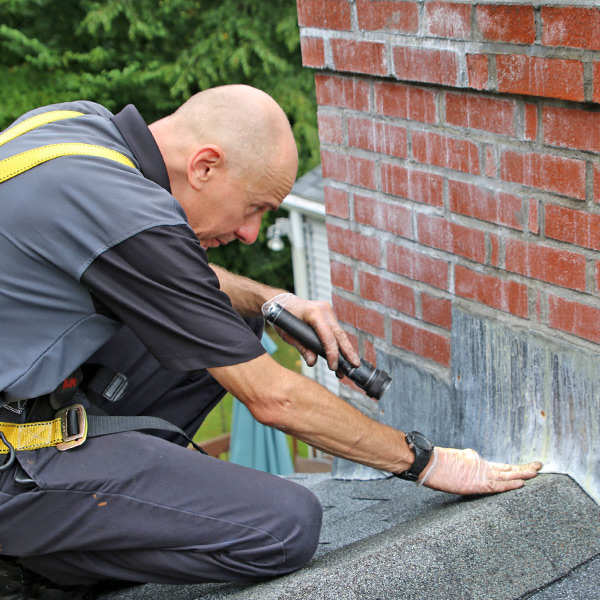
A typical chimney sweep appointment should last no less than one hour. During your sweep, however, your technician should do more than simply sweep the ashes out of your firebox and call it a day. Instead, they should: Perform an in-depth inspection of the chimney system, including the firebox, flue, brick
and mortar, crown, and cap; Remove all blockages such as leaves or any animals that made their way into the flue; Offer to repair a broken or missing crown; And remove any buildup of creosote, the sticky, tar-like substance that can eventually lead to a chimney fire.

Is their team knowledgeable?

Each Northeastern Chimney team member receives extensive training to ensure that our technicians are knowledgeable in all aspects of chimney maintenance and repair. Training and education are vital. When hiring a chimney sweep, be sure to look for context clues on their website and marketing materials that indicate if they train their team members.

The last thing you need is someone who doesn’t know much about the industry giving your chimney a passing grade when, in fact, it needs repairs before you use it again.

Do they offer free estimates?

A small yet important thing to consider when hiring a chimney sweep is if they offer free estimates for repair. All legitimate chimney sweep firms will offer free quotes for their services. This is important especially if your chimney hasn’t been serviced for a while and may require more than normal focus during your sweep.

What prices do they charge?

Finally, do they tell you the price of a sweep and inspection before performing services? Are they transparent with their overall pricing when asked? And as a minor note, does their pricing seem fair, fitting into your budget?

Chimney Liner Repair, Bristol CTDo they offer repair services?

As we already alluded to, your chimney sweep company must offer repair services. Some can be taken care of on the same day, such as replacing a missing chimney cap. Others may require a second appointment, especially if during the inspection your technician discovers problems with the structure or gaps in the brick and mortar. If all they offer on their site is to clean your chimney and nothing else, consider finding another option.

This post first appeared on https://www.mychimney.com

Chimney Brick Repair: Before Another Storm Hits

This has been a bit of a rough summer with the rain storms and high winds. It has resulted in numerous homes needing brick chimney repair. Now, that’s not to say those with stone chimneys or chimney’s made of siding don’t need repair, because they certainly do. Let’s talk about what goes into a brick chimney repair and chimneys made from other materials.

What is a Brick Chimney Repair?

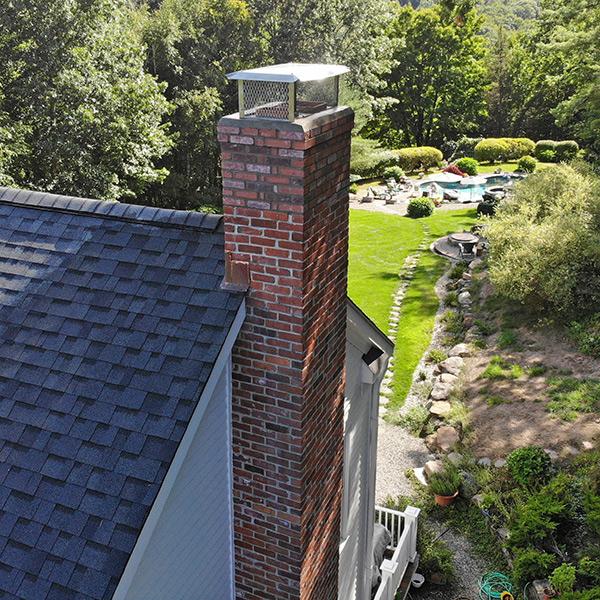
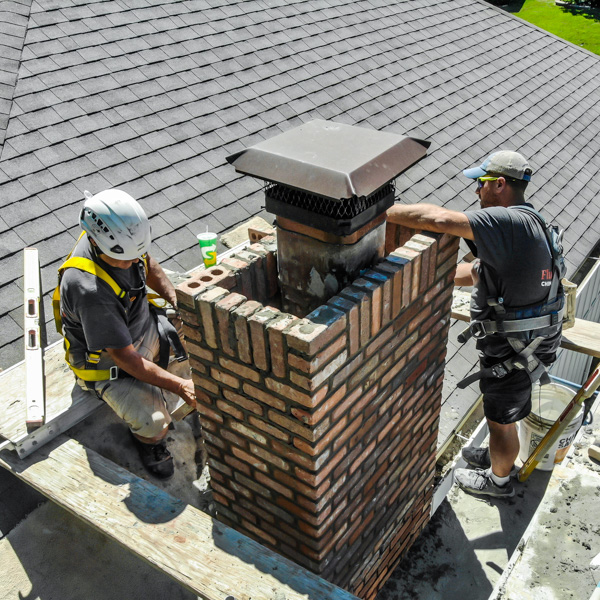
A brick chimney repair is when a highly skilled masonry specialist restores the chimney materials back to their original state. This can include, but not limited to the bricks, mortar, chimney crown and chimney fire tiles.

Repair Chimney Bricks, Stone and Other Materials

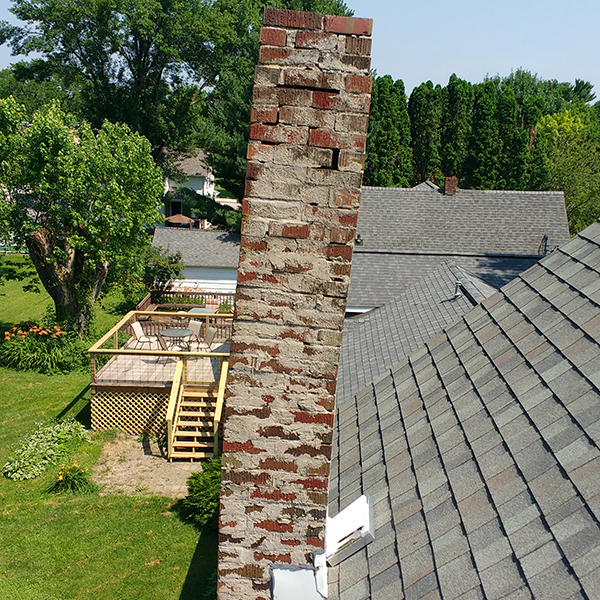
Chimney repairs made from bricks, stone, siding or concrete deteriorate over time. This can cause the chimney materials to fall off, flake or chip as too much moisture has absorbed in the materials which causes them to fall apart.

It’s hard to know when these materials become loose as the chimney is the highest point on your home. It’s not like you look at the chimney every day to notice the changes. However, this can be rectified when you have a yearly inspection on the fireplace and chimney, even when you don’t use the fireplace or if the fireplace is gas.

Repair Chimney Mortar

Chimney mortar is the cement material in between the bricks and stones. It’s basically the glue that keeps everything together. But just like glue, it doesn’t stick forever. That’s why bricks and stones need to be tuckpointed when the mortar is no longer in between the bricks and stones or is loose to the touch. This is repaired by grinding and then inserting fresh mortar to ensure the material is secure.

Chimney Crown Cracking

Just like a real crown, which goes on top of a person’s head, the chimney crown sits on top of the chimney. This is to protect from weather elements as well as protect the surrounding chimney materials. As always, the chimney crown can crack allowing snow, and rain water to enter in between. In fact, it doesn’t matter how small of a crack it may be, the water can and will penetrate the crack.

Chimney Flashing Leaves a Void

Chimney flashing is the staircase looking material at the bottom of the chimney. The importance of the chimney flashing is to connect the roofing system to the chimney. This directs the rain and snow away from the chimney and onto the roofing system where it filters into the gutters. If the rain water or snow gets behind the chimney flashing, then it has direct access into your home. That’s why when the chimney technicians are at your home, they always check if the flashing is still flush against the chimney. Any spare room will immediately welcome the elements and create chaos.

Why Now is the Best Time

Getting repairs done on the chimney is most commonly completed in the spring, summer or fall. The seasons allow for the best conditions for the materials to dry and adhere to the chimney structure. If you are not sure what condition your chimney is in, or you know it’s in need of repair, now is the best time to contact us before the winter sets in.


This post first appeared on https://www.superiorchimney.net

Laundry Lint Concerns

We all know that chimneys that are neglected can become fire hazards but we often forget that lint buildup can also be dangerous. Lint is a normal byproduct of doing your laundry, and it’s normally very easy to remove. However, if lint starts to build up, it can become a serious fire safety hazard. Here’s why it’s so important to prevent lint from getting stuck in your dryer trap.

Dryer Vent Cleaning Southington, CTWhy is lint buildup dangerous?

Ideally, lint should be removed from the lint trap after every load of laundry. However, it’s easy to forget to do this if you have a busy schedule. Certain fabrics also create more lint than others, which can overwhelm the lint trap even if you’ve just cleaned it. (New towels are an example of an item that creates excess lint.)

When this happens, wet lint that forms in the dryer makes its way past the lint trap and into your dryer vent. This clogs the vent and prevents hot air from passing through properly. This hot air then gets trapped in the vent with the lint, or even trapped in the dryer itself. If the dryer vent isn’t unclogged, it can result in a house fire.

What are signs lint has built up in your dryer vent?

Lint can easily build up in your dryer vent without anyone realizing it. However, there are some signs to watch for that are indicative of a clogged dryer vent.

  • Your laundry room starts to feel hot when you run the dryer. This happens because the heat isn’t escaping from the dryer properly. Your clothes may also feel extremely hot to the touch after they come out of the dryer.
  • Your monthly energy bills are higher and you can’t figure out why. When your dryer vent is clogged, your dryer has to work harder to run, which results in higher energy bills.
  • Your clothes are still damp when they come out of the dryer, or you have to run the dryer much longer to get your clothes as dry as you want.
  • You notice a musky or smoky smell on your clothes when you run the dryer. If this is starting to happen, get your dryer checked right away.

Dryer Vent Services New Britain, CTWhat should I do if lint has built up in my dryer?

If you think lint may have built up in your dryer vent, call a professional right away to have it inspected. If there is a clog, they will be able to remove the lint for you. Avoid using your dryer until after you’ve been given the all-clear by a professional.

Once your dryer vent is clean, make sure you’re removing all the lint from the lint trap every single time you do laundry. Making a habit of doing this is the best way to prevent laundry-related house fires.

This post first appeared on https://www.mychimney.com

5 of Atlanta’s Top Historic Neighborhoods  

Historic Atlanta homes are the most beautiful showcase of what the city has to offer. Five of Atlanta’s top historic neighborhoods boast diverse social scenes that perfectly balance community, history, and trendiness. The areas provide southern hospitality for everyone, no matter what phase of life you are in at the moment. Whether you are buying your first home, stepping into a single season, or looking for a safe place to raise a family, Atlanta has the perfect historic neighborhood for you. Each neighborhood offers unique characteristics for both the area and the homes. Let’s take a look at 5 of Atlanta’s top historic neighborhoods and what each one offers.

Grant Park

Grant Park is located between Downtown and East Atlanta. The area offers a visit to Zoo Atlanta or the iconic Oakland Cemetery. The neighborhood pairs rich history with ornate and unique architecture for endless beautiful scenery. A residential district that is well-known for its Victorian homes with detailed and ornate architecture. The details and aesthetics offer inviting visuals while the city centers around the oldest city park in Atlanta, Grant Park. It provides one of the safest communities in the city, perfect for raising a family. Just north of the historic Grant Park area is the trendy Old Fourth Ward district.

Old Fourth Ward

Old Fourth Ward is a former industrial area now packed with some of the best restaurants and shops. The historic 1920s Sears, Roebuck & Co. building was converted to Ponce City Market, serving as the center of this trendy Atlanta district. Connecting Ponce City Market and the historic Fourth Ward Park is the Atlanta BeltLine’s Eastside Trail. The trail is a converted railway offering a contemporary atmosphere for walking, biking, and enjoying all the area has to offer. Old Fourth Ward is an excellent neighborhood for someone wanting to experience Atlanta’s nightlife in a more reserved area with homes hosting more industrial styles, realistic necessities, and less ornate architecture. If you are looking for more unique and decorative styles, travel along the Eastside BeltLine Trail just east of Old Fourth Ward to Inman Park.

Inman Park

Inman Park is one of the greenest neighborhoods in Atlanta, boasting treelines along the roads and greenery bordering park areas. It is well known for its hip food scene filled with unrivaled brunch places, stunning wine bars, and cafes welcoming your pets. It is an excellent balance between trendy and practical, offering a wonderful place to raise a family. The neighborhood’s Krog Street Market is a refurbished factory honoring the history of the building and Atlanta while hosting incredible food spots and local shops. Inman Park is Atlanta’s first planned suburb which is beautifully evident in the landscaping and historic Victorian homes. If the greenery sounds perfect, but you are looking for a more vibrant area, look just north of Inman Park to the Virginia-Highland area.

Virginia-Highland

Virginia-Highland is the most vibrant bar and restaurant scene while still offering historic neighborhood views. Originally a streetcar suburb, Virginia-Highland is now a walkable area northeast of Downtown Atlanta and home to Orme Park and the Atlanta Botanical Garden. The intersection of North Highland and Virginia Avenues offers similar tree-lined streets to Inman Park, but instead hosts younger crowds and 1920s-style bungalow houses. This neighborhood offers something for everyone and is perfect for younger couples or individuals looking for a quirky and fun area to meet new people. If quirky is not your scene, look further north to a more traditional area of Tuxedo Park.

Tuxedo Park

Tuxedo Park is north of downtown in the Buckhead area and is listed in the National Register of Historic Places. It is home to the Georgia Governor’s Mansion and boasts over 100 years of the finest southern architecture. The estates offer historically diverse architectural styles of English, French, Mediterranean, Colonial Revival, and Traditional. Many homes in the area have multiple chimneys as notable monikers for the historic character of the home. Each historic-style home in the neighborhood displays beautiful architecture. The one-of-a-kind collection of historic homes in Tuxedo Park is a great fit for those looking to settle down in an iconic historic Atlanta home.

Atlanta offers a historic neighborhood for everyone, whether you are moving into a decorative Victorian home, a simple bungalow-style house, or an iconic estate. The homes stunningly showcase chimneys with brick art, ornate architecture, and unique characteristics. These chimneys require detailed work, and we would love to restore them in ways that perfectly complement your historic home.

This post first appeared on https://southernchimneys.com

How to Keep Your Fireplace Burning All Night

If you want to become an expert when it comes to starting and maintaining a wood fire, you should know how to keep it burning all night. When you use heat on a wood-burning stove, the controls of the wood are helpful when it comes to speeding up and slowing down the burn. However, if you want longer burns in the wood stove, you should control the size and shape of your wood. You will learn how to keep the wood burning all night. The large pieces of firewood are packed tightly to extend the burn and make it last all night.

Aside from calling a chimney repair to make sure everything is running smoothly; you will need the tips here.

 Remove the Old Ash

If you are new to wood stoves, the primary thing you need to do is to get rid of any old ash. This is going to give you enough space to start another fire. It is going to keep your stove clean. When you remove ash, you should wear heat-proof gloves. They are going to protect you from accidentally burning yourself by touching the hot coals. You should also make sure that the fire should be burned out completely before you begin to remove it.

Most of the time, when the ash is turning white, it is going to be burnt out and it will not be valuable. That is why it is best to get it from the stove. Use a brush or metal dustpan to clean the ash.

The Damper Should be Fully Open

In case there is a damper in the fireplace, you have to make sure that it is fully open before you start any fire.

An open damper helps to ensure that the chimney produces a maximum draw, which lets in more fresh air so it can get sucked into the fireplace from the room.

If there is a damper on your fireplace, it will normally be located at the chimney’s base, within the fireplace’s top inside. You can open the damper when you use the handle to extend it far enough.

Load Logs

You should carefully and gently rake the coals towards the front of the fire with a shovel from the accessories tool kit. When you use quality wood, you should choose logs that have a maximum size. For instance, if your wood heater is freestanding, like the radiant heater, choose logs that are up to 350 mm. If your model is larger, choose logs that are 500mm.

Using the tongs and poker, you should carefully place the logs at the back of the wood-burning heater. Place some small sticks along the logs, and rest one end in the coals at the front of the heater so that the larger logs will ignite.

Warm up the Chimney

The cold air that is trapped within the chimney causes issues when you light a fire in an open fireplace. The cold air that is trapped in a chimney pushes down the fireplace and prevents waste air from leaving. This can prevent fresh air from getting sucked into the fire.

If the fire is not hot enough to warm up the air within the chimney, it causes a fire to go out soon after it was started.

While warm air does not warm up the air within the chimney, it can cause a fire to exit just after it was started.

While warm air rises and cold air sinks down, the chimney can warm up before starting the fire.

This post first appeared on https://www.firstclasschimneyservices.com

End of Summer Chimney Checklist

Here’s What To Do

It is challenging to discuss heating season when we are in the midst of broiling heat conditions in New England, but as you know, time flies and the weather changes happen quickly.

It is important never to use a chimney that is not in good working condition due to the safety risks involved, so as the kids get ready to go back to school, preparing your home for the change of season is a must. Here is a list of 5 things you can do to get your chimney ready for use.

Remove Last Year’s Ash

We’re all guilty of it from time to time, putting off a task when there’s no steadfast due date – procrastination at its finest. Well, you’ve walked by that fireplace full of soot enough, now’s the time. Ash is much easier to move and dispose when it’s fully cooled and dry. You can even remove the old ash and sprinkle it in your garden for soil fertility. Into arts and crafts? Some ash contains enough potassium to create lye to use in homemade soaps!

Schedule your Routine Sweeping

Annual inspections and sweepings are important to the health of your chimney system, and waiting until the first cold night to call the chimney sweep, is not the best plan. We hear about it all the time, the proverbial turn on the heat and cross your fingers maneuver at the first temperature dip. Fall availability fills up early and quickly. Getting in the scheduling queue before colder weather sets in is a scheduling win.

Touch up Masonry

Not everyone knows that there’s a masonry season. Mortar and concrete need curing temperatures consistently above 40° to set, and although you can set up tarps and heaters in a pinch, it is not preferred or recommended.

If you can see deteriorated brick and mortar on the outside, chances are the masonry on the inside is even worse from flue gas exposure. Severely gone chimneys run the risk of falling on adjacent yards, decks, or cars – or even worse, collapsing-in causing an obstruction in the heating flue, potentially creating carbon monoxide to come back into the home. As of late, these passing thunderstorms are bringing with them damaging rain and winds that can aggravate a compromised chimney.

Apply Waterproofing

The freeze-thaw winter cycle absolutely destroys masonry in the Northeast, and not all waterproofing agents are the same. Most waterproofing agents in big box stores are acrylic or silicone, forming a film on the surface and trapping water vapors that can exacerbate chimney deterioration. Applying a commercial grade vapor permeable waterproofing before the winter can save you thousands down the line.

Install a Chimney Cap

Birds and squirrels love to make unused chimneys into their home. If you don’t have a chimney cap, it is possible that an animal or debris has gained entry over the last few months. Checking the chimney for houseguests and installing a properly fitting chimney cap is always a good idea. Already have a cap? Great! Be sure to check the cap to make sure it’s secure and not damaged during your annual inspection. This will prevent first-use headaches when the time comes.

The post End of Summer Chimney Checklist appeared first on Boston’s Best Chimney.

Does Homeowners Insurance Cover Chimney Repairs?

There are several manners in which chimneys become damaged. Some undergo wear and tear over the years, especially when they are not adequately maintained. Others are damaged by natural disasters, such as fires, being struck by lightning, or by having a tree fall on them during a storm. Our team often receives calls requesting chimney repairs. Many clients ask if homeowners insurance covers chimney repairs. Today, we’ll answer that question and give advice on how to avoid chimney damage.

Now, we’ll discuss whether or not homeowners insurance covers chimney repairs.

fireDoes Homeowners Insurance Cover Chimney Repairs?

The answer to this question is, “it depends!” The best source of information is your homeowner insurance company, so we recommend starting by making that phone call.

Generally, homeowners insurance covers chimney damage if it is caused by a natural disaster that is outside of your control, or even an accident such as a fire. Again, the best source of information for your insurance questions is your insurance company.

Homeowners insurance usually does not cover chimney damage resulting in wear and tear, however. The good news is that damage caused by natural wear and tear is preventable if you maintain your chimney.

How to Prevent Damaged Caused by Wear and Tear

Here are some short term steps that you can take to avoid costly damage down the road.

Get Your Chimney Inspected Annually

An annual chimney inspection will help you to avoid serious dangers, such as chimney fires and carbon monoxide poisoning by making sure that your chimney is up to code. Chimney inspectors often identify problem areas during their inspections that help homeowners to make necessary repairs before conditions worsen. We recommend hiring a CSIA (Chimney Safety Institute of America) sweep to do the job!

Have Your Chimney Swept Annually, or As Needed

Chimney sweeps are crucial in removing built up creosote from your chimney. We recommend having your chimney swept each year, or as needed.

If you are wondering “Should I waterproof my chimney?,” the answer is “yes!” This will protect it from the harsh New England elements, keeping the masonry strong over the years. In addition, it will prevent those unattractive white streaks (called “efflorescence”) from showing up.

chimneyMake Sure That You Have a Chimney Cap

Chimney caps are an easy win that will keep precipitation, debris, and animals out of your chimney. If your chimney does not yet have one, consider having a chimney cap installed as soon as possible. Check out our chimney cap guide for answers to all of your chimney cap questions!

Though this list of chimney damage prevention tips is by no means exhaustive, we hope that it gives you some easy steps to take to avoid expensive damage down the road.

The post Does Homeowners Insurance Cover Chimney Repairs? appeared first on Boston’s Best Chimney.

Should You Seal an Unused Chimney Flue?

Many homeowners have chimneys that are in disrepair and that they no longer wish to use. Our team frequently receives calls from people asking, “Should you seal an unused chimney flue?” Today, we’ll address that question.

What’s Going On with Your Unused Chimney?

If you have an unused chimney with an unsealed flue, it is most likely wasting energy, whether it is leaking your home’s heat during the winter or its air conditioner during the summer. It is also an access point for debris and animals to enter into.

Should You Seal an Unused Chimney Flue?

Yes! For the reasons described above, we highly recommend sealing your unused chimney flue.

Ways to Seal Your Unused Chimney Flue

Our team takes one of the three following approaches when sealing unused chimney flue, based on the situation and our clients’ wishes:

  1. Sealing from the peak of the chimney
  2. Sealing from the base of the chimney
  3. Sealing from the fireplace using brick and mortar.

When a chimney is sealed from the peak or base, this is easily reversible, making it easier to change your mind in the future, should you later desire to use your chimney.

In cases when chimneys are sealed from the fireplace using brick and mortar, this can still be reversed, but it is more complicated. This type of project would require some demolition and a high level of precision to reverse, making this kind of sealing a larger decision.

a sealed unused chimneyAre You Interested in Sealing Your Chimney Flue?

We do not recommend undertaking this as a DIY project. A team of professionals will do the job most efficiently and effectively, without any guess work.

The post Should You Seal an Unused Chimney Flue? appeared first on Boston’s Best Chimney.

How Do I Prepare My Fireplace for the Winter?

Chimney Cleaning Leawood, KSWood-Burning Fireplace

It’s not a good idea to leave the burnt wood, ash, creosote, and acidic combustion gas residues lingering in the fireplace all summer. So, the first step is to clean the fireplace. Don’t worry; it’s not that hard to do, and it usually takes less than an hour.

Gather your cleaning supplies: Gloves, mask, goggles, firebrick cleaner, stiff brush, broom, vacuum, newspaper, paper towels or a clean lint-free cloth, and a metal container. If you need help locating cleaning supplies for your fireplace, call us, and one of our certified technicians will be happy to assist. After your fireplace cools for 24 hours, follow these ten (10) simple steps to prepare your fireplace for winter:

  1. Put on your gloves, mask, and goggles to avoid breathing in irritating dust and harmful contaminants that may be present.
  2. Take the grate and gridirons out of the fireplace and set them on some newspaper on the patio.
  3. Sweep the ash into a metal container (reserve about a 1-inch layer for later).
  4. Using a broom or vacuum, remove any remaining debris on the floor.
  5. Spray the firebox walls with fireplace cleaner as directed on the label and scrub the firebox clean with a stiff brush. You may need some elbow grease to remove soot, hardened creosote, and baked-on stains covering the firebricks.
  6. Give the grate and gridirons a thorough cleaning and remove soot, creosote, and residue.
  7. Place a thin one-inch layer of ash on the floor of the fireplace. It will help start your next fire. You can recycle the rest in your garden.
  8. When clean and dry, put the grate and gridirons back in the fireplace.
  9. Use a glass cleaner to remove stains on the glass fireplace doors carefully.
  10. The only thing left to do is to schedule your annual chimney inspection.

Gas Fireplace

Yes, your gas fireplace needs to be prepared for winter too! Although a gas fireplace is a cleaner burning appliance and doesn’t require the deep cleaning of a wood-burning fireplace, it still needs routine care and maintenance to prevent premature failure, prolonging its useful life.

  1. Turn off the standing pilot light.
  2. Turn the gas key valve inside the fireplace to the OFF position.
  3. Remove the front facing to the fireplace.
  4. Use a portable vacuum or damp lint-free cloth to carefully clean any soot, pet hair, dust mites, and other debris inside the fireplace, including the gas logs and other components.
  5. Inspect the gas logs. Replace when there are signs of cracking or other damage.
  6. Clean the burner to remove any clogged ports.
  7. Schedule an annual safety inspection.

Wood Burning Fireplace Services Lees Summit MOChimney Sweeps

Did you know that summer is the best time for a chimney and fireplace inspection? So, when you need to have your chimney and fireplace inspected, cleaned, or repaired, the certified chimney sweeps at Fluesbrothers will get the job done safely and efficiently.

The post How Do I Prepare My Fireplace for the Winter? appeared first on Fluesbrothers Chimney Service.

Give Your Chimney New Life

Whether it’s a new roof, new siding, or fresh paint, your home needs a refresh from time to time. Homes across the country are of varying ages with 11% of US homes being built before 1950. If your home has a chimney and was built before 1960, then it’s highly likely that it is not up to code. In addition, its age means that it could be in need of a visual facelift. Today, we want to share some tips to give your chimney new life.

Chimney Liner installation Granby, CTChimney liner

Metal chimney liners are necessary for keeping your home safe. A liner prevents dangerous gases from entering your home. It also protects the interior structure from receiving too much heat. The liner will also allow for easier removal of creosote, a by-product of burning wood. Older homes often have ceramic or less durable liners. Updating yours with a metal replacement can help increase safety as well as your home’s value.

Weather

The exterior of your chimney receives endless wear and tear. Rain, snow, sun, and temperature extremes can all cause various forms of damage to your masonry.

As a basic example, mortar starts to break down as it ages. This allows water to penetrate your chimney causing further deterioration. Over time, this will lead to loose bricks and potentially the collapse of the entire structure. A Northeastern Chimney technician can inspect your chimney and look for any of these issues. And if they find damage, they can repair or replace the affected area.

Settling

Houses settle. As the ground shifts around the foundation, cracks and other damage can start to appear on your chimney’s brick and mortar, cap, and crown. These holes, while sometimes tiny, can allow water, insects, debris, and other issues to enter your chimney. Once they’re in, they can cause any number of problems. Once again, an inspection is critical to discovering these potential problems early on and getting the necessary repairs taken care of before they escalate to larger issues.

Waterproofing

We’ve mentioned water damage a few times today. Water is essential to life, but not your chimney’s safe operation. The freeze and thaw cycle can play havoc with your chimney leading to quite a few headaches. To prevent this, a waterproof sealant should be applied to the chimney’s surface to keep moisture at bay.

New paint, mantle, whitewash

Giving your chimney new life can be as simple as giving it a facelift! You can easily repaint your hearth to update your room’s aesthetic. You can also add updated elements, maybe a piece of reclaimed wood as a new mantle or an antique surround to the hearth indoors. Outside, a coat of whitewash can update the look to match your desired exterior design.

Chimney Services Rocky Hill, CT

The first step to giving your chimney new life is to schedule a cleaning and inspection.

Regular maintenance can catch issues while they are still small and correct them before they turn into a more dangerous and expensive problem.

This post first appeared on https://www.mychimney.com

(877) 959-3534